Overcoming Water Vapor Interference in FTIR Spectroscopy: A Comprehensive Guide for Reliable Biomedical Analysis
Fourier Transform Infrared (FTIR) spectroscopy is a cornerstone analytical technique in biomedical and pharmaceutical research, yet its accuracy is frequently compromised by water vapor interference.
Overcoming Water Vapor Interference in FTIR Spectroscopy: A Comprehensive Guide for Reliable Biomedical Analysis
Abstract
Fourier Transform Infrared (FTIR) spectroscopy is a cornerstone analytical technique in biomedical and pharmaceutical research, yet its accuracy is frequently compromised by water vapor interference. This article provides a comprehensive guide for researchers and drug development professionals on overcoming this challenge. It covers the fundamental principles of why water vapor disrupts spectra, explores practical hardware and software mitigation strategies—including modern purge systems and advanced algorithms like VaporFit. The guide also details rigorous validation protocols to ensure data integrity and compares FTIR with complementary techniques. By synthesizing the latest methodological advancements and troubleshooting insights, this resource empowers scientists to achieve the high-fidelity spectral data essential for reliable protein analysis, drug characterization, and quality control.
Understanding the Foe: The Fundamental Challenge of Water Vapor in FTIR
The Fundamental Principles of Water Vapor Interference
How Water Vapor Absorbs Infrared Radiation
Water vapor is a polar molecule with a significant dipole moment. When infrared (IR) radiation interacts with water vapor, the energy from specific IR frequencies is absorbed, causing the molecules to vibrate. These vibrations occur at characteristic frequencies, leading to absorption bands that appear as peaks in an FTIR spectrum [1].
The primary vibrational modes of water vapor that lead to IR absorption are the O-H stretching and H-O-H bending vibrations [2]. The O-H stretching vibrations appear as broad, intense bands in the higher wavenumber region, while the bending vibrations are found at lower wavenumbers. Furthermore, the rotational transitions of water molecules couple with these vibrational modes, creating a complex vibrational-rotational band structure. This results in a series of sharp spikes rather than smooth, broad bands, which can be particularly challenging to distinguish from sample peaks [3].
How These Absorptions Mask Sample Signals
The absorption bands of water vapor directly overlap with many diagnostically important functional groups present in samples, effectively obscuring them. The following table summarizes the key spectral regions affected.
Table 1: Characteristic FTIR Absorption Bands of Water Vapor and Their Interference with Sample Signals
| Water Vapor Absorption Region (cm⁻¹) | Type of Vibration | Sample Functional Groups Masked |
|---|---|---|
| 4000–3000 cm⁻¹ | O-H Stretching | O-H (alcohols, carboxylic acids), N-H (amines, amides) |
| 2300–1300 cm⁻¹ | Combination Bands | C=O (carbonyl), C=C (alkenes, aromatics), C≡N (nitriles) |
| Around 1600 cm⁻¹ | H-O-H Bending | N-H Bending, C=C Aromatic Stretching |
This spectral overlap means that even trace amounts of moisture in the optical path can compromise data quality. The interference is exacerbated by the fluctuating nature of atmospheric water vapor concentrations during measurement, leading to unstable baselines and making spectral subtraction techniques less effective [3]. In derivative spectroscopy, which is used to resolve overlapping peaks, these subtle interferences are greatly amplified, potentially inundating the desired sample information with artifacts [3].
Mechanisms and Pathways of Interference
The following diagram illustrates the complete process through which water vapor introduces interference in FTIR spectroscopy, from source to final spectrum.
Diagram 1: Pathway of water vapor interference in FTIR analysis, showing how environmental factors and instrument optics contribute to spectral artifacts.
Frequently Asked Questions (FAQs) & Troubleshooting
Q1: I consistently get strong water vapor peaks even after purging my instrument with nitrogen. What could be wrong? A1: Persistent water vapor peaks suggest either an inadequate purge or another source of moisture. Check the following:
- Purge System Integrity: Ensure there are no leaks in the purge gas lines or around the spectrometer covers and sample compartment doors.
- Purge Time: Allow sufficient time for the purge to displace all humid air; this can take from several minutes to hours for high-end research instruments.
- Gas Purity: Use high-purity, dry nitrogen or air with a dedicated gas dryer.
- Sample Contribution: If your sample is hygroscopic (e.g., salts, certain polymers), it may absorb moisture from the environment during loading. Prepare and load samples in a low-humidity environment if possible [2].
Q2: Why does spectral subtraction sometimes fail to remove water vapor peaks completely? A2: Traditional single-reference subtraction fails because atmospheric water vapor concentration is not static. The interference in your sample spectrum might be from a different concentration of water vapor than in your background spectrum. Furthermore, subtle spectral shifts can occur due to temperature fluctuations in the HeNe reference laser of the FTIR spectrometer, making perfect alignment and subtraction impossible [3]. Advanced software tools like VaporFit, which use a multi-spectral least-squares approach on multiple atmospheric measurements, are designed to overcome this limitation [4].
Q3: What are the best data preprocessing techniques to minimize the impact of residual water vapor? A3: A combination of techniques is often most effective:
- Advanced Scatter Correction: Methods like Extended Multiplicative Scatter Correction (EMSC) can model and remove scattering effects that may be conflated with absorption [5].
- Derivative Spectroscopy: Applying a second derivative can help resolve overlapping peaks and suppress broad, structured baseline effects, but it will also amplify high-frequency noise [6].
- 2D-Correlation Spectroscopy (2D-COS): This advanced method can help isolate the spectral features of your sample from those of water vapor by exploiting differences in their behavior under an external perturbation (e.g., temperature, concentration) [3].
Research Reagent Solutions
The following table lists key materials and software tools essential for effective management of water vapor in FTIR spectroscopy.
Table 2: Essential Research Reagents and Tools for Mitigating Water Vapor Interference
| Reagent / Tool | Function & Application | Key Considerations |
|---|---|---|
| Dry Nitrogen Gas | Inert purge gas to displace moisture from the optical path. | Use high-purity grade; ensure delivery system is airtight. |
| Desiccants (e.g., silica gel) | Remove moisture from sample environment during storage/preparation. | Critical for preparing hygroscopic samples like salts or certain polymers. |
| Sealed Liquid Cells | Hold liquid samples in a moisture-impermeable environment. | Prevents evaporation of volatile solvents and ingress of atmospheric water [2]. |
| VaporFit Software | Open-source tool for automated atmospheric correction. | Uses a multispectral least-squares approach for more accurate water vapor subtraction than single-reference methods [4]. |
| ATR Accessory | Surface analysis technique minimizing pathlength. | While not immune, it reduces the effective volume of air that needs to be purged compared to transmission cells [7]. |
Advanced Experimental Protocols
Protocol: Effective Purging for High-Sensitivity Measurements
This protocol is designed to minimize water vapor interference for the most demanding applications, such as collecting clean second-derivative spectra.
- Initial Setup: Connect a regulated supply of high-purity, dry nitrogen to the instrument's purge port. Ensure all covers on the spectrometer and sample compartment are securely fastened.
- Pre-Purging: Initiate the purge at a moderate flow rate (as per instrument manufacturer's recommendation) and allow it to run for a minimum of 1-2 hours before data acquisition. For highly sensitive detectors (e.g., MCT), overnight purging is recommended.
- Background Collection: Collect a fresh background spectrum with the purge actively running. The frequency of background collection should increase with ambient humidity fluctuations.
- Sample Loading: Open the sample compartment for the shortest time possible to introduce your sample. Close it and allow the purge to re-stabilize the environment for 5-10 minutes before collecting the sample spectrum [2].
Protocol: Retrieving Moisture-Free Spectra Using a 2D-COS Approach
For situations where physical purging is insufficient, this computational protocol can retrieve high-quality spectra [3].
- Data Collection: Acquire a series of FTIR spectra of your sample over time. The natural fluctuation of atmospheric water vapor in the lab can serve as the external perturbation.
- Construct 2D Correlation Spectra: Process the spectral series using 2D-COS software. This generates a 2D asynchronous spectrum.
- Identify SACPs: In the 2D asynchronous spectrum, locate the Systematic Absence of Cross Peaks (SACPs) that are characteristic of water vapor.
- Spectral Reconstruction: Slice the 2D asynchronous spectrum across the identified SACPs. This mathematical operation allows for the reconstruction of the pure component spectrum of your sample, effectively stripped of the interfering water vapor signals.
This article is part of a technical support series for a thesis on "Advanced Strategies for Overcoming Water Vapor Interference in FTIR Spectroscopy."
Troubleshooting Guides & FAQs
Q1: Why do I see sharp, doublet peaks at ~3730 cm⁻¹ and ~3625 cm⁻¹ in my background scan, and how do I remove them? A1: These are asymmetric and symmetric O-H stretching vibrations from ambient water vapor. To remove them:
- Protocol: Effective Purging
- Activate the spectrometer's internal purge gas (dry, compressed air or nitrogen) for a minimum of 30 minutes before data collection.
- Ensure the sample compartment is sealed properly. Check for worn O-rings.
- For highly sensitive measurements, use a continuous purge during both background and sample scans.
- Data: Recommended purge times for different sensitivity levels.
| Sensitivity Level | Minimum Purge Time | Expected Residual H₂O Vapor (Absorbance) |
|---|---|---|
| Routine Analysis | 15-20 minutes | < 0.01 |
| High-Quality R&D | 30-45 minutes | < 0.005 |
| Publication Grade | 60+ minutes | < 0.001 |
Q2: My sample's broad O-H stretch at ~3300 cm⁻¹ is obscured by a large, variable water vapor artifact. How can I resolve this? A2: This occurs when atmospheric water absorbs IR radiation along the optical path. The solution is consistent and thorough purging.
- Protocol: Background Collection Best Practices
- After purging, collect a new single-beam background spectrum.
- Collect sample spectra immediately after the background to minimize drift.
- If the sample compartment is opened, a new background must be collected after re-establishing the purge.
Q3: A peak appears at ~1650 cm⁻¹, which overlaps with the O-H bending region (1630-1600 cm⁻¹). Is this water or my sample? A3: The H-O-H bending vibration of water vapor appears sharply at ~1650 cm⁻¹. The O-H bending from alcohols and phenols is typically weaker and found between 1630-1000 cm⁻¹.
- Protocol: Diagnostic for Water Vapor Contamination
- Check for the characteristic water vapor doublet in the O-H stretch region (~3730 & ~3625 cm⁻¹). If this doublet is present, the peak at ~1650 cm⁻¹ is likely atmospheric water.
- Compare the sample spectrum to a carefully collected background spectrum. A pure water vapor peak will subtract out, revealing the underlying sample peaks.
- Data: Spectral positions of key O-H vibrations.
| Vibration Type | Wavenumber Range (cm⁻¹) | Characteristics & Assignment |
|---|---|---|
| O-H Stretch (Free) | 3650-3580 | Sharp, low intensity (dilute solutions) |
| O-H Stretch (H-Bonded) | 3550-3200 | Broad, strong (alcohols, carboxylic acids) |
| H-O-H Bend (Water Vapor) | ~1650 | Sharp, appears with stretch doublet |
| O-H Bend (In-Plane) | 1630-1000 | Weaker, complex region (alcohols, phenols) |
Q4: My sample is hygroscopic. How can I prepare it to minimize water absorption during analysis? A4: Sample preparation is critical for hygroscopic materials.
- Protocol: Handling Hygroscopic Samples
- Drying: Dry solid samples in a vacuum oven at an appropriate temperature (e.g., 60°C) for 24 hours before analysis.
- Environment: Use a glove bag or glove box purged with nitrogen or argon for all sample handling (weighing, mulling, pressing KBr pellets).
- ATR Technique: Use Attenuated Total Reflectance (ATR) which requires minimal sample preparation and exposure to air.
Experimental Workflow: Mitigating Water Vapor
FTIR Vapor Mitigation Workflow
Spectral Regions & Water Vapor Interference
O-H Spectral Regions & Artifacts
The Scientist's Toolkit
| Research Reagent / Material | Function in Experiment |
|---|---|
| High-Purity Compressed N₂ Gas | Displaces ambient, moisture-laden air from the optical path via instrument purge. |
| Desiccator Cabinet | Provides a dry, sealed environment for storing hygroscopic samples and KBr. |
| Anhydrous Potassium Bromide (KBr) | IR-transparent salt used for preparing solid sample pellets; must be kept dry. |
| Vacuum Oven | Removes adsorbed water from solid samples prior to analysis. |
| FTIR Grade Solvents (e.g., CDCl₃) | Anhydrous solvents for liquid sample analysis that minimize water contributions. |
Fourier Transform Infrared (FTIR) spectroscopy is a powerful analytical technique used to identify molecular structures based on their unique infrared absorption signatures. However, the accuracy of FTIR analysis is frequently compromised by water vapor interference, a pervasive challenge in spectroscopic research. Water vapor in the instrument's optical path or sample environment introduces spectral artifacts that can obscure critical functional group information and compromise quantitative results.
Water molecules possess a strong infrared absorption spectrum, with prominent peaks that directly overlap with key spectral regions used for functional group identification [2]. This interference is particularly problematic in gas-phase analysis and when studying hygroscopic materials, where water vapor peaks can skew absorbance measurements and lead to erroneous concentration calculations in quantitative assays. For researchers in drug development, where precision is paramount, understanding and mitigating this interference is essential for ensuring data integrity.
FAQs: Understanding Water Vapor Interference
Q1: Why is water vapor such a significant problem in FTIR spectroscopy?
Water vapor interferes with FTIR analysis because water molecules have strong, characteristic absorption bands in the infrared region. The OH stretching vibrations appear as broad bands between 3200-3600 cm⁻¹, while bending vibrations occur between 1600-1800 cm⁻¹ [2]. These regions directly overlap with important functional groups like amines, amides, and carbonyls, which are crucial in pharmaceutical compounds. Even trace amounts of environmental moisture can cause significant spectral interference.
Q2: How can I distinguish water vapor peaks from my sample's spectral features?
Water vapor in FTIR spectra typically appears as a series of sharp, rotational-vibrational lines rather than broad molecular absorption bands. These are often found in two primary spectral regions: 4000-3400 cm⁻¹ and 2200-1200 cm⁻¹ [8]. To confirm suspected water vapor interference, compare your sample spectrum to a background scan or a reference water vapor spectrum. The interference will appear as negative peaks if the background was collected with higher water vapor content than during sample measurement [7].
Q3: What are the most effective methods to physically minimize water vapor interference?
The most straightforward approach involves preventive measures to exclude water vapor from the FTIR system. Effective strategies include:
- Instrument purging with dry, inert gas (nitrogen or purified air) to displace moisture from the optical path [2]
- Sample desiccation using vacuum drying or desiccants before analysis, particularly for hygroscopic materials [2]
- Environmental control through maintaining stable laboratory temperature and humidity [2]
- Closed sampling systems utilizing sealed, moisture-impermeable cells for liquid and solid samples [2]
Q4: Can computational methods correct for water vapor interference?
Yes, computational approaches can mitigate water vapor effects after data collection. Spectrum subtraction techniques mathematically remove the contribution of water vapor from sample spectra [2]. Advanced pre-processing algorithms like Savitzky-Golay smoothing and segmented ratio correction can also minimize noise and baseline drift caused by water vapor [8]. However, these methods assume consistent water vapor content between background and sample measurements, which may not always hold true [2].
Q5: How does water vapor interference specifically affect quantitative analysis?
Water vapor interference introduces significant error in quantitative FTIR analysis through several mechanisms. It causes baseline instability, leading to inaccurate integration of peak areas. Spectral overlaps can obscure analyte peaks or create false peaks, while variable water content introduces non-reproducible background signals. All these factors directly impact the accuracy of concentration determinations based on the Beer-Lambert law [9].
Troubleshooting Guide: Identifying and Resolving Water Vapor Issues
Problem: Unexplained Peaks in Spectral Regions Critical to Analysis
Diagnosis: Sharp, unexpected peaks in the regions of 4000-3400 cm⁻¹ (OH stretch) and 2200-1200 cm⁻¹ (bending vibrations) indicate water vapor contamination [8].
Solution:
- Implement a dry nitrogen purge system for the instrument optics
- Ensure all sampling accessories are thoroughly dried before use
- Store hygroscopic samples in a desiccator prior to analysis
- Increase purging time before analysis to ensure system equilibrium
Problem: Negative Absorbance Peaks in Spectrum
Diagnosis: Negative peaks indicate that the background scan contained more water vapor than the sample scan [7].
Solution:
- Collect a new background spectrum immediately before sample measurement
- Ensure consistent purging between background and sample scans
- Clean ATR crystals thoroughly before background collection
- Verify the integrity of purge system seals and desiccants
Problem: Unstable Baseline and Poor Spectral Reproducibility
Diagnosis: Fluctuating water vapor levels cause baseline drift and poor replicate consistency [9].
Solution:
- Maintain constant laboratory temperature to prevent condensation
- Extend instrumental purging time until stable conditions are achieved
- Use sealed liquid cells for volatile or sensitive samples
- Implement longer signal averaging to improve signal-to-noise ratio
Problem: Inaccurate Quantitative Results Despite Proper Calibration
Diagnosis: Water vapor interference is introducing error in absorbance measurements critical for quantification [9].
Solution:
- Apply computational water vapor subtraction algorithms
- Select analytical peaks with minimal water vapor overlap
- Increase calibration standards to account for background variability
- Validate method with reference materials of known composition
Quantitative Impact of Water Vapor Interference
Table 1: Characteristic Water Vapor Absorption Regions and Their Spectral Interference
| Spectral Region (cm⁻¹) | Vibration Mode | Interfered Functional Groups | Impact on Quantitative Analysis |
|---|---|---|---|
| 4000-3400 | OH stretching | Alcohols, phenols, amines, amides | Skews hydrogen-bonding analysis; affects concentration measurements |
| 2200-1200 | Bending vibrations | Carbonyls, esters, amides, carboxylic acids | Obscures key biomarker peaks; compromises peak integration |
| 800-400 | Lattice vibrations | Inorganic compounds, halides | Interferes with inorganic material analysis |
Table 2: Effectiveness Comparison of Water Vapor Mitigation Strategies
| Mitigation Method | Implementation Complexity | Effectiveness | Best Use Scenarios |
|---|---|---|---|
| Nitrogen purging | Low | High | Routine analysis; moisture-sensitive samples |
| Sample desiccation | Medium | Medium-High | Hygroscopic materials; solid samples |
| Spectrum subtraction | Medium | Variable | Post-hoc correction; minimal water fluctuation |
| Sealed cells | High | High | Volatile liquids; long measurement times |
| Temperature control | Medium | Medium | Environments with fluctuating humidity |
Experimental Protocols for Mitigating Water Vapor Interference
Protocol 1: Instrument Purging for Water Vapor Reduction
Principle: Displacing moisture-laden air with dry gas from the optical path minimizes water vapor absorption signals [2].
Materials:
- FTIR spectrometer with purge gas ports
- Source of dry nitrogen or purified air (dew point ≤ -40°C)
- Flow regulator and tubing
Procedure:
- Connect dry gas source to instrument purge ports
- Set gas flow rate to manufacturer's specifications (typically 10-30 L/min)
- Allow purging for a minimum of 30-60 minutes before analysis
- Verify low water vapor levels by collecting a background spectrum and checking for residual water peaks
- Maintain continuous purge throughout analysis session
Protocol 2: Computational Water Vapor Subtraction
Principle: Digital removal of water vapor spectrum from sample data using reference water vapor signatures [9].
Materials:
- FTIR software with spectral subtraction capabilities
- Reference water vapor spectrum collected under identical conditions
Procedure:
- Collect high-resolution background spectrum under analytical conditions
- Acquire sample spectrum with identical instrument settings
- Identify a region dominated exclusively by water vapor (e.g., 1900-1800 cm⁻¹)
- Scale reference water spectrum to match sample spectrum in this region
- Subtract scaled water spectrum from sample spectrum
- Verify successful subtraction by checking elimination of sharp water peaks without introducing negative features
Protocol 3: ATR Analysis with Moisture Control
Principle: Minimizing environmental exposure during attenuated total reflectance measurements [7].
Materials:
- FTIR spectrometer with ATR accessory
- Desiccant chamber for sample storage
- Dry purge gas for ATR compartment
Procedure:
- Pre-dry ATR crystal with gentle nitrogen stream
- Collect background spectrum immediately before sample measurement
- Apply sample quickly to minimize atmospheric exposure
- Use ATR clamp to ensure good contact and create slight seal
- Consider environmental enclosure for humidity-sensitive samples
- Clean crystal immediately after measurement to prevent moisture absorption
Workflow Diagram: Comprehensive Strategy for Managing Water Vapor Interference
Research Reagent Solutions for Water Vapor Management
Table 3: Essential Materials and Reagents for Water Vapor Control in FTIR Spectroscopy
| Item | Function | Application Notes |
|---|---|---|
| Dry nitrogen generator | Provides moisture-free purge gas | Prefer over gas cylinders for continuous operation; ensure dew point ≤ -40°C |
| Desiccant (molecular sieve) | Sample drying and storage | Regenerate regularly; use indicating desiccant to monitor effectiveness |
| Sealed liquid cells | Isolate samples from atmosphere | Essential for volatile solvents; various window materials available for different spectral ranges |
| Hygrometer | Monitor laboratory humidity | Ideal range: 30-50% RH; critical for reproducible results |
| ATR accessories with purge adapters | Minimize atmospheric exposure during measurement | Diamond ATR preferred for corrosive samples; ensure proper sealing |
| Reference water vapor spectrum | Computational subtraction | Collect under identical instrumental conditions for accurate subtraction |
FAQ: Understanding Sample Absorbance-Dependent Interference
What is sample absorbance-dependent interference? This phenomenon occurs when a sample is too concentrated or too thick, causing it to absorb so much infrared light that the detector receives an insufficient signal. This leads to spectral saturation, where peaks become distorted, flattened, and lose detail, making the data unreliable [10] [11]. The problem is particularly acute in the context of FTIR spectroscopy research aimed at overcoming water vapor interference, as both the sample and the water vapor can contribute to this saturation effect.
Why do these effects worsen with higher sample concentration? The relationship between sample concentration and signal quality is not linear. According to the Beer-Lambert law, absorbance is proportional to concentration and pathlength. Beyond a certain point, excessive absorption causes the following cascade of problems [10] [11]:
- Signal Saturation: The detector is starved of light, leading to peaks that are "cut off" at the top and appear flattened.
- Loss of Spectral Detail: Fine structural features, which are crucial for identifying functional groups or studying intermolecular interactions, are obscured [12].
- Increased Vulnerability to Contaminants: In techniques like Attenuated Total Reflectance (ATR), a high-concentration sample already pushes the instrument's dynamic range. Any additional absorption from contaminants like a dirty ATR crystal or ambient water vapor can push the signal into a non-linear response region, creating severe spectral artifacts like negative peaks [7] [13].
How does this specifically exacerbate water vapor interference? Water vapor has a complex spectrum with many sharp peaks. When a highly concentrated sample causes saturation and broad spectral distortions, it becomes incredibly difficult to accurately identify and subtract the sharp, narrow bands from water vapor. The two effects become intertwined, complicating the correction process and potentially introducing artifacts during data processing [12].
Troubleshooting Guide: Correcting and Preventing Interference
The table below outlines common symptoms, their causes, and solutions for absorbance-dependent interference.
| Problem Symptom | Primary Cause | Recommended Solutions |
|---|---|---|
| Noisy or unstable readings, drifting baseline [10] | Sample concentration is too high, leading to a low signal-to-noise ratio. | Dilute the sample to bring its absorbance into the optimal range (typically 0.1–1.0 AU) [10] [11]. |
| Saturated or "cut-off" peaks, loss of spectral detail [10] [11] | Excessive absorption; sample is too thick or concentrated, exceeding the instrument's linear range. | For solid pellets, grind less sample. For liquids, use a shorter pathlength cell or dilute the sample [11]. |
| Negative absorbance peaks [7] [10] | Often seen in ATR; the background was collected with a dirty crystal or contaminant, which is then "subtracted" from a saturated sample spectrum. | Clean the ATR crystal thoroughly with a recommended solvent, collect a new background, and then re-analyze your sample [7] [13]. |
| Distorted peaks in Diffuse Reflection (DRIFTS) [7] [14] | Data processed in absorbance units instead of Kubelka-Munk units, which is the correct transformation for quantitative diffuse reflectance work. | Reprocess the diffuse reflectance data using Kubelka-Munk units to obtain a correct, interpretable spectrum [7] [14]. |
| Persistent sharp spikes overlaid on your spectrum [12] | Inadequate compensation for sharp water vapor peaks, a problem magnified when the sample's own signal is saturated. | Improve instrument purging with dry air or inert gas, and use advanced vapor subtraction algorithms that account for changing environmental conditions [12]. |
Experimental Protocol: Avoiding Interference During Sample Preparation
Proper sample preparation is the most effective way to prevent absorbance-dependent interference. The following workflow provides a methodology for solid samples using the KBr pellet technique, a common procedure where concentration control is critical.
Title: Solid Sample Prep and Check Workflow
Detailed Steps:
- Grind the Sample: Finely grind approximately 1-2 mg of your solid sample using an agate mortar and pestle. The goal is a very fine, homogeneous powder to reduce light scattering [11].
- Mix with Matrix: Mix the ground sample with about 100-200 mg of dry, infrared-transparent potassium bromide (KBr) powder. This creates a dilute dispersion of the sample in the KBr matrix [11].
- Press the Pellet: Transfer the mixture to a pellet die and apply high pressure using a hydraulic press to form a clear, transparent pellet. The pellet should be thin enough to be visually transparent [11].
- Validate and Iterate: After collecting the FTIR spectrum, check for saturation. If absorbance values exceed 1.5 AU, the sample is still too concentrated. Repeat the process from step 1, using less sample or more KBr diluent, until the absorbance falls within the ideal 0.1–1.0 AU range [10] [11].
The Scientist's Toolkit: Essential Materials for Reliable FTIR Analysis
The table below lists key reagents and materials used in FTIR sample preparation to mitigate interference, along with their critical functions.
| Item | Function & Rationale |
|---|---|
| Potassium Bromide (KBr) | An IR-transparent matrix used to dilute solid samples to an optimal concentration for transmission measurements, preventing signal saturation [11] [14]. |
| ATR Crystal (Diamond, ZnSe) | The internal reflection element in ATR accessories. A clean crystal is essential; a dirty one is a common source of negative peaks and spectral artifacts [7] [13]. |
| IR-Transparent Windows (NaCl, KBr) | Used to construct liquid cells. The material must be chosen based on the spectral range of interest and compatibility with the solvent (e.g., KBr windows cannot be used with aqueous solutions) [11]. |
| Mortar and Pestle (Agate) | For grinding solid samples to a fine, uniform powder, ensuring homogeneity and reducing light scattering which can cause spectral distortions [11] [14]. |
| Hydraulic Pellet Press | Applies the high pressure required to form solid KBr-sample mixtures into transparent pellets for transmission analysis [11]. |
| Desiccator | Used to store KBr and prepared samples to prevent moisture absorption, which introduces strong water vapor interference in the final spectrum [12] [14]. |
| Lint-Free Wiping Cloth | For cleaning ATR crystals and optical surfaces without introducing fibers or contaminants that could scatter light or produce extraneous spectral peaks [10]. |
Fourier Transform Infrared (FTIR) spectroscopy is a powerful analytical technique, but its accuracy can be significantly compromised by environmental and procedural contaminants. Water vapor, in particular, presents a major challenge due to its strong infrared absorption, which can obscure the spectral features of the target analyte. This guide details the primary sources of contamination—ambient humidity, improper sample preparation, and instrument purging failures—and provides systematic solutions to ensure data integrity in chemical and pharmaceutical research.
Troubleshooting Guides
Guide 1: Identifying and Resolving Moisture Contamination
Moisture is a ubiquitous interferent in FTIR spectroscopy. The table below outlines common symptoms and their solutions.
Table 1: Troubleshooting Moisture Interference in FTIR Spectra
| Observed Symptom | Most Likely Cause | Recommended Corrective Action |
|---|---|---|
| Sharp, negative peaks in the absorbance spectrum | Dirty ATR crystal during background scan [13] [7] | Clean the ATR crystal thoroughly with a suitable solvent and acquire a new background spectrum [7]. |
| Broad O-H stretching band (~3700-3100 cm⁻¹) and H-O-H bending band (~1640 cm⁻¹) | High ambient humidity; insufficient instrument purging [2] [15] | Initiate or verify continuous instrument purging with dry air or nitrogen [16]. Ensure laboratory humidity is controlled. |
| Sharp spikes in the spectrum overlapping with sample peaks | Residual atmospheric water vapor and CO₂ [17] [18] | Use advanced spectral processing software (e.g., VaporFit) for multispectral atmospheric correction [17]. |
| Noisy or unstable baseline; persistent water vapor peaks even after purging | Failed purge gas filter; incorrect purge gas quality or flow [16] | Check the purge gas filter (green indicates dry; yellow indicates damp) and replace if necessary. Verify purge gas dew point is -70 °C or below and flow rate is correct [16]. |
Guide 2: Addressing Sample Preparation Errors
Improper sample preparation can introduce contaminants or create spectral artifacts that mimic or mask interference.
Table 2: Common Sample Preparation Errors and Fixes
| Error Type | Impact on Spectrum | Prevention & Solution |
|---|---|---|
| Contaminated KBr Plates or ATR Crystal | Extraneous absorbance bands from previous samples or cleaning agents [15]. | Clean accessories meticulously with solvent, then ethanol, and polish before use [19]. |
| Overly Concentrated Solid Sample | Saturated or "clipped" peaks, leading to a loss of spectral detail [15] [19]. | For KBr pellets, use a sample concentration of 0.2-1% to ensure the pellet is transparent and peaks are in the linear detector range [19]. |
| Inhomogeneous or Poorly Ground Solid | Broadened peaks and Christiansen scattering effects, causing distorted, sloping baselines [19]. | Grind the sample to a fine powder (1-2 microns) to reduce light scattering [19]. |
| Water in Solvent | A broad water band obscuring the O-H and C=O stretching regions [19]. | Use anhydrous, IR-grade solvents. Obtain a spectrum of the pure solvent for background subtraction [19]. |
Frequently Asked Questions (FAQs)
Q1: My lab is often humid. What are the best practices for instrument purging? For humid environments, continuous (24/7) purging is strongly recommended to protect sensitive optical components from condensation and permanent damage [16]. Use a purge gas (dry air or nitrogen) with a dew point of -70 °C (-94 °F) or below and maintain a typical flow rate of 20 Standard Cubic Feet per Hour (SCFH) for both the spectrometer and microscope [16]. A purge gas generator is often more effective and economical than gas cylinders for continuous operation [16].
Q2: I've purged my instrument, but weak water vapor peaks remain. What can I do? Even with purging, trace amounts of water vapor can persist. In such cases, computational post-processing is highly effective. Software tools like the open-source VaporFit use a multispectral least-squares approach to dynamically subtract the variable contributions of water vapor and CO₂ from your sample spectra, significantly improving accuracy [17].
Q3: How can I tell if my ATR crystal is clean? The most definitive check is to run a background scan with the crystal empty and inspect the resulting spectrum. If you see absorbance bands, the crystal is contaminated. A clean crystal should produce a flat background. Visually, ensure the crystal is free of scratches and residue [7].
Q4: Why does my KBr pellet look cloudy, and how does this affect my data? A cloudy pellet is often caused by insufficient grinding of the KBr mixture, moisture in the sample, or a pellet that is too thick [19]. Cloudiness leads to light scattering, which results in a noisy spectrum with distorted baselines and reduced overall signal. Ensure the sample is dry, grind the mixture thoroughly, and work quickly to minimize moisture absorption from the air [19].
Experimental Protocols
Protocol 1: Establishing a Proper Instrument Purge
Maintaining a dry optical path is critical for reducing atmospheric interference.
Materials Needed:
- Source of clean, dry air or nitrogen (dew point ≤ -70 °C) [16]
- Purge gas generator (recommended) or gas cylinders [16]
- Oil-trap filter (10-micrometer) [16]
- Dual Zone Purge Pneumatics kit (or manufacturer-specific equivalent) [16]
- Open-ended wrenches, Phillips screwdriver, PTFE thread seal tape [16]
Methodology:
- Installation: Connect the quick-release pressure coupling to your purge gas source using an appropriate regulator valve and fittings. Use PTFE tape to ensure a tight seal [16].
- Connection: Snap the male inlet of the wall plumbing assembly into the quick-release fitting. Connect the gas lines from the purge kit to the dedicated purge inlets on the spectrometer and the microscope [16].
- Settings: Open the main shutoff valve. Set the pressure regulator to 20 PSI and the flowmeter to 20 SCFH for both the spectrometer and microscope zones [16].
- Initialization: After turning on the instrument and purge, wait 30 to 60 minutes for the system to be fully pured before collecting data [16].
- Continuous Operation: To prevent moisture ingress and protect the instrument, maintain purging continuously, even when the instrument is not in use [16].
Protocol 2: Preparing a High-Quality KBr Pellet
This protocol ensures a clear pellet for transmission measurements with minimal scatter and moisture.
Materials Needed:
- Anhydrous Potassium Bromide (KBr) powder
- Hydraulic pellet press and die set
- Agate mortar and pestle
- Oven and desiccator
Methodology:
- Drying: Transfer a small amount of KBr powder from a 100 °C oven into a mortar. Work quickly to minimize moisture absorption [19].
- Mixing: Add your solid sample to achieve a final concentration of 0.2 to 1% (w/w) in KBr. Mix and grind gently but thoroughly to a fine powder without over-grinding the KBr [19].
- Pressing: Place the mixture into a pellet die. Apply pressure in a hydraulic press (e.g., 20,000 psi) for a few seconds to form a transparent pellet [19].
- Analysis: Immediately place the clear pellet into the sample holder and run the spectrum. The largest peak should have a transmission of 0-10% for optimal detector response [19].
The Scientist's Toolkit
Table 3: Essential Research Reagent Solutions for Mitigating FTIR Contamination
| Item | Function & Rationale |
|---|---|
| Dry Nitrogen or Air Generator | Produces a continuous supply of purge gas with a dew point ≤ -70 °C, effectively displacing moisture and CO₂ from the optical path [16] [17]. |
| Anhydrous Potassium Bromide (KBr) | An IR-transparent matrix used to prepare solid samples as pellets, minimizing scattering and allowing for analysis of dilute samples [11] [19]. |
| ATR Cleaning Solvents (e.g., Methanol, Ethanol) | Used to thoroughly clean the ATR crystal between samples to prevent cross-contamination, which is a common source of erroneous peaks [7] [19]. |
| VaporFit Software | An open-source tool for automated atmospheric correction. It uses a multispectral least-squares algorithm to mathematically remove residual water vapor and CO₂ signals from sample spectra [17]. |
| Desiccant | Used in storage chambers to maintain a dry environment for hygroscopic samples and KBr powder, preventing water absorption before analysis [2]. |
Workflow and Relationship Diagrams
Moisture Contamination Mitigation Workflow
The diagram below outlines the logical decision process for diagnosing and resolving common moisture-related issues in FTIR spectroscopy.
Proven Strategies and Tools for Effective Water Vapor Suppression
Frequently Asked Questions (FAQs)
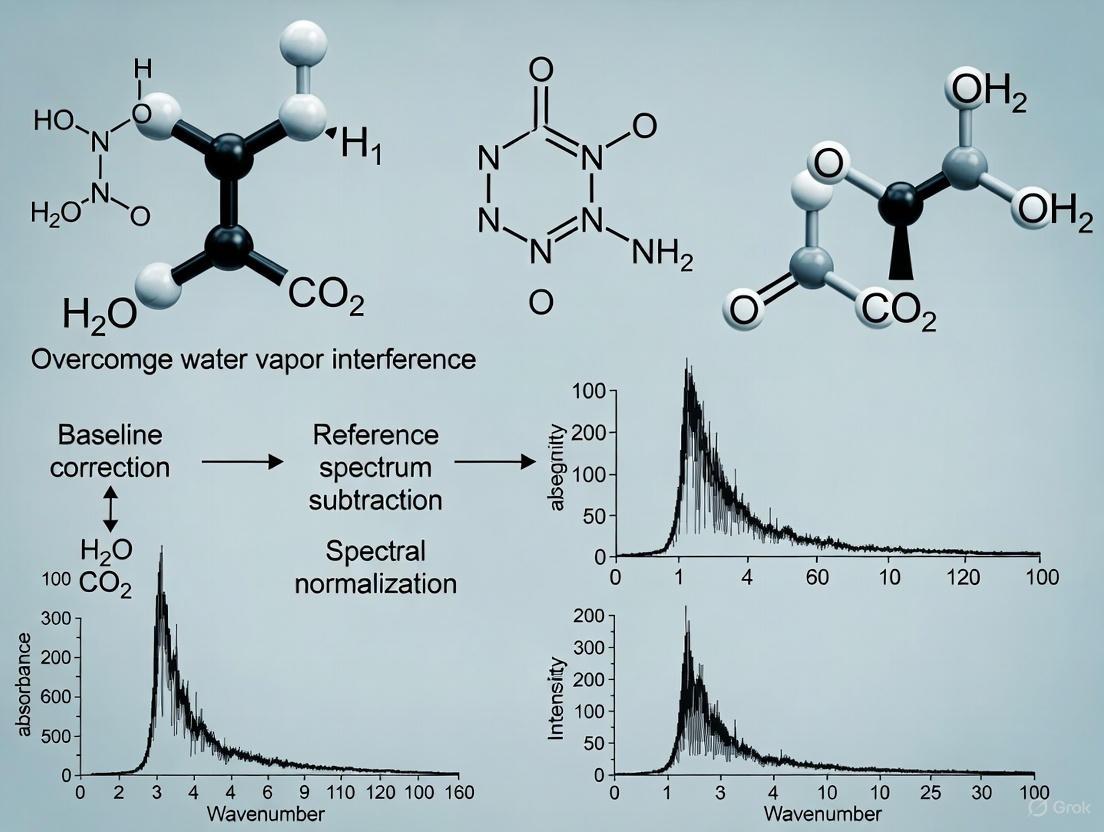
What is the primary purpose of purging an FTIR spectrometer? Purging is essential to remove atmospheric water vapor (H₂O) and carbon dioxide (CO₂) from the sample chamber and optical path of the FTIR spectrometer. These gases absorb infrared light, creating sharp, interfering peaks that can obscure important spectral features from your sample, particularly in the regions around 3400 cm⁻¹ (water vapor) and 2300 cm⁻¹ (CO₂) [20] [21] [22].
What are the main sources of purge gas, and how do I choose? The two primary sources are compressed gas tanks (nitrogen or dry air) and in-house purge gas generators. Your choice depends on your lab's specific needs for safety, convenience, operational cost, and gas usage volume [20] [22].
Why does my spectrum still show water vapor peaks even after purging? Residual interference can persist due to several factors:
- Insufficient Purging Time: The system may not have been purged long enough to achieve a stable, dry atmosphere.
- Leaks: Check for leaks in the purge gas supply lines or around the sample compartment seals [21].
- Impure Purge Gas: The supply from tanks or generators can contain impurities if filters are saturated or not maintained [17].
- Background Change: The background spectrum was collected under different atmospheric conditions than the sample spectrum. Always collect a new background after the purging environment has stabilized [21].
Troubleshooting Guide
Problem: Persistent Water Vapor/CO₂ Peaks
| Problem Area | Checkpoints | Solutions |
|---|---|---|
| Purge Gas Supply | • Gas tank empty?• Generator inlet pressure low?• Supply line kinked/blocked? | • Replace gas tank.• Ensure compressed air supply is adequate (e.g., 80 psig for 23 lpm flow) [22].• Inspect and clear supply lines. |
| System Integrity | • Sample compartment door properly sealed?• Loose fittings in gas line? | • Ensure door is fully closed and seals are intact.• Tighten all connections. |
| Purge Gas Purity | • Last filter replacement date?• Dew point of generated gas elevated? | • Replace coalescing pre-filter and molecular sieves as per manufacturer's schedule (often annual) [20] [22]. |
| Procedure | • Purging time sufficient?• New background collected after purge? | • Purge for a longer duration (e.g., 2+ minutes [22]).• Always collect a fresh background spectrum under stable purge conditions [21]. |
Problem: Unstable Baseline or Noisy Signal
| Problem Area | Checkpoints | Solutions |
|---|---|---|
| Optics | • Moisture condensation on optics?• Interferometer misaligned? | • Extend purging time to dry optics completely.• Contact qualified service personnel for alignment [21]. |
| Detector | • Detector saturated?• Detector cooling failed (if MCT)? | • Adjust instrument parameters (gain, aperture) to reduce signal intensity [21].• Service cooling system. |
The table below summarizes the key differences between using gas tanks and an in-house generator to help inform your decision.
| Feature | Gas Tanks (N₂ or Dry Air) | In-House Purge Gas Generator |
|---|---|---|
| Safety | High-pressure hazard (>2000 psi); risk during transport and installation [22]. | Low pressure; gas is generated and ported directly to the instrument, minimizing hazard [20] [22]. |
| Convenience | Requires manual monitoring and replacement; risk of interrupting automated experiments [22]. | "Set and forget"; provides gas continuously without user intervention other than annual maintenance [22]. |
| Operational Cost | Recurring cost of gas, delivery, and cylinder rental [20]. | Low operating cost; uses compressed lab air and electricity; payback period can be under one year [20]. |
| Environmental Impact | High energy for gas compression and purification, plus transportation emissions [20]. | More energy-efficient; eliminates transportation of heavy cylinders [20] [22]. |
| Flow Rate / Performance | Practical flow rate may be limited by cost and tank consumption. | Can achieve higher, consistent flow rates (e.g., up to 102 lpm), enabling faster purging [20] [22]. |
Workflow: Establishing and Maintaining an Effective Purge System
The following diagram illustrates the logical workflow for implementing a hardware-based purge solution, from selection to troubleshooting.
The Scientist's Toolkit: Essential Research Reagents and Materials
| Item | Function / Purpose |
|---|---|
| High-Purity Nitrogen Gas Tank | Provides dry, CO₂-free purge gas. Requires careful handling and monitoring [22]. |
| In-House Purge Gas Generator | Produces dry, CO₂-free air directly from compressed lab air, enhancing safety and convenience [20] [22]. |
| Coalescing Filter | Removes particulate matter, oil, and water droplets from the compressed air supply before it enters the generator [20] [22]. |
| Molecular Sieves (PSA System) | The core component in a generator that adsorbs and removes water vapor and CO₂ molecules from the air stream [22]. |
| Dew Point Monitor | Integrated into generators to ensure the output gas is sufficiently dry (e.g., dew point of -73°C) [22]. |
| KBr Plates / ATR Crystal | Sample presentation hardware that must be kept clean and dry to avoid introducing artifacts [21]. |
| Desiccator | For storing hygroscopic materials like KBr to prevent moisture absorption before sample preparation [21]. |
Within the broader context of overcoming water vapor interference in Fourier Transform Infrared (FTIR) spectroscopy research, proper sample preparation is not merely a preliminary step but a critical determinant of data fidelity. Hygroscopic materials, which readily absorb ambient moisture, present a significant analytical challenge. The absorbed water interferes with the IR spectrum, particularly obscuring the vital amide I and II regions used for protein secondary structure analysis and introducing broad, intense bands that can mask analyte signals [23] [12]. This guide details best practices for the desiccation of hygroscopic samples and the use of sealed cells to ensure the integrity of FTIR spectroscopic data in drug development and scientific research.
FAQs: Fundamental Principles
1. Why is controlling moisture so critical in FTIR spectroscopy of hygroscopic materials?
Water vapor in the spectrometer's path and water absorbed by the sample are major sources of spectral interference. Water molecules have strong, sharp IR absorption bands that can overlap with and obscure the key spectral features of your analyte, such as the amide I band (~1650 cm⁻¹) used for protein structural analysis [12]. Furthermore, the hydration state can alter the secondary structure of biological macromolecules, leading to shifts in peak positions and intensities, thereby compromising the biochemical information [23].
2. What is the difference between a desiccant and a desiccator?
A desiccant is a hygroscopic substance (e.g., silica gel, calcium sulfate) that attracts and holds water molecules from its immediate environment, thereby maintaining a state of dryness [24] [25]. A desiccator, on the other hand, is a sealed container (often made of glass or plastic) used to store samples in a dry atmosphere. Desiccators frequently contain a desiccant at the bottom to absorb moisture from the enclosed space and can be evacuated to create a vacuum, which further promotes drying [24].
3. For how long should a bacterial biomass sample be dried prior to FTIR analysis?
The optimal drying time can vary based on the sample and equipment. However, research on bacterial biomass has demonstrated that extended drying periods (e.g., 23 hours at 45 °C) yield more reproducible FTIR spectra compared to shorter durations, as they ensure a more consistent and complete removal of residual moisture [26].
4. Can the process of preparing a sample for FTIR itself alter the sample's biochemistry?
Yes. Sample preparation methods, including desiccation, ethanol dehydration, and formalin fixation, have been shown to significantly alter the biochemical information detected in FTIR spectra compared to fresh, hydrated tissue. These methods can cause changes in infrared absorption band intensities, peak positions, and the profile of key bands like amide I [23]. Therefore, the preparation protocol must be carefully chosen and consistently applied.
Troubleshooting Guides
Problem 1: Persistent Water Vapor Peaks in Spectrum
| Observed Symptom | Potential Cause | Solution |
|---|---|---|
| Sharp, negative-going peaks (often in pairs) around 3700-3500 cm⁻¹ and 1900-1300 cm⁻¹ [12]. | Inadequate purging of the spectrometer; sample introduced moisture; background measured under different humidity. | Purge the instrument thoroughly with dry, CO₂-free air or nitrogen before and during data collection. Ensure the sample is properly desiccated. Measure the background reference under identical environmental conditions and shortly before the sample. |
| Residual vapor bands after standard purging. | Long experiment duration allowing for environmental drift. | Implement an advanced vapor subtraction algorithm that uses multiple vapor spectra collected before, during, and after the experiment for more robust correction [12]. |
Problem 2: Irreproducible Spectra from Hygroscopic Samples
| Observed Symptom | Potential Cause | Solution |
|---|---|---|
| Varying intensities in the O-H stretching region (~3300 cm⁻¹) and amide bands between sample runs. | Variable water content due to exposure to ambient humidity during preparation or measurement. | Standardize and control the sample drying time and temperature [26]. Store and handle samples in a controlled atmosphere (e.g., inside a glove box) and use sealed cells for measurement. |
| Inconsistent baseline and band shapes in powdered samples. | Inhomogeneous sample due to clumping from absorbed moisture. | Grind the sample to a fine, homogeneous powder in a dry environment (e.g., inside a desiccator glove box) to create a uniform thin film for analysis [26]. |
Problem 3: Physical Changes to the Sample During Preparation
| Observed Symptom | Potential Cause | Solution |
|---|---|---|
| Shifts in the carbonyl (C=O) stretching band position, e.g., from 1737 cm⁻¹ to 1729 cm⁻¹ [26]. | Mechanical stress from grinding inducing partial crystallization in biopolyesters like PHB. | Be consistent with the grinding protocol. Understand that grinding, while improving homogeneity, can induce physical changes in some components. For quantitative work, ensure the preparation method is identical for all samples and standards. |
| General loss of spectral fidelity or new, unexpected peaks. | Chemical contamination from the environment or desiccant. | Ensure the desiccant is fresh and that the storage container is clean. Use high-purity, instrument-grade desiccants and avoid those that are known to be volatile. |
Experimental Protocols
Protocol 1: Desiccation of Solid Biological Samples for ATR-FTIR
This protocol is adapted from methods used for the preparation of bacterial biomass and tissue sections [23] [26].
1. Materials and Equipment:
- Vacuum desiccator
- Silica gel desiccant (with color indicator)
- Laboratory oven (capable of maintaining 45-50 °C)
- Mortar and pestle
- Agate or glass ball mill (optional, for better homogeneity)
- FTIR spectrometer with ATR accessory
2. Procedure:
- Mounting: For tissue samples, mount the fresh-frozen tissue with OCT medium on a cryotome and section to a thickness of 5-10 µm. Mount consecutive sections onto Mirr-IR slides or similar substrates [23].
- Primary Drying: Place the mounted samples in a vacuum desiccator loaded with silica gel. Evacuate the desiccator and let the samples dry for a minimum of 48 hours at room temperature [23].
- Grinding (for bulk samples): For bacterial biomass or similar powders, grind the dried sample thoroughly using a mortar and pestle. This step is crucial for obtaining a homogeneous suspension and a uniform film but should be performed consistently as it can affect the crystallinity of some components [26].
- Film Preparation (for transmission mode): Resuspend the ground powder in a volatile solvent like Milli-Q water. Spread the suspension on an IR-transparent window (e.g., ZnSe) and allow it to dry completely, forming a thin, uniform film [26].
- Final Drying: For highest reproducibility, transfer the prepared samples (on slides or windows) to a laboratory oven and dry at 45 °C for an extended period (e.g., 23 hours) to ensure complete and consistent removal of residual moisture [26].
- Storage: Store the completely dried samples in a sealed desiccator until immediately before FTIR analysis.
Protocol 2: Advanced Water Vapor Subtraction for High-Sensitivity Measurements
This protocol is recommended for studies of protein solutions or any application where subtle spectral features must be resolved [12].
1. Materials and Equipment:
- FTIR spectrometer with purging capability
- ATR accessory suitable for liquids
2. Procedure:
- Purging: Initiate purging of the FTIR spectrometer and ATR accessory with dry air or nitrogen for at least 30-60 minutes before data collection to stabilize the environment.
- Vapor Spectrum Collection: Do not rely on a single vapor spectrum. Instead, collect multiple water vapor spectra at different time points: before the experimental series begins, intermittently between sample measurements, and after the series concludes. This captures the variability in environmental conditions during the experiment [12].
- Sample Measurement: Collect your sample spectra as usual, ensuring the ATR crystal is meticulously cleaned and a fresh background is taken immediately prior to each sample, if possible.
- Data Processing: Use a least-squares fitting algorithm to subtract the multiple vapor spectra from your raw sample spectra simultaneously. This approach automatically determines the optimal subtraction coefficients, minimizing residual vapor artifacts more effectively than manual, single-spectrum subtraction and is less dependent on user expertise [12].
Workflow Visualization
The following diagram illustrates the logical workflow for preparing and analyzing a hygroscopic sample, integrating desiccation and data correction to overcome water vapor interference.
The Scientist's Toolkit: Essential Research Reagents & Materials
The table below lists key materials required for the effective preparation and analysis of hygroscopic samples for FTIR spectroscopy.
| Item | Function/Benefit | Example Use Case |
|---|---|---|
| Silica Gel | A highly porous, inert, and non-corrosive desiccant. Often contains a color indicator (blue to pink) to signal when it needs regeneration. | Maintaining a dry environment in desiccators for sample storage [24] [25]. |
| Vacuum Desiccator | A sealed container that can be evacuated. Lowering the pressure inside greatly accelerates the drying process by reducing the boiling point of water. | Initial rapid drying of solid samples and long-term storage of prepared samples [24]. |
| Molecular Sieves | Synthetic desiccants with uniform pore sizes that can be tailored to absorb water molecules specifically while excluding larger molecules. Superior for drying solvents and protecting sensitive reagents [24] [25]. | Drying organic solvents used in sample preparation or creating an ultra-dry atmosphere for highly sensitive materials. |
| FTIR Sealed Cell | A liquid cell with IR-transparent windows (e.g., CaF₂) that can be sealed to completely isolate the sample from the external atmosphere. | Analysis of hygroscopic materials in solution (e.g., protein studies) or liquids that are air-sensitive [27]. |
| Nitrogen/Air Dryer | A source of dry, CO₂-free purge gas. Essential for removing atmospheric water vapor and CO₂ from the optical path of the FTIR spectrometer. | Routine purging of the spectrometer compartment before and during data acquisition to obtain a stable baseline [12] [27]. |
Core Principles of FTIR and the Water Vapor Challenge
Fourier Transform Infrared (FTIR) spectroscopy is a powerful analytical technique that identifies chemical compounds by measuring the absorption of infrared light by molecular bonds, which vibrate at characteristic frequencies [1] [27]. These vibrations create a unique spectral "fingerprint" for each material. However, this sensitivity also makes FTIR highly susceptible to interference from atmospheric water vapor, which has a strong and complex infrared absorption spectrum [17] [2].
Water vapor introduces sharp, rotational-vibrational peaks that can obscure critical sample bands in two key regions: 4000–3000 cm⁻¹ (O-H stretching) and 2300–1300 cm⁻¹ [3]. This interference is problematic because the concentration and temperature of water vapor in the instrument's optical path can fluctuate during an experiment, making consistent correction difficult [12] [3]. For researchers studying subtle spectral changes, such as in protein secondary structure or intermolecular interactions in solution, these artifacts can compromise data integrity and lead to erroneous conclusions [17] [12].
Troubleshooting Guides & FAQs
The most common sources are:
- Ambient Laboratory Humidity: Especially prevalent in climates with high relative humidity [2].
- Inadequate Purging: An imperfectly purged instrument or purging gas containing impurities [17].
- Sample-Derived Moisture: Water introduced during sample preparation or inherent in hygroscopic materials [2].
- Human Activity: Fluctuations caused by people in the room or frequent opening of the sample compartment [17].
FAQ: I see sharp negative peaks in my spectrum after subtracting water vapor. What does this mean?
Negative absorbance peaks are a classic sign of an imperfect background correction. This often occurs when the water vapor content or temperature in the optical path is different during the sample scan compared to the background scan [13] [3]. The subtraction process is effectively removing "too much" or "too little" of the vapor signal. A simple fix is to clean the ATR crystal (if used) and collect a fresh background spectrum under conditions as identical as possible to the sample measurement [13].
Troubleshooting Guide: Common FTIR Artifacts and Solutions
| Problem Symptom | Likely Cause | Recommended Solution |
|---|---|---|
| Noisy or spiky baseline in specific regions (e.g., ~2300 cm⁻¹, ~1600 cm⁻¹) [3] | Insufficient correction of variable atmospheric water vapor and CO₂. | Improve instrument purging with dry gas; use advanced software correction (e.g., multispectral subtraction) instead of single-reference subtraction [17] [12]. |
| Negative peaks in absorbance spectrum [13] | Difference in water vapor concentration between background and sample scans; dirty ATR crystal. | Clean accessory; collect new background scan; ensure stable lab conditions [13]. |
| Broad interference obscuring sample peaks [2] | Water physically present in the sample itself (e.g., in hygroscopic materials). | Desiccate or dry the sample prior to analysis; use sealed, moisture-impermeable cells [2]. |
| Failed spectral subtraction with large, distorted peaks [28] | Incorrect use of the subtraction factor, leading to over- or under-subtraction. | Adjust the subtraction factor interactively until the characteristic vapor peaks are flattened to the baseline [28]. |
Software Correction Methodologies: From Traditional to Modern
Traditional Spectral Subtraction
Traditional spectral subtraction is a foundational technique for removing known spectral components, such as water vapor, from a mixture spectrum. The core algorithm is [28]:
Sample Spectrum – (Subtraction Factor × Reference Spectrum) = Result Spectrum
The critical step is optimizing the subtraction factor to scale the reference spectrum so that its peaks perfectly match their size in the sample spectrum. When done correctly, the contribution of the reference material (e.g., water) is removed, leaving a clean result spectrum [28]. The process for setting the subtraction factor is illustrated below:
Modern Algorithm: Multispectral Least-Squares Approach
Modern algorithms like those implemented in VaporFit software address the key limitation of traditional methods—atmospheric variability—by using multiple background spectra instead of one [17] [12].
Experimental Protocol for Effective Modern Correction:
- Data Acquisition: Instead of a single background scan, record several (e.g., 5-10) "atmospheric spectra" throughout the experiment—before, after, and between sample measurements. This captures the natural variability of the lab atmosphere [12].
- Software Processing: The algorithm uses an iterative least-squares minimization to find the optimal combination of these multiple atmospheric spectra that, when subtracted, removes the sharp vapor features from your sample spectrum. The core residual function minimized is [17]:
rν = [Yν - Σ(an × atmν,n)] - ȲνWhereYνis the raw sample spectrum,anis the optimized coefficient for the n-th atmospheric spectrumatmν,n, andȲνis the smoothed estimate of the corrected spectrum. - Parameter Optimization: A key parameter is the smoothing window (using the Savitzky-Golay method), which helps the algorithm distinguish between sharp atmospheric spikes and broad sample bands. VaporFit provides tools to objectively select the optimal smoothing parameters [17].
The fundamental difference between traditional and modern approaches is summarized in the workflow below:
Advanced Methods: Two-Dimensional Correlation Spectroscopy (2D-COS)
For exceptionally challenging cases, particularly when seeking to analyze fine spectral structure in regions dominated by water vapor, a 2D-COS approach can be used. This method can separate the contributions of different components based on their response to an external perturbation (e.g., temperature, concentration). It has been shown to effectively retrieve moisture-free spectra and reliable second derivative spectra, which are crucial for analyzing overlapping bands [3].
The Scientist's Toolkit: Software and Reagents
Research Reagent Solutions
| Item | Function / Role in Experiment |
|---|---|
| Dry Inert Gas (N₂ or dried air) | Purging the spectrometer's optical path to physically displace ambient water vapor [17] [2]. |
| Desiccants | Drying samples and sampling accessories (e.g., ATR crystals, sample holders) prior to analysis [2]. |
| Sealed Transmission Cells | Preventing the ingress of outside humidity during measurement of liquid samples [2]. |
| Deuterated Water (D₂O) | Shifting the solvent absorption bands when studying aqueous solutions, allowing access to spectral regions obscured by H₂O [17]. |
| ATR Crystals (Diamond, ZnSe) | Enabling direct analysis of solids and liquids with minimal sample preparation; require regular cleaning to avoid contamination [13] [27]. |
Comparison of Featured Software Tools
| Software / Algorithm | Core Methodology | Key Advantages | Application Context |
|---|---|---|---|
| Traditional Subtraction [28] | Single-reference spectrum subtraction with manual scaling. | Simple, built into all FTIR software, good for stable conditions. | Quick checks, single sample analysis in well-controlled environments. |
| VaporFit [17] [12] | Multispectral least-squares fitting with automated coefficient optimization. | Handles atmospheric variability, user-friendly GUI, open-source. | Long experiments, high-resolution studies, aqueous solution analysis. |
| 2D-COS Approach [3] | Two-dimensional correlation spectroscopy to separate components. | Can retrieve signals from regions heavily masked by water vapor. | Complex mixtures, analyzing overlapping bands in "difficult" spectral regions. |
Best Practices and Pro Tips
- Purging is Non-Negotiable: Even with advanced software, a stable and well-purged instrument is the first line of defense. Use a high-quality, dry purge gas and ensure the system is properly sealed [17] [2].
- Background Strategy: For traditional subtraction, collect the background immediately before the sample and under identical conditions. For modern algorithms, embrace the multi-spectrum approach [12].
- Validate Your Results: After correction, always check that sharp vapor peaks are removed without distorting the broader, sample-related bands. Generating a second derivative spectrum can be a stringent test for residual vapor artifacts [3].
- Sample Preparation: For hygroscopic materials, proper desiccation is more effective than any software correction. Know your sample's properties [2].
VaporFit Technical Support Center
Frequently Asked Questions (FAQs)
Q1: What is the core innovation of VaporFit compared to traditional atmospheric correction methods?
A1: Unlike traditional methods that rely on subtracting a single reference atmospheric spectrum, VaporFit employs a multi-spectral least-squares approach. It dynamically optimizes subtraction coefficients for multiple atmospheric spectra recorded during an experiment, effectively modeling and removing the variability of water vapor and CO₂ interference [17].
Q2: My corrected spectrum still shows residual atmospheric artifacts. What should I adjust first?
A2: Residual artifacts often result from suboptimal Savitzky-Golay (SG) smoothing parameters. VaporFit includes tools to visualize quantitative smoothness metrics for different window sizes. We recommend performing a parallel correction test around your initial parameters. The default values (polynomial order 3, window size 11) are a good starting point for spectra with standard band widths [17].
Q3: Why must I provide multiple atmospheric spectra for the correction process?
A3: The concentration of atmospheric water vapor and CO₂ fluctuates due to factors like room humidity, instrument purging efficiency, and sample compartment openings. Using multiple reference spectra allows VaporFit's algorithm to accurately model these dynamic changes, which is impossible with a single, static reference spectrum [17].
Q4: Can VaporFit be used to correct for interference other than water vapor?
A4: Yes. While specifically designed for H₂O and CO₂, the algorithm's methodology is also effective for correcting other types of FTIR spectral interference caused by volatile compounds sometimes present in laboratory samples [17].
Q5: How does the software help me evaluate the quality of the correction objectively?
A5: Beyond visual inspection, VaporFit provides objective smoothness metrics and includes a Principal Component Analysis (PCA) module. The PCA module allows for visual assessment of spectral series before and after correction, helping to identify and remove outliers resulting from poor atmospheric correction [17].
Troubleshooting Guides
Issue: Poor Correction Quality in Specific Spectral Regions
| Potential Cause | Diagnostic Steps | Solution |
|---|---|---|
| Incorrect SG parameters | Use the built-in tool to run parallel corrections with varying window sizes and observe the smoothness metrics. | Adjust the SG window size. A larger window provides more smoothing but may obscure real, sharp sample peaks. |
| Insufficient/Redundant atmospheric reference spectra | Check the PCA plot for atmospheric spectra; they should form a tight cluster. | Ensure you are using a representative set of 5-10 atmospheric spectra and remove any outliers from the input set [17]. |
| Extremely sharp sample bands | Visually inspect if the sample has bands as sharp as the atmospheric lines. | The algorithm may struggle if sample features are too similar to atmospheric spikes. Consider adjusting the SG window size as a compromise. |
Issue: The Software Fails to Process My Spectral Data
| Potential Cause | Diagnostic Steps | Solution |
|---|---|---|
| Incorrect file format | Ensure your spectra files are in a supported format (e.g., .csv, .txt). | Convert your spectra to a plain text format with wavenumber and absorbance values separated by a comma or tab. |
| Mismatched spectral resolution/range | Check that all sample and atmospheric spectra have the same resolution and wavenumber range. | Reprocess all raw spectra to ensure consistent parameters before importing them into VaporFit. |
| Missing baseline | The refined VaporFit algorithm no longer includes a baseline correction step during atmospheric fitting. | Manually perform a baseline correction on your spectra before importing them into VaporFit for atmospheric correction [17]. |
Experimental Protocols for Effective Correction
For optimal results with VaporFit, follow these data acquisition strategies:
- Acquire Multiple Backgrounds: Regularly record single-beam background spectra (atmospheric references) throughout your experiment. Ideally, record one background for every 2-3 sample spectra [17].
- Maintain Instrument Purging: Consistently purge your FTIR spectrometer with dry nitrogen or dried air to minimize, but not eliminate, atmospheric interference. This reduces the dynamic range the software needs to correct [17] [3].
- Standardize Measurement Parameters: Use consistent spectrometer settings (resolution, number of scans) for all sample and atmospheric background measurements to prevent artifacts from procedural inconsistencies.
The Scientist's Toolkit: Key Research Reagent Solutions
The table below lists essential materials used in the experiments validating VaporFit, as detailed in the associated research [17].
| Reagent/Material | Function in the Experimental Context |
|---|---|
| Betaine (anhydrous) | Used to create aqueous solution test series for evaluating the correction algorithm in the presence of strong water vapor bands. |
| D₂O (NMR grade) | Creates HDO spectra upon mixing with H₂O, providing a complex system for testing correction accuracy in varying isotopic environments. |
| Urea | Forms a drying droplet series on an ATR crystal, creating a dynamically changing system with evolving atmospheric contributions. |
| Hen Egg White Lysozyme | Represents a typical biomacromolecule, used to test the algorithm's performance on biologically relevant samples. |
| Demineralized Water | Serves as the solvent for preparing all aqueous test solutions, ensuring minimal interference from ionic contaminants. |
| Diamond ATR Accessory | The sampling accessory used for solid and liquid samples, a common source of atmospheric interference due to the open sample compartment. |
| Transmission Cuvette (CaF₂ windows) | Used for liquid transmission measurements, another standard sampling method where atmospheric correction is critical. |
VaporFit Algorithm Workflow
The diagram below illustrates the iterative correction process of the VaporFit algorithm.
Recommended FTIR Data Collection Workflow
Implementing a rigorous data collection protocol is crucial for successful atmospheric correction. This workflow outlines the key steps.
FAQs: Overcoming Water Vapor Interference in FTIR
Why is water vapor particularly problematic for protein secondary structure analysis? The amide I band (1700–1600 cm⁻¹), crucial for determining protein secondary structure, is highly susceptible to interference from the sharp vibrational-rotational peaks of gaseous water vapor. Even minor residual water vapor absorptions are amplified by the second derivative and Fourier self-deconvolution (FSD) treatments used to resolve overlapping component peaks. This can lead to the misinterpretation of vapor artifacts as genuine protein component peaks, compromising quantitative analysis [29].
What are the limitations of traditional criteria for evaluating water vapor subtraction? Traditional "single-point" (disappearance of characteristic vapor peaks) and "window-region" (a featureless baseline between 1850–1720 cm⁻¹) criteria can be unreliable due to a phenomenon called sample’s absorbance-dependent water vapor interference. This means that even if a spectrum appears clean in a protein-free region, significant vapor interference can persist in regions where the sample itself has high absorbance, such as the amide I band. A more robust "whole-spectrum" criterion, comparing the sample's second derivative spectrum to that of liquid water, is recommended for a truthful assessment [29].
My second derivative spectrum still shows sharp, negative peaks. What does this indicate? Sharp, negative-going peaks in your second derivative spectrum are a classic signature of residual water vapor interference. These artifacts originate from the intrinsic narrow bandwidth of gaseous water vapor rotations. Their presence indicates that the initial vapor subtraction was insufficient and requires further optimization of the correction method [3] [29].
Why does purging the instrument with dry air sometimes fail to completely remove vapor interference? Even with purging, two key issues can persist. First, the transient concentration of moisture in the optical path can fluctuate. Second, temperature fluctuations in the optical cavity of the instrument's reference HeNe laser can cause a subtle but critical systematic spectral shift between the sample and background single-beam spectra. This shift makes perfect spectral subtraction of water vapor nearly impossible [3].
Troubleshooting Guides
Problem: Unreliable Water Vapor Subtraction in Protein Spectra
Issue: After routine background subtraction, the second derivative of a protein's amide I band still contains artifact peaks, making secondary structure analysis unreliable.
Solution: Implement a comprehensive evaluation and correction protocol.
- Re-evaluate Your Spectrum: Go beyond the standard "window-region" check. Compare the second derivative spectrum of your protein sample with the second derivative spectrum of liquid water across the entire region of interest. If similar sharp features are present, vapor interference is significant [29].
- Apply an Advanced Subtraction Algorithm: Instead of subtracting a single vapor spectrum, use a least-squares approach with multiple vapor spectra.
- Protocol: Collect several (
n>5) single-beam vapor spectra intermittently throughout your experiment (before, after, and between sample measurements). Use a fitting algorithm to find the best linear combination of these vapor spectra that minimizes the residual function against your sample's raw single-beam spectrum. This accounts for environmental changes during the experiment [12] [30].
- Protocol: Collect several (
- Validate the Result: The final corrected protein absorption spectrum should not contain the sharp rotational lines of water vapor, and its second derivative should no longer show the characteristic sharp negative peaks when compared to the liquid water reference [29].
Problem: Moisture Interference in Polymer Characterization
Issue: FTIR spectra of polymers like polyethylene (PE) or ethylene-vinyl acetate copolymer (EVA) are contaminated by moisture bands, obscuring informative vibrational bands and ruining the second derivative spectra used to resolve congested bands.
Solution: Correct for systematic shifts and use two-dimensional correlation spectroscopy (2D-COS).
- Correct for Spectral Shift:
- Establish a database of single-beam background spectra collected over time.
- For a given single-beam sample spectrum, select a matching background spectrum from the database that has the most similar spectral shift, using a metric like the Carbo similarity (CAB value) to guide the selection. This corrects for laser temperature fluctuation effects [3].
- Remove Fluctuating Vapor Signals:
- Use a comprehensive 2D-COS method on the corrected absorption spectra. The 2D asynchronous spectrum can identify and isolate spectral features (like polymer bands) from those that change out-of-phase (like fluctuating water vapor), allowing for the retrieval of a moisture-free polymer spectrum [3].
Experimental Protocols
Protocol 1: Automatic Least-Squares Vapor Correction
This protocol is designed for robust, automated removal of water vapor from a series of FTIR spectra [12] [30].
- Application: Ideal for long-term experiments, such as monitoring protein structural changes or polymer kinetics, where environmental conditions may drift.
- Key Research Reagent Solutions:
- Dry Nitrogen or Purified Air: Used for purging the instrument's optical path to minimize background moisture.
- Software with Least-Squares Fitting Capability: Custom scripts (e.g., Python) or advanced spectrometer software to perform the fitting algorithm.
Procedure:
- Data Collection: Collect your series of sample spectra as usual. Additionally, collect multiple (
n= 5-10) single-beam background (vapor) spectra throughout the experiment. It is critical to acquire these before, after, and at intervals between the sample measurements. - Algorithmic Subtraction: For each raw sample spectrum, the algorithm fits a linear combination of the multiple vapor spectra. The fitting process minimizes a special residual function (e.g., focusing on regions known to be free from sample absorption) to determine the optimal subtraction factors for each vapor spectrum.
- Output: The result is a corrected spectrum where the contribution of water vapor has been subtracted based on the actual varying conditions during the measurement, not a single static reference.
Protocol 2: The RMF (Retrieve Moisture-Free) Approach for High-Quality Derivative Spectra
This protocol combines physical correction with advanced chemometrics to obtain high-quality second derivative spectra, even in regions masked by moisture [3].
- Application: Essential for sensitive analyses where subtle spectral features must be preserved, such as in polymer crystallinity studies or precise protein conformational analysis.
- Key Research Reagent Solutions:
- Database of Single-Beam Background Spectra: A pre-established library of backgrounds.
- Software for 2D-COS Analysis: specialized software for generating two-dimensional correlation spectra.
- Stable Purge Gas System: Ensures minimal and stable background moisture during data acquisition.
Procedure:
- Spectral Shift Correction:
- Calculate the Carbo similarity metric (CAB value) between your single-beam sample spectrum and all single-beam backgrounds in your database.
- Select the background spectrum with the highest CAB value (best match) for use in Equation 1 (
A(x) = -log10[BS(x)/BB(x)]) to compute the absorption spectrum. This step corrects for systematic shifts.
- 2D-COS Analysis:
- Use the set of absorption spectra (e.g., from a time-dependent or perturbation-based experiment) to generate a 2D asynchronous correlation spectrum.
- Analyze this 2D spectrum to identify and isolate the polymer or protein bands from the asynchronous water vapor signals.
- Slice the 2D asynchronous spectrum across points known as Systematic Absence of Cross Peaks (SACPs) to retrieve the pure component spectrum, effectively free from moisture interference.
Data Presentation
Table 1: Comparison of FTIR Water Vapor Mitigation Techniques
| Method | Key Principle | Best For | Advantages | Limitations |
|---|---|---|---|---|
| Physical Purging [2] | Displaces moisture in optical path with dry gas. | Routine analysis, all sample types. | Simple principle, reduces background. | May not eliminate interference completely; requires ongoing resource. |
| Least-Squares Vapor Subtraction [12] [30] | Computational subtraction using multiple vapor spectra. | Long experiment series with varying conditions. | Accounts for environmental drift; automated, less user bias. | Requires collection of extra vapor spectra. |
| Spectral Shift Correction + 2D-COS (RMF) [3] | Corrects laser shift & uses 2D correlation to separate signals. | Sensitive analyses requiring high-quality derivative spectra. | Effective in regions masked by moisture; retrieves pure component spectra. | Complex workflow; requires specialized software and expertise. |
| ATR-FTIR with Purge [31] [27] | Minimizes vapor path length; sample contact with crystal. | Liquid, solid, and biological samples. | Minimal sample prep; reduced vapor volume. | Potential for sample contact issues; not suitable for all geometries. |
Workflow Visualization
FTIR Vapor Troubleshooting Workflow
Research Reagent Solutions
Table 2: Essential Materials for Mitigating FTIR Water Vapor Interference
| Item | Function in Experiment | Application Context |
|---|---|---|
| Dry Nitrogen Gas | Purging the optical bench to minimize ambient water vapor. | Universal for all sensitive FTIR experiments. |
| Attenuated Total Reflection (ATR) Crystal | Sampling accessory that minimizes the effective path length exposed to air. | Analysis of solids, liquids, and gels [31] [27]. |
| Sealed/Low-E Slides | Provide a reflective, moisture-impermeable substrate for sample analysis. | Transflection measurements of biological samples [31]. |
| Database of Background Spectra | A library of single-beam spectra for matching and correcting spectral shifts. | Essential for the RMF approach to correct laser fluctuation [3]. |
| Software for 2D-COS & Least-Squares Fitting | Advanced computational tools for separating sample signal from vapor interference. | Critical for implementing the RMF and automatic subtraction protocols [3] [12]. |
Advanced Troubleshooting and Optimization of FTIR Protocols
FAQs: Addressing Common Concerns on Water Vapor Interference
What are the most common signs of water vapor interference in an FTIR spectrum? The most common signs are sharp, narrow peaks that appear in specific regions of the spectrum. Key indicators include a pair of sharp peaks near 3700 cm⁻¹ and 3600 cm⁻¹ (O-H stretching), and another set of sharp peaks in the region between 1900 cm⁻¹ and 1300 cm⁻¹, which overlaps with critical analytical bands like the amide I region (~1640 cm⁻¹) used for protein analysis. These sharp peaks are due to the vibration-rotation modes of gaseous water molecules and can be easily mistaken for true sample components [12] [32].
Why are my spectra still showing water vapor peaks even after purging the spectrometer? Even with purging, complete elimination of water vapor is challenging. Temperature fluctuations during a long experiment can change the concentration and rotational state of water vapor in the optical path, making a single vapor spectrum measurement insufficient for perfect correction. Furthermore, a phenomenon known as "sample's absorbance-dependent water vapor interference" means that the apparent severity of vapor artifacts is magnified in spectral regions where your sample itself has high absorbance, even if the purge conditions are constant [12] [32].
What is the limitations of the "window-region" criterion for evaluating vapor interference? The traditional "window-region" criterion judges success by a flat baseline in the protein-absorption-free region between 1850 cm⁻¹ and 1720 cm⁻¹. However, research has shown that a spectrum can satisfy this criterion and still be significantly affected by water vapor interference in the amide I region (~1640 cm⁻¹). This is because the interference is not uniform and depends on the sample's own absorbance, making localized evaluation unreliable [32].
Troubleshooting Guide: A Systematic Workflow
Follow this step-by-step guide to diagnose and address residual water vapor in your FTIR spectra.
Step 1: Visual Inspection and Initial Diagnosis
First, learn to identify the fingerprint of water vapor in your raw, uncorrected spectrum.
- Action: Visually inspect your raw absorption spectrum for the characteristic sharp peaks of water vapor.
- Key Regions to Check:
- ~3700 cm⁻¹ and ~3600 cm⁻¹
- The entire range from 1800 cm⁻¹ to 1300 cm⁻¹
The diagram below outlines the core diagnostic workflow.
Step 2: Evaluate Using Established (but Limited) Criteria
Use the traditional methods as an initial, but not definitive, check.
- Action: Examine the "window region" of your spectrum between 1850 cm⁻¹ and 1720 cm⁻¹ [32].
- Interpretation: A featureless baseline in this region is a positive sign, but it does not guarantee the absence of interference in the adjacent amide I band. Proceed to Step 4 for a more reliable evaluation.
Step 3: Implement an Enhanced Vapor Correction Protocol
For high-quality spectra, especially for protein studies, a robust correction method is needed.
- Principle: Instead of measuring a single vapor spectrum, collect multiple vapor spectra before, after, and between sample measurements to capture changing environmental conditions [12].
- Data Processing: Use an automatic least-squares fitting algorithm to subtract this set of vapor spectra from your raw sample spectrum simultaneously. This method minimizes researcher bias and provides a more trustworthy correction than manual subtraction of a single vapor spectrum [12].
Step 4: Apply the "Whole-Spectrum" Criterion for Final Validation
Before performing second derivative or Fourier self-deconvolution (FSD), use this more reliable check [32].
- Action: Compare the second derivative spectrum of your corrected sample with the second derivative spectrum of liquid water.
- Interpretation: If your sample spectrum is free of vapor interference, its second derivative spectrum should not resemble the complex, multi-peaked pattern of liquid water's second derivative in the same region. Similarity indicates persistent interference.
Data Presentation: Key Spectral Artifacts and Evaluation Criteria
The following tables summarize the critical quantitative data for identifying and evaluating water vapor interference.
Table 1: Characteristic FTIR Bands of Water Vapor and Sample
| Type | Spectral Region (cm⁻¹) | Characteristic Peak Shape | Significance & Potential Overlap |
|---|---|---|---|
| Water Vapor | 3700 & 3600 | Sharp, narrow doublet | O-H stretching; usually clear of sample peaks. |
| Water Vapor | 1900 - 1300 | Multiple sharp, narrow peaks | Overlaps critically with amide I (~1640 cm⁻¹) and other sample bands. |
| Liquid Water | ~1645 | Broad band | Bending mode; directly overlaps with protein amide I band. |
| Protein | ~1640 (Amide I) | Broad band | Used for secondary structure analysis; highly vulnerable to vapor artifact. |
Table 2: Comparison of Evaluation Criteria for Water Vapor Interference
| Criterion Name | Method | Limitation |
|---|---|---|
| "Window-Region" [32] | Visually inspect for a flat baseline in the 1850–1720 cm⁻¹ region. | Not reliable; spectrum can pass this check but still have significant vapor interference in the amide I band. |
| "Single-Point" [32] | Check for the disappearance of a specific water vapor peak (e.g., at 1716 cm⁻¹). | Not reliable; does not account for interference across the entire spectrum. |
| "Whole-Spectrum" [32] | Compare the second derivative spectrum of the sample with that of liquid water. | More reliable; reveals sample's absorbance-dependent interference that other methods miss. |
Experimental Protocol: Enhanced Vapor Subtraction
This protocol details the method for robust vapor correction using multiple vapor spectra and least-squares fitting [12].
Objective: To acquire a set of water vapor spectra that accurately represent changing conditions during an experiment for use in an automatic subtraction algorithm.
Materials:
- FTIR spectrometer with ATR accessory or transmission cell.
- Dry inert gas (e.g., nitrogen) purge system (optional but recommended).
- Software capable of performing least-squares fitting of spectra.
Procedure:
- Initialization: Start the experiment with a well-purged spectrometer (if using purge).
- Vapor Spectrum Collection (Pre-sample): Record a background and collect 2-3 vapor spectra.
- Sample Measurement: Collect your first sample spectrum.
- Intermittent Vapor Collection: After every 2-3 sample measurements, collect another 2-3 vapor spectra. This captures drifts in temperature and humidity.
- Final Vapor Collection: After the last sample, collect a final set of 2-3 vapor spectra.
- Data Processing: Use an algorithm (e.g., the proposed
vaporfit.pyscript [12]) that employs a least-squares approach to fit and subtract the entire set of collected vapor spectra from each raw sample spectrum simultaneously. The algorithm minimizes a residual function without requiring the researcher to manually choose subtraction coefficients.
The Scientist's Toolkit: Essential Research Reagents & Materials
Table 3: Key Materials for FTIR Studies Requiring High-Fidelity Spectra
| Item | Function & Brief Explanation |
|---|---|
| High-Purity Dry Gas (N₂) | Purging the spectrometer optics to minimize the concentration of atmospheric water vapor during measurement [12] [32]. |
| Calcium Fluoride (CaF₂) Windows | Optical windows for mounting liquid or solid samples; transparent in the mid-IR range and less hygroscopic than other materials [33]. |
| Deuterated Water (D₂O) | A solvent for protein studies; its bending mode (~1207 cm⁻¹) shifts away from the critical amide I region, simplifying analysis and vapor subtraction [32]. |
| Periodically Poled Lithium Niobate (PPLN) Crystal | A nonlinear crystal used in advanced FTIR setups for generating mid-infrared light via spontaneous parametric down-conversion, allowing detection with visible-light detectors [34]. |
| Least-Squares Fitting Algorithm | Software script (e.g., Python-based) designed to perform automatic, coefficient-free subtraction of multiple vapor spectra from sample spectra, reducing researcher bias [12]. |
Optimizing Savitzky-Golay Smoothing Parameters for Effective Artifact Removal
Core Concepts: Savitzky-Golay Smoothing and Atmospheric Interference
Fourier Transform Infrared (FTIR) spectroscopy is a powerful tool for analyzing molecular structures, but its accuracy is often compromised by spectral artifacts, particularly from atmospheric water vapor and carbon dioxide. These interferences appear as sharp, narrow peaks that can obscure the broader, more meaningful absorption bands from your sample. Effective removal of these artifacts is a critical step in data preprocessing.
The Savitzky-Golay filter is a digital filter that smooths data by applying a low-degree polynomial to successive subsets of adjacent data points using the method of linear least squares. Unlike a simple moving average, which can distort a signal's shape, Savitzky-Golay smoothing is designed to preserve the inherent line shape and features of spectral peaks while effectively reducing high-frequency noise. This makes it exceptionally valuable for preparing FTIR spectra for quantitative analysis or further processing, such as derivative spectroscopy [35].
Within the specific context of advanced atmospheric correction algorithms, such as the one implemented in the VaporFit software, the Savitzky-Golay filter plays a pivotal role. These algorithms use an iterative least-squares process that dynamically combines multiple atmospheric spectra to correct a sample spectrum. The smoothness of the estimated, ideal spectrum (Ȳν) during each iteration is controlled by Savitzky-Golay parameters. Proper selection of these parameters is crucial for the algorithm to distinguish between sharp atmospheric noise and broad sample absorption bands, thereby achieving an effective correction without distorting the underlying sample data [17].
Parameter Selection Guide
Optimizing the two key parameters of the Savitzky-Golay filter—window size and polynomial order—is essential for balancing noise reduction against signal preservation. The table below summarizes their roles and provides guidelines for selection.
Table: Optimization Guide for Savitzky-Golay Parameters
| Parameter | Definition | Impact on Spectrum | Recommended Starting Point | Optimization Consideration |
|---|---|---|---|---|
| Window Size | The number of adjacent data points used for local polynomial fitting [17]. | A larger window increases smoothing but may blur sharp peaks and reduce resolution. A smaller window preserves details but may under-smooth noise. | 11 points [17] | Should be smaller than the width of the narrowest spectral feature of interest. Must be an odd number. |
| Polynomial Order | The degree of the polynomial fitted to the data within the window [17]. | A higher order can better follow complex shapes but may overfit noise. A lower order provides stronger smoothing but can distort peak shapes. | 3 (cubic) [17] | For most spectral features, a quadratic or cubic polynomial is sufficient. |
The optimal values are not universal; they depend on your specific instrumental parameters. As noted in the VaporFit study, "For series typically measured in our laboratory, default parameters (polynomial order 3, window size 11) are usually optimal. However, these parameters may differ for spectra with significantly larger or smaller band full width at half maximum (FWHM) or different spectral resolution" [17].
Experimental Protocols for Artifact Removal
Integrated Workflow for Vapor Correction and Smoothing
The following diagram illustrates a robust experimental and computational workflow for mitigating water vapor interference, incorporating the optimized use of the Savitzky-Golay filter within an advanced correction protocol.
Diagram Title: FTIR Water Vapor Correction Workflow
This workflow synthesizes the two-key experimental practice of collecting multiple atmospheric spectra throughout an experiment with the computational power of modern algorithms [12]. The critical integration point is where the Savitzky-Golay filter's smoothed spectrum serves as the target for the iterative optimization of atmospheric subtraction coefficients [17].
Step-by-Step Protocol for VaporFit with Savitzky-Golay Optimization
This protocol provides detailed methodology based on the VaporFit software, which exemplifies the application of these principles.
- Experimental Pre-requisites: Ensure the FTIR spectrometer is properly purged with a dry, inert gas (e.g., nitrogen) to minimize the initial load of atmospheric interferents [17] [2].
- Enhanced Data Acquisition:
- Instead of collecting a single background spectrum, record multiple atmospheric reference spectra (e.g., 5-10) throughout the experimental session. This should include measurements before, after, and at intervals between sample measurements. This captures the natural variability in laboratory conditions (humidity, temperature) [12].
- Collect your sample spectra as usual.
- Computational Correction with VaporFit:
- Load your sample spectrum and the multiple atmospheric reference spectra into the VaporFit software.
- The algorithm begins with initial estimates for the subtraction coefficients for each vapor spectrum.
- It enters an iterative loop: a. A currently corrected spectrum is calculated by subtracting the combined vapor spectra (with current coefficients) from the raw sample spectrum. b. This corrected spectrum is then smoothed using the Savitzky-Golay filter to create an estimation of the ideal, artifact-free spectrum (Ȳν). c. The difference (residual) between the currently corrected spectrum and the smoothed estimation is calculated. d. A least-squares method adjusts the vapor subtraction coefficients to minimize this residual.
- The loop continues until the coefficients converge, effectively removing the sharp atmospheric features while preserving the broad sample bands [17].
- Parameter Selection and Quality Control:
- Use the built-in tools in VaporFit to visualize the correction quality for different Savitzky-Golay parameters.
- Rely on objective smoothness metrics and Principal Component Analysis (PCA) modules, if available, to rationally assess the optimal window size and polynomial order without over-relying on subjective visual inspection [17].
- The final output is a high-fidelity corrected spectrum with minimal atmospheric interference.
Troubleshooting FAQs
FAQ 1: After applying Savitzky-Golay smoothing, my spectral peaks appear distorted and less resolved. What is the most likely cause and solution? This is a classic sign of using a Savitzky-Golay window size that is too large. An excessively large window causes over-smoothing, where the filter blurs adjacent peaks and flattens sharp spectral features. To resolve this, progressively reduce the window size and observe the result. The optimal window should be smaller than the full width at half maximum (FWHM) of the narrowest genuine peak in your spectrum [17].
FAQ 2: Why do sharp, derivative-like artifacts sometimes appear in my corrected spectrum, and how can I address them? These artifacts are typically caused by imperfect subtraction of water vapor peaks due to temperature fluctuations between the sample and background measurements. Even slight temperature changes alter the rotational-vibrational fine structure of water vapor, making simple one-to-one background subtraction ineffective. The solution is to adopt a multispectral correction approach. Using a algorithm like the one in VaporFit, which dynamically fits multiple vapor spectra recorded at different times, accounts for this variability and leads to a much cleaner correction [17] [12] [3].
FAQ 3: My processed spectrum is still noisy, but increasing the Savitzky-Golay window size distorts my data. What are my options? When you hit the practical limit of traditional smoothing, consider these steps:
- Revisit Data Acquisition: The most effective way to reduce noise is to improve the signal-to-noise ratio (S/N) at the source. Increase the number of scans or co-additions during spectral acquisition, as the S/N ratio improves with the square root of the number of scans [36].
- Explore Advanced Methods: For large, challenging datasets, machine learning techniques, such as autoencoding neural networks, have shown great promise in removing noise and artifacts in a single, parameter-free pass, often with superior preservation of spectral features compared to conventional filters [36].
The Scientist's Toolkit: Key Research Reagents & Materials
Table: Essential Materials for FTIR Experiments and Vapor Correction
| Material / Reagent | Function in Experiment | Specific Role in Mitigating Interference |
|---|---|---|
| Dry Inert Gas (N₂) | Purging the optical path of the FTIR spectrometer. | Displaces ambient moisture and CO₂, reducing the baseline level of atmospheric interferents and is a prerequisite for effective software correction [17] [2]. |
| Multiple Background Spectra | A set of atmospheric reference measurements. | Provides the algorithm with a realistic model of how water vapor signals change over time, enabling robust least-squares fitting [17] [12]. |
| Sealed Transmission Cells | Holding liquid samples for analysis. | Creates a closed, moisture-impermeable environment that prevents the exchange of atmospheric water with the sample, stabilizing the background [2]. |
| VaporFit Software | An open-source algorithm for atmospheric correction. | Implements the iterative, multispectral least-squares fitting that uses Savitzky-Golay smoothing to optimally separate artifact from signal [17]. |
Correcting for Laser Cavity Temperature Fluctuations and Other Instrumental Drifts
Troubleshooting Guides
FAQ: Addressing Laser and Instrumental Drift
Q: What are the symptoms of a fluctuating laser cavity temperature in my FTIR instrument? A: The primary symptom is a systematic spectral shift between single-beam sample and background spectra. This shift often makes standard spectral subtraction methods无效 in removing the interference of atmospheric moisture, leaving behind residual spikes and bands in regions like 4000–3000 cm⁻¹ and 2300–1300 cm⁻¹ [3]. This can also manifest as a distorted baseline or poor performance when trying to obtain reliable second-derivative spectra [3].
Q: How can I diagnose a failing HeNe laser or power supply? A: A drop in laser intensity below 500 µW can indicate a failing laser tube or power board issues [37] [38]. This can lead to a noisy interferogram, frequency shifts, and a complete loss of signal. The system status indicator in instrument control software (e.g., OMNIC Paradigm) may also turn yellow or red, signaling a failed diagnostic test or laser miscalibration [39].
Q: What are the best practices to minimize baseline instability and drift? A: Baseline instability can be caused by several factors. The key steps to correct it are:
- Purge Efficiently: Lower the purge flow rate to minimize acoustic noise inside the instrument and allow 10-15 minutes after closing the compartment cover for the purge to stabilize [39].
- Control Environment: Ensure the instrument has warmed up for at least one hour for temperature stability and check that the desiccant is active (color indicator is not pink) to control internal humidity [39] [21].
- Check Components: Verify that cooled detectors have been properly cooled for at least 15 minutes and that sample compartment windows are not fogged [39].
Detailed Methodology: The RMF Approach for Moisture-Free Spectra
Researchers have developed a robust "Retrieve Moisture-Free IR" (RMF) approach to overcome limitations caused by laser cavity temperature fluctuations [3]. This method is particularly vital for obtaining reliable second-derivative spectra in regions typically obscured by water vapor.
Experimental Protocol
Establish a Background Spectrum Database:
- Concept: Based on the "big-data and pigeon-hole theory," a large database of single-beam background spectra (
BB(x)) is collected under varying but measured environmental conditions [3]. - Execution: Over time, accumulate hundreds of background scans, logging parameters like internal instrument temperature and humidity.
- Concept: Based on the "big-data and pigeon-hole theory," a large database of single-beam background spectra (
Correct Systematic Spectral Shift:
- Identify Shift: For a given single-beam sample spectrum (
BS(x)), calculate the Carbo similarity metric (d²θor CAB value) against backgrounds in the database to quantify the systematic spectral shift [3]. - Match Background: Select the single-beam background spectrum from the database whose CAB value most closely matches that of the sample spectrum. This corrects the shift induced by the HeNe laser's temperature fluctuation [3].
- Generate Corrected Absorbance: Use the matched
BB(x)andBS(x)to calculate a corrected absorption spectrum,A(x), using the standard formula:A(x) = -log10[BS(x)/BB(x)][3].
- Identify Shift: For a given single-beam sample spectrum (
Remove Transient Moisture Fluctuations:
- Apply 2D-COS: Use a comprehensive two-dimensional correlation spectroscopy (2D-COS) analysis on a series of corrected spectra [3].
- Interpret Results: The 2D asynchronous spectrum will exhibit a phenomenon called Systematic Absence of Cross Peaks (SACPs) for the gaseous water component [3].
- Slice the Spectrum: By slicing the 2D asynchronous spectrum across these SACPs, the FTIR spectrum of the pure sample, without the interference of moisture, can be faithfully recovered [3].
Summary of Key Experimental Parameters
| Parameter | Specification | Purpose |
|---|---|---|
| Instrument | Thermo-Fischer Nicolet-6700 FT-IR [3] | Example instrument used in methodology development. |
| Detector | MCT (cooled with liquid N₂) [3] | High sensitivity for detecting subtle spectral features. |
| Resolution | 2 cm⁻¹ [3] | Standard resolution for detailed molecular analysis. |
| Number of Scans | 128 [3] | Co-adding scans improves the signal-to-noise ratio. |
| Samples | Polyethylene (PE), Ethylene-Vinyl Acetate (EVA) [3] | Example polymeric materials used for validation. |
The Scientist's Toolkit: Essential Research Reagents and Materials
| Item | Function in the Experiment |
|---|---|
| Polymeric Film Samples | Testing specimens (e.g., PE, EVA) used to validate the RMF approach and study fine spectral structures [3]. |
| KBr or KCl Matrix | A non-absorbing matrix used to dilute powdered samples for DRIFTS or transmission measurements, minimizing spectral artefacts [14]. |
| Diamond Powder | An extremely robust, non-absorbing matrix for diffuse reflectance measurements, especially where chemical inertness is required [14]. |
| Ethanol (AR Grade) | Used for cleaning optical components like ATR crystals; effective for removing organic contaminants without etching surfaces [3] [38]. |
| Liquid Nitrogen | Coolant required for operating high-sensitivity MCT detectors, which are essential for detecting weak signals [3] [14]. |
| Desiccant | Critical for maintaining a dry environment within the instrument to minimize spectral interference from atmospheric water vapor [39] [21]. |
Workflow and Relationship Diagrams
Diagram: Correcting Spectral Drift with the RMF Approach
Diagram: Diagnosing FTIR Laser and Drift Issues
Pitfalls in Second Derivative and Fourier Self-Deconvolution (FSD) Analysis
Troubleshooting Guides
Troubleshooting Second Derivative Analysis
Second derivative analysis is used to resolve overlapping peaks and eliminate constant baseline drift by transforming broad spectral features into sharper, negative-going peaks [40] [41]. However, several pitfalls can compromise its effectiveness.
Problem: Excessive Noise Amplification
- Symptoms: The derivative spectrum appears noisy and "spiky," making it difficult to distinguish real spectral features from noise [40].
- Causes: The derivative calculation inherently amplifies high-frequency noise. This is particularly problematic with low signal-to-noise ratio (SNR) raw data [40] [15].
- Solutions:
- Optimize Data Acquisition: Increase the number of scans during data collection to improve the SNR of the original spectrum [15].
- Apply Appropriate Smoothing: Before differentiation, apply mild smoothing to the raw spectrum. The Savitzky-Golay (SG) filter is commonly used for this purpose, as it smooths data while preserving the shape and width of spectral peaks [17] [40].
- Select Optimal Smoothing Parameters: Choosing incorrect Savitzky-Golay parameters (polynomial order and window size) can lead to excessive signal loss or inadequate noise reduction [17]. Use objective metrics, if available in your software, to guide parameter selection.
Problem: Spectral Distortion and Artifacts
- Symptoms: Peaks appear shifted or distorted, and side-lobes (ringing) may appear next to strong peaks [40].
- Causes: Overly aggressive smoothing or the use of an inappropriate differentiation algorithm can distort the spectral line shape [40].
- Solutions:
- Use Milder Parameters: Avoid using a large smoothing window or a high polynomial order with the Savitzky-Golay filter. Start with conservative settings (e.g., polynomial order 2 or 3) and a small window size, then adjust incrementally [17].
- Validate with Standards: Always process a standard material with known spectral features to verify that your derivative parameters do not introduce artifacts or shift peak positions [15].
Problem: Incorrect Baseline Removal in Complex Cases
- Symptoms: The second derivative spectrum still shows a sloping or curved baseline, complicating quantitative analysis.
- Causes: Second derivatives only eliminate constant and linear baseline offsets. They are less effective for complex, non-linear baselines [40].
- Solutions:
- Combine Preprocessing Methods: Apply a separate, suitable baseline correction algorithm to the raw spectrum before performing derivative analysis [40].
- Consider Alternative Methods: For spectra with severe baseline drift, Fourier Self-Deconvolution Differentiation (FSDD), which combines FSD and differentiation, may be more effective at baseline elimination [40].
The table below summarizes these common issues and their solutions.
| Problem | Symptoms | Solutions |
|---|---|---|
| Excessive Noise Amplification | Noisy, "spiky" spectrum; low signal-to-noise ratio [40] [15]. | Increase number of scans; apply Savitzky-Golay smoothing; optimize smoothing parameters [17] [40]. |
| Spectral Distortion | Peak shifts, distorted line shapes, appearance of side-lobes or ringing [40]. | Use milder smoothing parameters; validate methods with standard reference materials [17] [15]. |
| Incorrect Baseline Removal | Sloping or curved baseline remains after derivation [40]. | Apply baseline correction before derivation; use advanced methods like FSDD for complex baselines [40]. |
Troubleshooting Fourier Self-Deconvolution (FSD)
FSD is a mathematical technique used to narrow spectral bands, thereby improving apparent resolution and separating overlapped peaks [42] [43]. Its application requires careful parameter selection to avoid introducing errors.
Problem: Inadequate Resolution Enhancement or Over-deconvolution
- Symptoms: The deconvoluted spectrum shows no noticeable improvement in resolution, or conversely, shows artificial, sharp peaks not present in the original data [40] [42].
- Causes: This is directly caused by incorrect selection of the FSD parameters, specifically the bandwidth (FWHH - Full Width at Half Height) and the narrowing factor (K). An underestimated bandwidth or an overestimated narrowing factor leads to over-deconvolution and "ringing" artifacts [40] [42].
- Solutions:
- Use Prior Knowledge: Estimate the initial bandwidth parameter from the widths of isolated peaks in your original spectrum.
- Iterative Refinement: Systematically vary the bandwidth and narrowing factor over a small range of values and observe the output. Choose the parameters that provide the best resolution improvement without generating obvious artifacts [42].
- Use Apodization Functions: Apply apodization functions (e.g., Bessel, Gaussian) during the FSD process to suppress the ringing side-lobes that result from the deconvolution [40].
Problem: Noise Amplification
- Symptoms: The deconvoluted spectrum has a significantly degraded signal-to-noise ratio [40].
- Causes: Similar to derivative methods, FSD can amplify high-frequency noise present in the original data [40].
- Solutions:
- Smooth the Input Spectrum: Gently smooth the original spectrum before applying FSD [40].
- Use a Combination Method: Implement the FSDD (Fourier Self-Deconvolution Differentiation) method. This approach uses the FSD operator first to achieve preliminary peak separation with high SNR, which creates a better starting point for subsequent differentiation [40].
Problem: Parameter Dependence and Reproducibility
- Symptoms: Results are difficult to reproduce between users or instruments due to the subjective nature of parameter selection [40].
- Causes: The FSD outcome is highly sensitive to user-defined parameters, and optimal values can vary between samples and instruments [40] [42].
- Solutions:
- Standardize Protocols: Develop and document a standardized set of FSD parameters for specific types of samples within your lab.
- Report Parameters Fully: When publishing or reporting data, always include the specific FSD parameters used (bandwidth, narrowing factor, apodization function) to ensure reproducibility [42].
The table below summarizes these common FSD issues and their solutions.
| Problem | Symptoms | Solutions |
|---|---|---|
| Inadequate Resolution or Over-deconvolution | No improvement or appearance of artificial sharp peaks and "ringing" artifacts [40] [42]. | Use prior knowledge for bandwidth; iteratively refine parameters (bandwidth & narrowing factor); use apodization functions [40] [42]. |
| Noise Amplification | Degraded signal-to-noise ratio in the processed spectrum [40]. | Smooth the input spectrum before FSD; use the FSDD combined method [40]. |
| Poor Reproducibility | Results vary significantly between users or instrument sessions [40] [42]. | Develop standardized in-lab protocols; fully document all parameters used in analysis [42]. |
FAQs
How do I choose between using second derivative and FSD for my FTIR data?
The choice depends on your primary goal and the quality of your data [40]:
- Second Derivative is highly effective for eliminating constant and linear baselines and for resolving heavily overlapped peaks by transforming them into sharper, distinct negative peaks. It is a good first choice for qualitative analysis and peak identification [40] [41].
- FSD is primarily used to narrow the widths of spectral bands, thereby improving the apparent resolution. It is particularly useful for quantifying individual components within a complex, overlapped envelope of bands and can better preserve the original peak shapes compared to derivatives [42] [43].
For challenging spectra suffering from both severe overlap and significant baseline drift, a combined method like FSDD (Fourier Self-Deconvolution Differentiation) may be optimal, as it leverages the benefits of both techniques while mitigating their individual drawbacks, such as FSD's limited resolution and derivative's noise sensitivity [40].
What are the best practices to minimize artifacts when using these techniques?
Minimizing artifacts requires a focus on data quality and conservative processing:
- Start with High-Quality Data: Ensure your raw spectrum has a high signal-to-noise ratio and a flat baseline before applying any advanced processing. This is the most critical step [15].
- Use Conservative Parameters: Avoid the temptation to over-process. Begin with mild smoothing, a small narrowing factor in FSD, or a low polynomial order in derivative analysis, and increase gradually only as needed [17] [40].
- Validate with Controls: Always process a standard or control sample to verify that your processing method does not create or distort spectral features [15].
- Leverage Software Tools: Use built-in software tools, such as principal component analysis (PCA) modules or objective smoothness metrics, to help evaluate the quality of your corrections and parameter choices objectively [17].
How does effective atmospheric correction (like removing water vapor) impact the success of FSD and derivative analysis?
Effective atmospheric correction is fundamental to the success of both FSD and derivative analysis. Residual sharp peaks from water vapor (H₂O) or carbon dioxide (CO₂) can be severely amplified by these mathematical techniques, obscuring the sample's true spectral features and leading to misinterpretation [17].
- Advanced Correction Software: Instead of relying on a single background subtraction, use specialized algorithms like those in VaporFit software. These employ a multispectral least-squares approach to dynamically correct for variable atmospheric contributions based on multiple atmospheric measurements taken during the experiment [17].
- Proper Instrument Purging: Consistently purge your FTIR instrument with dry, CO₂-free air or nitrogen to minimize the initial atmospheric interference [17] [15].
Experimental Protocol for Combined FSDD Analysis
The following workflow is designed for analyzing spectra with overlapping peaks, baseline drift, and noise, using the combined Fourier Self-Deconvolution Differentiation (FSDD) method [40].
Methodology
- Data Acquisition: Collect the FTIR spectrum of the sample, ensuring a high signal-to-noise ratio by using an adequate number of scans (e.g., 32 or 64). Prior to sample measurement, acquire a new background spectrum under identical conditions [17] [15].
- Atmospheric Correction: Process the raw sample spectrum to remove interference from atmospheric water vapor and CO₂. Using a tool like VaporFit is recommended for its dynamic, multi-spectral correction approach [17].
- Fourier Self-Deconvolution (FSD):
- Objective: Narrow the spectral bandwidths to preliminarily resolve overlapping peaks and reduce noise [40] [42].
- Procedure: Apply the FSD algorithm to the corrected spectrum. This involves Fourier-transforming the spectrum, multiplying it by an apodization function, and dividing by an impulse response function before performing the inverse Fourier transform [40].
- Parameter Optimization: Iteratively adjust the FSD parameters:
- Bandwidth (FWHH): Estimate from isolated peaks in the spectrum.
- Narrowing Factor (K): Increase gradually to avoid over-deconvolution and ringing artifacts.
- Apodization Function: Use (e.g., Bessel or Gaussian) to suppress side-lobes [40].
- Fourier Filtering and Differentiation (FFD):
- Objective: Further separate the now-narrower peaks and eliminate baseline drift [40].
- Procedure: Apply the FFD operator to the result of the FSD step. This performs differentiation directly in the Fourier domain, which includes an integrated filtering step to mitigate noise amplification [40].
- Parameter Selection: Typically, a second-order derivative is sufficient for baseline removal. The filter parameters should be chosen to balance noise reduction and signal preservation [40].
- Validation: Compare the final FSDD spectrum with the original raw data to ensure that real spectral features have been enhanced without the introduction of significant distortions or artifacts. Validate the method using a standard sample with known spectral characteristics [40] [15].
Research Reagent and Material Solutions
The following table lists key materials and software tools essential for conducting robust FSD and derivative analysis in FTIR spectroscopy.
| Item | Function | Application Note |
|---|---|---|
| Dry Gas Generator | Generates nitrogen or dried air for instrument purging to minimize spectral interference from atmospheric water vapor and CO₂ [17]. | Consistent purging is the first line of defense against atmospheric interference, which is crucial before any advanced data processing [17] [15]. |
| Certified Reference Materials | Standards with well-characterized IR spectra used for wavenumber calibration and validation of spectral processing methods [15]. | Essential for verifying that FSD or derivative processing does not artificially shift peak positions or create spectral artifacts [15]. |
| VaporFit Software | An open-source tool for automated, multi-spectral correction of atmospheric interference in FTIR spectra [17]. | Provides a more accurate and reproducible alternative to single-reference background subtraction, creating a cleaner baseline for subsequent FSD/derivative analysis [17]. |
| ATR Crystal Cleaner | Specialized solvents and cleaning materials for maintaining the cleanliness of ATR accessories [13]. | A dirty crystal can cause negative peaks and spectral distortions that are amplified by derivative and FSD processing [13]. |
| Savitzky-Golay Filter | A digital filter that can be applied for smoothing and differentiation, built into most FTIR software suites [17] [40]. | The primary tool for reducing noise amplification in derivative analysis. Parameter selection (polynomial order, window size) is critical [17] [40]. |
Implementing a Rigorous Background Acquisition and Data Pre-processing Workflow
Framed within a thesis on overcoming water vapor interference in FTIR spectroscopy, this guide provides targeted troubleshooting and FAQs to support researchers in obtaining reliable data.
In Fourier-Transform Infrared (FTIR) spectroscopy, the interference from atmospheric water vapor and carbon dioxide presents a significant challenge to data integrity. These absorptions can obscure critical sample bands, leading to erroneous interpretation in chemical and biological analysis [2] [17]. Implementing a rigorous workflow for background acquisition and spectral pre-processing is not merely a best practice—it is a foundational requirement for achieving accurate, reproducible, and meaningful results, particularly in sensitive applications like drug development and material science [44] [17]. This guide addresses specific, high-frequency problems researchers encounter and provides clear, actionable solutions.
Troubleshooting FAQs and Guides
FAQ 1: Why do I see sharp, negative peaks in my absorbance spectrum?
Answer: This is a classic symptom of a contaminated ATR (Attenuated Total Reflection) crystal or an outdated background measurement. The negative peaks indicate that the sample spectrum is absorbing less IR radiation at specific wavelengths than the background measurement did. This occurs because the contaminant on the crystal (e.g., residue from a previous sample) was present during the background scan but is not part of your current sample, or vice-versa [13].
Solution:
- Clean the ATR Crystal: Gently clean the crystal with a soft cloth and an appropriate solvent (e.g., methanol, isopropanol) that will dissolve the residue without damaging the crystal.
- Acquire a Fresh Background: After cleaning and ensuring the crystal is completely dry, collect a new background spectrum with the clean crystal in place. This should be done immediately before measuring your sample.
FAQ 2: My baseline is unstable and shows strong, shifting water vapor bands. How can I stabilize it?
Answer: Instability in the baseline and the presence of variable water vapor bands are caused by fluctuations in humidity and temperature within the optical path of the FTIR spectrometer. Even in purged systems, minor changes can introduce these artifacts, which are magnified in sensitive analyses like second-derivative spectroscopy [17] [18].
Solution:
- Improve Instrument Purging: Ensure the purge gas (dry nitrogen or air) is of high purity and that the flow rate is adequate and consistent. Check all purge lines for leaks.
- Control the Environment: Maintain a stable temperature in the laboratory to prevent thermal fluctuations that can change the water vapor concentration inside the instrument.
- Use Advanced Computational Correction: For persistent issues, employ specialized software like VaporFit, which uses a multi-spectral least-squares approach to dynamically correct for variable atmospheric contributions, providing a more robust solution than simple single-spectrum subtraction [17].
FAQ 3: My quantitative results are inconsistent, even with replicate samples. What could be wrong?
Answer: Inconsistency in quantitative analysis often stems from a combination of poor background handling, inadequate purging, and suboptimal data processing parameters. The weak signals representing subtle molecular interactions are easily masked by this noise [17].
Solution:
- Standardize Background Acquisition: Always collect a new background scan immediately before a set of samples, using the same instrumental parameters (number of scans, resolution).
- Validate Processing Parameters: When using algorithms like Savitzky-Golay smoothing in correction software, ensure the parameters (window size, polynomial order) are optimized for your specific spectral features. Default values may not be suitable for all data types [17].
- Implement a Rigorous Workflow: Adhere to a systematic pre-processing pipeline as outlined below to ensure all sources of interference are methodically addressed [44] [45].
Experimental Protocols for Mitigating Water Vapor Interference
Protocol 1: Proactive Physical Mitigation during Data Acquisition
This protocol focuses on preventing water vapor interference before it is recorded in the spectrum.
Principle: Minimize the presence of water vapor in the spectrometer's optical path and sample environment through physical means [2].
Methodology:
- Instrument Purging: Continuously purge the optical bench and sample compartment with dry, compressed nitrogen gas. The purge should be activated for at least 15-30 minutes before data collection to achieve a stable atmosphere [2] [27].
- Sample Desiccation:
- For solid samples, dry in a vacuum desiccator over a desiccant like phosphorus pentoxide (P₂O₅) prior to analysis.
- For liquid samples, use anhydrous solvents and ensure sample cells are perfectly dry.
- Hardware Maintenance:
- Regularly check and replace the desiccant (e.g., indicating silica gel) in the instrument's built-in desiccant ports.
- Ensure the ATR crystal is clean and dry before acquiring a background measurement.
- Stable Conditions: Maintain a constant laboratory temperature to reduce thermal drift, which can cause baseline instability [2].
Protocol 2: Computational Correction of Acquired Spectra Using VaporFit
When physical prevention is insufficient, computational correction is required. This protocol details the use of the open-source VaporFit software [17].
Principle: Dynamically correct for variable atmospheric contributions by using an iterative least-squares algorithm that optimizes subtraction coefficients for multiple atmospheric reference spectra [17].
Methodology:
- Data Acquisition Strategy:
- Record multiple "atmospheric" or "vapor" reference spectra throughout your experiment. These are single-beam spectra of the empty cell or clean ATR crystal under the same purging conditions as your samples.
- This creates a library of atmospheric states for the algorithm to use.
- Software Workflow:
- Load your sample spectrum and the multiple atmospheric reference spectra into VaporFit.
- The algorithm iteratively minimizes the residual function:
rν = [Yν - Σ(an * atmν,n)] - Ȳν, where:Yνis the measured sample spectrum.anis the optimized subtraction coefficient for the n-th vapor spectrum.atmν,nis the n-th recorded atmospheric spectrum.Ȳνis the estimated, ideally corrected spectrum obtained by smoothing the intermediate result.
- Select appropriate Savitzky-Golay smoothing parameters (default is often polynomial order 3, window size 11). The software includes tools to help select optimal parameters objectively [17].
- Quality Control: Use the built-in PCA (Principal Component Analysis) module to visually evaluate the correction quality and ensure atmospheric features have been effectively removed without distorting sample bands.
Experimental Workflow Diagram
The following diagram visualizes the integrated physical and computational correction pathway.
Research Reagent and Equipment Solutions
Table 1: Essential materials for an effective FTIR workflow against water vapor interference.
| Item | Function/Description | Key Consideration |
|---|---|---|
| Dry Nitrogen Purge Gas | Displaces moisture-laden air from the optical path and sample compartment [2]. | Purity is critical; use an in-line filter to remove any residual moisture or oil from compressed gas sources. |
| Desiccants | Used for sample preparation and instrument maintenance. | Indicating silica gel (changes color when exhausted); phosphorus pentoxide (P₂O₅) for aggressive drying [2]. |
| VaporFit Software | Open-source tool for advanced atmospheric correction [17]. | Employs a multi-spectral least-squares algorithm, superior to traditional single-spectrum subtraction. |
| ATR Cleaning Kit | Solvents and lint-free wipes for crystal maintenance. | Prevents contamination that causes negative peaks and baseline distortion [13]. |
| Sealed Transmission Cells | For analyzing liquid samples in transmission mode. | Prevents absorption of atmospheric moisture during measurement, crucial for hygroscopic samples [2]. |
Key Takeaways for Researchers
Successfully overcoming water vapor interference requires a dual-pronged strategy: rigorous physical prevention to minimize the problem at its source, followed by sophisticated computational correction to clean the acquired data. Adopting the systematic workflow and troubleshooting guidance outlined above will significantly enhance the accuracy, sensitivity, and reproducibility of your FTIR analyses, which is indispensable for high-stakes research and development.
Ensuring Accuracy: Validation Protocols and Complementary Techniques
Fourier Transform Infrared (FTIR) spectroscopy is a powerful analytical technique used to identify chemical compounds based on their unique infrared absorption fingerprints. However, a pervasive challenge in obtaining high-quality, reproducible spectra is interference from atmospheric water vapor. Even in controlled environments, water vapor introduces sharp vibrational-rotational peaks that can obscure critical sample information, particularly in the 4000-3000 cm⁻¹ and 2300-1300 cm⁻¹ regions where important functional groups absorb.
Traditional quality control in FTIR often relies on single-point validation, such as checking baseline stability at a specific wavenumber. This approach is insufficient for modern applications requiring high sensitivity and reproducibility. Moving to whole-spectrum validation ensures that atmospheric interference is systematically addressed across the entire spectral range, providing the robust data quality essential for research and drug development.
Troubleshooting Guides
Diagnosing and Resolving Common FTIR Issues
Problem 1: Persistent sharp peaks at ~2350 cm⁻¹ and ~670 cm⁻¹ in the spectrum
- Description: Sharp, negative or positive peaks remain after standard background subtraction.
- Potential Cause: These peaks are characteristic of atmospheric carbon dioxide (CO₂). Their persistence indicates incomplete background subtraction or varying CO₂ levels between sample and background scans [17].
- Solution:
- Ensure consistent and adequate purging of the instrument with dry, CO₂-free air or nitrogen before and during both background and sample scans.
- Check for leaks in the instrument housing or purge gas lines.
- Utilize advanced spectral correction software that can handle variable atmospheric conditions [17].
Problem 2: Broad, distorted baseline in the 3400 cm⁻¹ and 1600 cm⁻¹ regions
- Description: The spectrum shows a sloping or irregular baseline with broad absorption features.
- Potential Cause: This is a classic sign of interference from gaseous water (moisture) in the optical path. Fluctuations in ambient humidity and temperature are typical culprits [2] [18].
- Solution:
- Extend the purging time with dry gas to ensure the optical compartment is thoroughly dried.
- Store and use desiccant within the sample compartment, and check it regularly.
- For sensitive quantitative work, employ a sealed, moisture-impermeable cell for the sample.
- Apply computational moisture correction techniques, such as the multi-spectral fitting used in the VaporFit software [17].
Problem 3: Negative absorbance peaks after ATR measurement
- Description: The sample spectrum shows peaks pointing downward (negative absorbance).
- Potential Cause: The background scan was collected with a dirty Attenuated Total Reflection (ATR) crystal. Contaminants on the crystal during the background scan are "subtracted" from the sample, resulting in negative peaks [13] [7].
- Solution:
- Before collecting a background, always clean the ATR crystal thoroughly with a soft cloth and an appropriate solvent (e.g., water, ethanol, acetone) [46].
- Collect a new background scan after cleaning.
- Visually inspect the crystal before each use for scratches or residue.
Problem 4: Noisy or weak signal
- Description: The spectrum has a high level of noise, making peaks difficult to distinguish.
- Potential Cause: This can stem from various sources, including an aging IR source, a failing detector, insufficient scans, or vibration interference [47].
- Solution:
Advanced Correction Workflow for Whole-Spectrum Validation
For research-grade analysis, a systematic approach is required to minimize atmospheric interference. The following workflow outlines the key steps for obtaining a high-fidelity, moisture-corrected spectrum.
This workflow integrates both physical and computational strategies. The physical prevention stage involves purging the optical path with dry gas and ensuring samples are properly dried [2]. The computational stage leverages advanced algorithms, like the iterative least-squares minimization in VaporFit, which uses multiple background spectra to dynamically correct for varying atmospheric conditions [17]. Final validation should use objective metrics to ensure the correction has effectively removed sharp atmospheric features without distorting the sample's spectral bands.
Frequently Asked Questions (FAQs)
Q1: Why is purging with dry nitrogen not completely eliminating water vapor peaks? A: Even with purging, trace amounts of moisture can remain. Furthermore, fluctuations in laboratory temperature and humidity, the frequency of opening the sample compartment, and impurities in the purging gas can cause variability that a simple background subtraction cannot fully correct. Advanced software solutions that account for this variability are often necessary for complete removal [17] [18].
Q2: What is the difference between the spectrum I get from Transmission vs. ATR? A: Both techniques produce similar "fingerprints" but with key differences. Transmission measures the light passing through a sample, which often requires specific preparation like KBr pellets. ATR measures the interaction of light with the surface of a sample in contact with a crystal. The depth of penetration in ATR is wavelength-dependent, which can cause minor shifts in peak intensities and shapes compared to transmission. Modern software can apply a correction function to make ATR spectra closely resemble transmission spectra for library matching [48].
Q3: How do I know if my ATR crystal is clean enough for a measurement? A: The best practice is to collect a background spectrum with the crystal appearing clean and empty. If this background spectrum is flat and featureless (lacking any absorption peaks), the crystal is clean and ready for use. If you see peaks, clean the crystal again and collect a new background [46] [7].
Q4: What are the best practices for storing my FTIR accessories to prevent moisture damage? A: Hygroscopic accessories, especially those with KBr or ZnSe components, should always be stored in a desiccator with an active desiccant like silica gel. This prevents moisture from being absorbed into the optical elements, which can cause etching, cloudiness, and spectral interference [46] [47].
Q5: My sample is aqueous. What is the best way to minimize the strong water signal? A: Using an ATR accessory is ideal for aqueous samples as it limits the pathlength to a few microns. Choose a crystal material that is resistant to water, such as diamond. For transmission measurements, use a very short pathlength liquid cell (e.g., with a 5-15 µm spacer) and select windows like CaF₂ or ZnSe that are less soluble in water compared to KBr [46] [48].
The Scientist's Toolkit: Essential Research Reagents and Materials
The following table details key materials and their functions for conducting reliable FTIR experiments, particularly those aimed at mitigating water vapor interference.
| Item | Function & Application | Key Considerations |
|---|---|---|
| Dry Nitrogen Generator | Produces high-purity, dry gas for purging the FTIR optical path [17]. | Prefer a dedicated generator over gas cylinders for consistent quality and lower long-term cost. |
| ATR Crystals (Diamond) | Enables direct, non-destructive analysis of solids, liquids, and pastes with minimal sample prep [46] [48]. | Diamond is hard, chemically inert, and suitable for most samples, but has a minor absorption band around 1800-2300 cm⁻¹ [46]. |
| Desiccant | Used in storage desiccators and sometimes within the instrument to maintain a low-humidity environment [2]. | Silica gel is common; monitor the color indicator and regenerate or replace it regularly. |
| Sealed Liquid/Gas Cells | Holds liquid or gaseous samples in a controlled, sealed environment to prevent exchange with the external atmosphere [2] [46]. | Pathlength must be appropriate for the sample (e.g., very short for water, long for gases). |
| VaporFit Software | Open-source tool for automated, multi-spectral correction of water vapor and CO₂ interference [17]. | Uses a least-squares approach on multiple background scans for superior results compared to simple subtraction. |
| Potassium Bromide (KBr) | Used for preparing solid samples for transmission analysis via the pellet method [48]. | Must be kept perfectly dry as it is highly hygroscopic. Grinding and pressing should be done in a low-humidity environment. |
Adopting a whole-spectrum validation approach is fundamental for high-quality FTIR spectroscopy. This involves moving beyond simple background subtraction to a comprehensive strategy that combines physical prevention, rigorous data acquisition, and sophisticated computational correction.
Daily Quality Control Checklist:
- Purging: Allow sufficient time (e.g., 15-30 minutes) for the instrument to purge with dry gas before measurements [47].
- Desiccant Check: Verify that desiccant in the sample compartment and storage containers is active (not exhausted) [2].
- ATR Crystal Inspection: Clean the crystal and run a background scan to confirm it is free of contaminants [7].
- Background Acquisition: Collect a fresh background under the same atmospheric conditions as your sample scans [2].
- Data Validation: After correction, inspect key spectral regions (e.g., 3800-3500 cm⁻¹, 2400-2200 cm⁻¹) for residual atmospheric peaks and use software tools to assess correction quality [17] [18].
Frequently Asked Questions (FAQs)
Q1: What is the main limitation of traditional "by-hand" water vapor subtraction in FTIR? Traditional manual subtraction relies on a single vapor reference spectrum and the researcher's experience to choose a subtraction coefficient. This method struggles because atmospheric conditions (humidity, temperature) change during an experiment. A single reference cannot account for this variability, often leading to over- or under-subtraction and introducing artifacts, especially in long experiments [12].
Q2: How does the multispectral least-squares approach, used by algorithms like VaporFit, fundamentally differ? Instead of using one vapor spectrum, this method uses multiple vapor spectra recorded before, after, and during the experiment. An iterative least-squares process automatically optimizes a unique subtraction coefficient for each vapor spectrum. This dynamically models the changing atmospheric conditions, leading to a more accurate and objective correction [17] [12].
Q3: My spectra still show sharp vapor artifacts after correction. What parameters should I check? This issue is often related to the Savitzky-Golay (SG) smoothing parameters. The algorithm uses SG smoothing to estimate the ideal, vapor-free spectrum. If the window size is too small, sharp vapor features may not be removed. If it's too large, genuine sharp sample features might be distorted. Use the objective smoothness metrics in tools like VaporFit to rationally evaluate and select the optimal polynomial order and window size for your data [17].
Q4: Why is proper data acquisition crucial for effective atmospheric correction? Even the best algorithm cannot correct data that lacks necessary information. Recording multiple vapor spectra throughout your experiment is essential. This provides the algorithm with a realistic picture of how the atmosphere changed, which it uses to build an accurate correction model. Relying on a single vapor spectrum measured only at the start or end of the session is a common pitfall [17] [12].
Troubleshooting Guides
Issue 1: Poor Correction Quality in Specific Spectral Regions
- Symptoms: Residual positive or negative peaks in regions associated with water vapor (e.g., around 3700 cm⁻¹, 1600 cm⁻¹) or CO₂ (around 2350 cm⁻¹) after correction.
- Possible Causes & Solutions:
- Cause: Inadequate representation of atmospheric variability in the vapor reference set.
- Solution: Ensure you collect a sufficient number (e.g., 5-10) of vapor spectra interspersed with your sample measurements, not just at the beginning or end [12].
- Cause: Incorrect Savitzky-Golay smoothing parameters.
- Solution: Utilize the built-in tools in software like VaporFit to visualize the correction quality across different window sizes and polynomial orders. Default parameters (order 3, window size 11) are a good starting point but may need adjustment for your specific spectral resolution and peak widths [17].
Issue 2: Over-Smoothing and Loss of Spectral Features
- Symptoms: The corrected spectrum appears too smooth; genuine broad sample peaks are distorted or have reduced intensity.
- Possible Causes & Solutions:
- Cause: The Savitzky-Golay window size is too large relative to the full width at half maximum (FWHM) of your sample's spectral bands.
- Solution: Decrease the SG window size. The optimal window should be large enough to smooth out sharp vapor lines but small enough to preserve the natural shape of your sample's absorption bands [17].
Issue 3: Inconsistent Correction Across a Spectral Series
- Symptoms: The quality of vapor removal varies significantly from one spectrum to the next in a time-series or concentration-series dataset.
- Possible Causes & Solutions:
- Cause: Drastic changes in the instrument's internal atmosphere between sample measurements that are not captured by the vapor spectra.
- Solution: Maintain a stable purging environment and minimize the opening of the sample compartment. Increase the frequency of vapor spectrum acquisition during the experiment to better track atmospheric fluctuations [17] [12].
Performance Comparison of Correction Methods
The table below summarizes the key differences between traditional manual subtraction and the automated multispectral least-squares approach.
Table 1: Comparative Analysis of Water Vapor Correction Methods for FTIR Spectroscopy
| Feature | Traditional Manual Subtraction | Multispectral Least-Squares (e.g., VaporFit) |
|---|---|---|
| Core Principle | Manual subtraction of a single vapor reference spectrum [12]. | Automated, iterative least-squares fitting using multiple vapor spectra [17]. |
| Number of Vapor Spectra | One [12]. | Multiple (recorded throughout the experiment) [17] [12]. |
| Parameter Selection | Subtraction coefficient chosen manually by the user [12]. | Subtraction coefficients optimized automatically by the algorithm [17]. |
| Objectivity | Low; relies on user experience and judgment [12]. | High; results are reproducible and not user-dependent [12]. |
| Handling of Atmospheric Variability | Poor; cannot account for changes during the experiment [17]. | Excellent; dynamically models changing conditions [17]. |
| Best For | Quick, non-critical analysis where high precision is not required. | High-precision studies, quantitative analysis, and long-term experiments where atmospheric stability cannot be guaranteed [17] [12]. |
Experimental Protocol for Effective Atmospheric Correction
For optimal results with advanced correction algorithms, follow this detailed methodology for data acquisition:
- Instrument Preparation: Purge the FTIR spectrometer with a steady stream of dry gas (e.g., nitrogen) for a sufficient time to stabilize the atmosphere before measurements begin [17].
- Initial Vapor Spectrum: Record a background spectrum and a vapor reference spectrum at the beginning of the session.
- Sample Measurement: Record your first sample spectrum.
- Intermittent Vapor Measurements: After every 2-3 sample measurements, record another vapor spectrum. This captures the natural drift in humidity and CO₂ levels [12].
- Final Vapor Spectrum: Conclude the session by recording a final vapor spectrum.
- Data Processing:
- Load the entire spectral series (sample and multiple vapor spectra) into the correction software (e.g., VaporFit).
- Select the appropriate spectral range for correction (typically regions showing vapor interference).
- Use the software's built-in metrics to guide the selection of Savitzky-Golay smoothing parameters (polynomial order and window size). A default of order 3 and window size 11 is a good starting point [17].
- Execute the correction algorithm and use the PCA module or visual inspection to evaluate the quality and consistency of the results across the entire dataset [17].
Table 2: Key Research Reagent Solutions for Atmospheric Correction Experiments
| Item Name | Function/Application |
|---|---|
| VaporFit Software | Open-source software with a graphical interface for performing multispectral least-squares atmospheric correction. It includes tools for parameter optimization and quality assessment [17]. |
| Dry Purging Gas (N₂) | Used to minimize the initial water vapor and CO₂ load in the spectrometer chamber, forming the first line of defense against atmospheric interference [17]. |
| Betaine Aqueous Solutions | A common test sample for evaluating correction algorithms in the OH/COO⁻ band region, as used in the VaporFit validation studies [17]. |
| D₂O in H₂O Solutions | A test system for studying H/D exchange and validating correction in different spectral regions [17]. |
| Savitzky-Golay Smoothing | A digital filtering technique used within the correction algorithm to estimate the ideal vapor-free spectrum, crucial for the least-squares minimization process [17]. |
Workflow Diagram of the Multispectral Correction Algorithm
The following diagram illustrates the logical workflow of the iterative least-squares algorithm used by tools like VaporFit for atmospheric correction.
Troubleshooting Guides
FAQ: Addressing Common FTIR Issues for Inorganic Materials
Q1: My FTIR spectrum for an inorganic powder shows a broad peak around 3450 cm⁻¹, interfering with my analysis. What is this and how can I minimize it?
A: This is a classic sign of adsorbed water [49]. Many inorganic compounds are hygroscopic and readily absorb moisture from the atmosphere. To minimize this:
- Sample Preparation: Handle and prepare samples in a low-humidity environment, such as inside a drybox or glovebag [21]. Ensure thorough drying of samples prior to measurement [21].
- Instrument Operation: Purge the FTIR instrument with dry air or an inert gas to minimize atmospheric water vapor [21]. Acquire a new background spectrum immediately before measuring your sample, especially if environmental conditions have changed [21].
Q2: I am trying to identify a metal carbonate, but the spectral features are weak. What could be the problem?
A: Weak signals in inorganic FTIR analysis can stem from several issues:
- Insufficient Grinding: Solid samples must be finely and uniformly ground to avoid weak spectral signals and light scattering [21].
- Improper Pellet Composition: When using the KBr pellet method, an incorrect sample-to-KBr ratio can lead to uneven distribution and spectral artifacts. A typical ratio of 1:100 is a good starting point [21]. Remember that KBr is hygroscopic and must be stored and handled in a dry environment to prevent water absorption [21].
- Sample Quantity: Using an insufficient amount of sample will result in weak signals [21].
Q3: Why does my FTIR spectrum for a known inorganic compound not perfectly match the library spectrum?
A: This is a common occurrence with inorganic and crystalline materials. The difference is likely due to polymorphism—different crystalline forms of the same molecule produce different infrared spectra [49]. Factors like particle size, pressure applied during pellet formation, and the specific crystalline phase (e.g., calcite vs. aragonite for CaCO₃) can all alter the spectrum [49]. Raman spectroscopy and XRD are better suited for distinguishing between such polymorphs [50].
Q4: When should I use Raman spectroscopy instead of FTIR for my inorganic material?
A: Raman spectroscopy is often the better choice for:
- Analyzing Inorganics: Raman is highly sensitive to homo-nuclear bonds (e.g., C–C, C=C, S–S) and provides a wider range of diagnostic bands for inorganic materials like metal oxides and ceramics [51] [52].
- Detecting Carbon Allotropes: Raman is uniquely powerful for characterizing carbon materials (graphite, graphene, diamond-like carbon) by probing their C-C bonding structure [52].
- Avoiding Fluorescence: If your sample fluoresces, it can overwhelm the Raman signal. In such cases, FTIR is not affected and may be preferable [51].
- Minimal Sample Preparation: Raman requires little to no sample preparation and is non-destructive, allowing analysis of "as-received" samples [50].
Advanced Troubleshooting: Overcoming Water Vapor Interference
Water vapor in the atmosphere absorbs IR light, causing sharp, interfering peaks in the regions around 3700-3500 cm⁻¹ and 1650 cm⁻¹ [21]. While purging the instrument is the first line of defense, advanced methods exist for more challenging situations, such as open-path FTIR.
Experimental Protocol: Multispectral Correction for Water Vapor
This methodology is based on the principles behind advanced correction software like VaporFit [53].
- Data Acquisition: Record multiple atmospheric background spectra throughout your experiment to capture the natural variability in water vapor concentration [53].
- Algorithmic Correction: Employ a software tool that uses a multispectral least-squares approach. This algorithm automatically optimizes subtraction coefficients based on the multiple background measurements, rather than relying on a single reference spectrum [53].
- Quality Evaluation: Use built-in objective metrics, such as smoothness evaluation or Principal Component Analysis (PCA), to intuitively assess the quality of the correction and ensure water vapor features have been effectively removed without distorting the sample's spectral features [53].
The Scientist's Toolkit: Complementary Techniques for Inorganic Analysis
The following table summarizes the core techniques and their synergistic roles in the analysis of inorganic materials.
Table 1: Essential Techniques for Comprehensive Inorganic Material Characterization
| Technique | Core Principle | Key Strengths for Inorganics | Common Research Scenarios |
|---|---|---|---|
| FTIR Spectroscopy | Measures absorption of IR light by bonds undergoing a change in dipole moment [48]. | Sensitive to polar bonds (e.g., O-H, C=O) and polyatomic anions (e.g., SO₄²⁻, CO₃²⁻) [49]. Ideal for identifying functional groups and waters of hydration [49]. | Confirming the presence of sulfate or carbonate groups; detecting adsorbed water or waters of hydration in a sample [49]. |
| Raman Spectroscopy | Measures inelastic scattering of light due to molecular vibrations involving a change in polarizability [50]. | Sensitive to homo-nuclear bonds (C-C, C=C, S-S) and metal-oxygen stretches [51] [52]. Excellent for carbon allotropes, metal oxides, and ceramics. Minimal sample prep required [50] [52]. | Characterizing graphene or diamond-like carbon (DLC) films; analyzing metal oxide catalysts; distinguishing polymorphs [50] [52]. |
| X-ray Diffraction (XRD) | Measures the diffraction pattern of X-rays by a crystalline lattice. | The gold standard for determining crystalline phase, unit cell parameters, and crystal structure [54]. | Identifying the specific crystalline phase of a mineral (e.g., calcite vs. aragonite); determining the crystallinity of a synthesized inorganic powder [54]. |
Workflow Visualization: An Integrated Analytical Strategy
The following diagram illustrates a logical workflow for characterizing an unknown inorganic material by leveraging the complementary strengths of FTIR, Raman, and XRD.
FAQs and Troubleshooting Guides
How can I quantitatively measure the improvement in Signal-to-Noise Ratio (SNR) after applying a smoothing filter?
Answer: You can quantify SNR improvement by comparing the noise level in a non-absorbing (flat) region of the spectrum before and after processing. A common method involves calculating the standard deviation of the intensity in a region where no peaks are present.
- Recommended Metric: Calculate the standard deviation of absorbance values in a flat spectral region (e.g., between 2000 cm⁻¹ and 1800 cm⁻¹, which is often featureless for many samples). A lower standard deviation after processing indicates noise reduction.
- Protocol:
- Select a quiet, non-absorbing region in your raw spectrum.
- Calculate the standard deviation of the y-axis values (e.g., absorbance) in this region.
- Apply your smoothing algorithm (e.g., a Savitzky-Golay filter) [55].
- Calculate the standard deviation in the same quiet region of the processed spectrum.
- The ratio of the two standard deviations (Raw SNR / Processed SNR) indicates the factor of improvement. Alternatively, SNR can be expressed as the peak height divided by the noise level.
What metrics are used to evaluate spectral fidelity after atmospheric correction to ensure real sample features are not distorted?
Answer: Spectral fidelity ensures that the correction process removes interference without altering the genuine sample spectrum. Key metrics involve evaluating the stability of known sample peaks and the "flatness" of the baseline in regions associated with water vapor and CO₂.
- Recommended Metrics:
- Peak Position and Shape Consistency: The wavenumber position and full width at half maximum (FWHM) of sharp, well-defined sample peaks should not shift significantly post-correction [55].
- Absence of Negative Peaks: The corrected spectrum should not exhibit negative absorbance peaks in the regions specific to atmospheric water vapor (3940–3540 cm⁻¹ and 2000–1300 cm⁻¹) and CO₂ (2400–2250 cm⁻¹ and 740–600 cm⁻¹) [55] [7].
- Protocol:
- Identify a sharp, isolated peak from your sample material in the raw spectrum. Record its position and FWHM.
- Perform atmospheric correction using your software's built-in function [55].
- In the corrected spectrum, re-measure the position and FWHM of the same sample peak. Significant changes indicate potential distortion.
- Visually inspect the atmospheric regions listed above. The baseline in these regions should be flat and free of the characteristic sharp water/CO₂ peaks. The presence of negative peaks suggests over-subtraction [7].
Are there established benchmarks for acceptable SNR or fidelity for publication-quality FTIR data?
Answer: While universal benchmarks are rare due to the dependency on sample type and instrument, a common rule of thumb for publication-quality spectra is that the maximum absorbance of the strongest peak should be at least 10 times the peak-to-peak noise in a flat region. For spectral fidelity, a key benchmark is the lack of residual or negative atmospheric peaks after correction [7].
- SNR Benchmark: SNR > 10:1 for the strongest peak is generally considered acceptable, with higher values (>100:1) required for high-precision quantitative analysis.
- Fidelity Benchmark: The corrected spectrum should not introduce artificial features. The baseline in the atmospheric correction regions should be smooth and free from obvious residual interference artifacts [55].
How do machine learning algorithms for noise reduction compare to traditional methods like Savitzky-Golay smoothing in terms of quantified outcomes?
Answer: Machine learning (ML) algorithms can achieve superior results by leveraging the underlying structure of the data. Studies have shown that ML can match the quality of traditional methods with significantly less data acquisition time.
- Quantified Comparison: Research has demonstrated that applying dimensionality reduction algorithms like Non-negative Matrix Factorization (NMF) to a single-scan FT-IR spectral image can achieve a spatial resolution and SNR comparable to data obtained from 64 repetitive scans and averaged [56].
- Protocol for ML-based Enhancement:
- Acquire a hyperspectral data cube from your FT-IR instrument.
- Reshape the data into a 2D matrix
M(spatial pixels × spectral points). - Perform Singular Value Decomposition (SVD) to analyze eigenvalues and determine the number of principal components for noise reduction [56].
- Apply the NMF algorithm to decompose the matrix
Minto two non-negative matrices,WandH[56]. - Reconstruct the de-noised spectral image from
WandHusing the components identified via SVD. - Quantify the improvement by comparing the standard deviation in a flat region of the raw single-scan data versus the ML-processed data. The ML-processed data should show a significantly lower noise level, similar to what is achieved by averaging many scans [56].
Table 1: Key Metrics for Assessing Signal-to-Noise Ratio (SNR)
| Metric | Formula / Method | Interpretation | Ideal Outcome |
|---|---|---|---|
| Standard Deviation in Quiet Region | ( \text{Noise} = \sigma_{\text{quiet region}} ) | Lower value indicates less noise. | Post-processing value is significantly lower. |
| Peak-to-Peak Noise | ( \text{max}(A{\text{quiet}}) - \text{min}(A{\text{quiet}}) ) | Direct measure of noise amplitude. | Post-processing value is significantly lower. |
| Signal-to-Noise Ratio (SNR) | ( \text{SNR} = \frac{A{\text{peak}}}{\sigma{\text{quiet region}}} ) | Higher value indicates a clearer signal. | Post-processing value is significantly higher. |
| Equivalent Scanning Time | Compare single-scan ML-processed SNR to multi-scan averaged SNR [56] | Measures time efficiency of advanced processing. | Single-scan ML data matches SNR of 64+ scan average [56]. |
Table 2: Key Metrics for Assessing Spectral Fidelity
| Metric | Method | Application Context | Ideal Outcome |
|---|---|---|---|
| Peak Position Shift | Measure wavenumber (cm⁻¹) of a reference peak pre- and post-processing [55]. | All processing methods (smoothing, correction). | Shift < instrument resolution (e.g., < 2 cm⁻¹). |
| FWHM Change | Measure Full Width at Half Maximum of a reference peak pre- and post-processing [55]. | Smoothing, derivative treatments. | Change is minimal or understood (smoothing increases FWHM). |
| Absence of Residual Peaks | Visual inspection of atmospheric bands (H₂O, CO₂) post-correction [55]. | Atmospheric correction. | No sharp positive peaks in atmospheric regions. |
| Absence of Negative Artifacts | Visual inspection of entire spectrum, especially atmospheric regions [7]. | Atmospheric correction, baseline correction. | No negative absorbance peaks. |
| Classification Accuracy | Use PLS-DA or similar on pre-processed data to classify known samples [57]. | Comparing overall data quality for analysis. | High accuracy (>95%) confirms retained chemical information. |
Experimental Protocols
Protocol 1: Standard Workflow for Quantifying SNR and Fidelity Post-Correction
This protocol provides a step-by-step guide for systematically evaluating the effectiveness of any data processing method in FTIR spectroscopy.
Acquire Raw Spectra:
- Collect your sample spectrum with appropriate instrument settings.
- Collect a background spectrum (for transmission/ATR) or a reference spectrum (for reflection modes) using a clean accessory [7].
Establish Baseline Metrics (Pre-correction):
- Identify a Quiet Region: Select a spectral region without sample absorption peaks (e.g., 2000-1800 cm⁻¹).
- Calculate Initial Noise: In this quiet region, calculate the standard deviation of the absorbance values.
- Identify a Reference Peak: Select a strong, sharp, and well-isolated peak from your sample. Record its exact wavenumber position and its Full Width at Half Maximum (FWHM).
Apply Data Processing:
- Execute the data processing technique you wish to evaluate (e.g., smoothing, atmospheric correction, machine learning denoising).
Calculate Post-Correction Metrics:
- Re-calculate Noise: In the same quiet region, calculate the new standard deviation of the absorbance values.
- Re-measure Reference Peak: Measure the wavenumber position and FWHM of your reference peak in the processed spectrum.
- Inspect for Artifacts: Visually inspect the entire spectrum, particularly regions associated with water vapor and CO₂, for any negative peaks or other non-physical features [55] [7].
Quantify Improvement:
- SNR Improvement: Compute the ratio of the post-correction noise to the pre-correction noise. A value less than 1 indicates noise reduction.
- Fidelity Assessment: Report any shift in the reference peak's position or FWHM. Report the presence or absence of residual atmospheric peaks or negative artifacts.
Protocol 2: Enhanced Spatial Resolution via Machine Learning and Gaussian Fitting
This protocol details an advanced method from recent literature to enhance the spatial resolution of FT-IR spectral images, providing a quantifiable alternative to repeated measurements [56].
Data Acquisition & Preparation:
- Acquire an FT-IR hyperspectral image data cube.
- Transform the 3D data cube (x, y, wavenumber) into a 2D data matrix
Mwith dimensions (number of spatial pixels × number of spectral points).
Dimensionality Reduction with SVD:
- Perform Singular Value Decomposition (SVD) on the matrix
Mto decompose it into matricesU,Σ, andVᵀ[56]. - Analyze the scree plot (eigenvalues of variance) of the diagonal elements of
Σto determine the number of principal components that capture the signal while excluding noise.
- Perform Singular Value Decomposition (SVD) on the matrix
Noise Reduction with NMF:
- Using the component count from the SVD analysis, apply the Non-negative Matrix Factorization (NMF) algorithm to decompose
Minto two non-negative matrices,WandH(M ≈ W H) [56]. - Reconstruct the denoised data matrix using the selected components from
WandH.
- Using the component count from the SVD analysis, apply the Non-negative Matrix Factorization (NMF) algorithm to decompose
Spatial Resolution Enhancement with Gaussian Fitting:
- To further enhance the mapping of specific chemical structures, apply a Gaussian model fitting at the specific wavenumber of a characteristic peak (e.g., C–F bond).
- At each spatial pixel, fit a Gaussian function to the peak of interest by optimizing parameters like amplitude, sigma, and offset using a least-squares algorithm.
- Use the calculated amplitude (or relative intensity) from the Gaussian fit to generate a chemical map with enhanced spatial resolution and contrast [56].
Diagram 1: ML-enhanced FTIR workflow.
The Scientist's Toolkit: Essential Research Reagents and Materials
Table 3: Key Materials for FTIR Experiments and Data Validation
| Item | Function | Example in Context |
|---|---|---|
| Clean ATR Crystal | Provides a clean surface for background measurement, critical for accurate ATR analysis. | A pristine diamond crystal ensures the background spectrum doesn't contain features from previous samples [7]. |
| Non-Absorbing Reference | Used for instrument calibration and background scans. | A clean, dry air background for transmission measurements, or a gold mirror for reflection measurements [58]. |
| Standard Reference Material | A material with known, sharp peaks to validate spectral fidelity and instrument performance. | Polystyrene film is commonly used to check wavenumber accuracy and resolution. |
| Skimmed Milk / Complex Matrix | A standardized, complex biological matrix for testing method robustness and additive detection. | Used in validation studies to test the prediction of specific components like linoleic acid [59]. |
| Ball Mill | Used for sample preparation to create homogeneous mixtures of materials. | Blending PTFE powder with a polymer (e.g., PAI) for creating consistent spray-coated samples [56]. |
| Proprietary Software Algorithms | Built-in functions for standard processing and correction tasks. | IRsolution's atmospheric correction and Savitzky-Golay smoothing functions [55]. |
Technical Troubleshooting Guide
Why does water vapor interference persist despite using a spectrometer purged with dry gas?
Even with dry gas purging, residual atmospheric noise often remains due to two primary factors: imperfections in the purging gas and temperature fluctuations in the optical system.
- Gas Purity Issues: Purging gases may contain impurities or fail to completely displace all atmospheric components within the spectrometer. This leaves residual water vapor and carbon dioxide that create absorption bands in the resultant spectra [60] [17].
- Laser Temperature Fluctuations: Variations in the temperature of the reference HeNe laser's optical cavity cause systematic spectral shifts between single-beam sample and background spectra. This makes traditional spectral subtraction methods ineffective for complete moisture removal [3].
- Environmental Variability: Factors beyond experimental control, including ambient humidity, number of people in the room, frequency of opening the sample compartment, and solvent content, contribute to inconsistent atmospheric conditions during measurement [17].
How can I effectively remove moisture interference to obtain reliable second derivative spectra?
Obtaining reliable second derivative spectra requires addressing both the systematic spectral shift and transient moisture concentration fluctuations.
- Spectral Shift Correction: Use similarity metrics (such as the Carbo similarity metric) to identify and correct subtle spectral shifts caused by laser temperature fluctuations. Implement a database of single-beam background spectra to match with sample spectra [3].
- Comprehensive 2D-COS Method: Apply two-dimensional correlation spectroscopy (2D-COS) to handle interference caused by fluctuating transient moisture concentrations. This approach effectively retrieves moisture-free spectra even in regions typically obscured by water vapor [3].
- Vacuum Conditions: When possible, work under vacuum equilibrium within the spectrometer. This eliminates interference from atmospheric moisture and carbon dioxide, though it requires additional time for vacuum establishment [60].
What are the limitations of traditional spectral subtraction for water vapor removal?
Traditional spectral subtraction often fails due to several inherent limitations in dealing with dynamic atmospheric conditions.
- Static Reference Inadequacy: Traditional methods rely on subtracting a single reference spectrum, which cannot account for the dynamic variability of atmospheric conditions during experiments. The proportions of water vapor and CO₂ change continuously based on factors like room occupancy and compartment openings [17].
- Inability to Handle Spectral Shift: Conventional subtraction cannot correct for the systematic spectral shifts caused by temperature fluctuations in the HeNe reference laser [3].
- Spike Characteristics: Moisture interference appears as a series of spikes in FTIR spectra with characteristics quite different from random noise. This makes standard smoothing algorithms like Savitzky-Golay ineffective for their removal [3].
Advanced Methodologies for Moisture-Free Spectra
The RMF (Retrieve Moisture-Free) Approach for Polyethylene and EVA
The RMF approach represents a significant advancement in obtaining high-quality FTIR spectra for polymeric materials like polyethylene and ethylene-vinyl acetate copolymer.
Table: Key Steps in the RMF Approach for Polymeric Materials
| Step | Description | Technique/Instrumentation | Outcome |
|---|---|---|---|
| Spectral Shift Correction | Corrects subtle systematic shifts from laser temperature fluctuations | Carbo similarity metric (CAB value); database matching of single-beam spectra | Eliminates systematic errors from instrumental variations |
| 2D-COS Analysis | Handles interference from fluctuating moisture concentrations | Two-dimensional correlation spectroscopy | Removes transient moisture interference |
| Validation | Application to polymer samples to verify method effectiveness | Polyethylene (PE) and ethylene-vinyl acetate copolymer (EVA) films | High-quality spectra and reliable second derivative spectra without moisture interference |
Experimental Parameters:
- FTIR spectra were collected using a Thermo-Fischer Nicolet-6700 FT-IR spectrometer equipped with an MCT detector [3].
- All spectra were recorded at a resolution of 2 cm⁻¹ with 128 co-added scans [3].
- Samples included PE and EVA films provided by SINOPEC Yanshan Petrochemical Company, used as received without additional processing [3].
VaporFit: Automated Atmospheric Correction Software
VaporFit is an open-source software solution that implements an advanced algorithm for automated atmospheric interference correction in FTIR spectroscopy.
Algorithm Core Mechanism: The software employs an iterative least-squares minimization process that dynamically combines multiple vapor spectra with optimized coefficients. Unlike classical subtraction relying on a single reference spectrum, VaporFit uses this formula for the residual function:
[r\nu = Y\nu - \left(\sum{n=1}^N an \cdot atm{\nu,n}\right) - \bar{Y\nu}]
Where:
- (Y_ν) = measured sample spectrum before correction
- (a_n) = subtraction coefficient for the n-th vapor spectrum
- (atm_{ν,n}) = n-th recorded atmospheric spectrum
- (\bar{Y_ν}) = estimated spectrum after ideal atmospheric correction [17]
Key Advantages:
- Automatically optimizes subtraction coefficients based on multiple atmospheric measurements
- Provides objective smoothness metrics for parameter selection
- Includes a principal component analysis (PCA) module for correction quality evaluation [17]
Optimized FTIR Acquisition Parameters for Polyethylene Characterization
Research has established optimal parameters for FTIR analysis of polyethylene grades to achieve the best signal-to-noise ratio while minimizing atmospheric interference.
Table: Optimal FTIR Parameters for Polyethylene Characterization
| Parameter | Optimal Setting | Effect on Spectrum Quality |
|---|---|---|
| Spectral Resolution | 2-4 cm⁻¹ | Balances detail capture with measurement time |
| Number of Scans | 32-128 | Improves signal-to-noise ratio through averaging |
| Apodization | Optimized for instrument | Reduces sidelobe artifacts in the spectrum |
| Beam Aperture | Adjusted for detector | Maximizes signal without saturation |
| Vacuum Conditions | Yes (when available) | Eliminates atmospheric CO₂ and water vapor interference |
Experimental Validation:
- Using these optimized parameters, researchers successfully distinguished between LDPE, HDPE, and LLDPE, which is challenging with standard spectral libraries [60].
- The BOMEM DA8 spectrometer equipped with different detectors and vacuum capability demonstrated significant improvement in spectral quality when working under vacuum conditions [60].
Frequently Asked Questions (FAQs)
How does water vapor affect FTIR analysis of polyethylene and EVA specifically?
Water vapor interference is particularly problematic for polyethylene and EVA analysis because their characteristic bands overlap with vibrational-rotational peaks of gaseous water. The O-H stretching (4000-3000 cm⁻¹) and other informative vibrational bands (2300-1300 cm⁻¹) critical for polymer analysis are often obscured by moisture interference, making accurate characterization difficult without proper correction methods [3].
Are there specific spectral regions where water vapor interference is most problematic?
Yes, water vapor creates significant interference in two broad spectral regions:
- 4000-3000 cm⁻¹: This region contains O-H stretching vibrations that overlap with moisture bands [3].
- 2300-1300 cm⁻¹: This range includes multiple important vibrational bands (N-H stretching, CO stretching, CC stretching, and CH₂ bending) that are affected by water vapor rotational-vibrational peaks [3].
These interferences become particularly problematic when seeking fine spectral structure information through second derivative spectroscopy, where nuanced residual interference is significantly magnified [3].
What is the practical implication of the finding that water desorption is 16 times faster than absorption at elevated temperatures?
This finding has significant implications for experimental design and material performance assessment. For EVA-encapsulated materials like photovoltaic modules, this means:
- Unsealed modules dry out rapidly on sunny days when operational temperatures reach 50°C [61].
- Moisture-induced damage primarily occurs during extended wet exposure periods without sunshine [61].
- Experimental absorption measurements conducted at room temperature may not accurately represent real-world conditions where temperature fluctuations drive cyclic absorption/desorption behavior [61].
Research Reagent Solutions
Table: Essential Materials for Moisture-Free FTIR Spectroscopy of Polymers
| Reagent/Material | Function | Application Notes |
|---|---|---|
| High-Purity Nitrogen Gas | Purging spectrometer to reduce atmospheric interference | Must be dry with minimal impurities; generated by nitrogen generators [17] |
| Polyethylene Reference Samples | Method validation and calibration | Include LDPE, HDPE, LLDPE grades for comprehensive testing [60] |
| EVA Films | Experimental substrate for method development | Commercial EVA with ~33% vinyl acetate content; available from chemical suppliers [3] [61] |
| Silicon Filters | Sample filtration and preparation | 5 µm pore size for microplastic studies; compatible with FTIR analysis [62] |
| ATR Crystals | Sample analysis without extensive preparation | Diamond ATR accessories enable rapid measurement with minimal sample prep [17] |
Workflow Diagram
Workflow for Retrieving Moisture-Free FTIR Spectra: This diagram illustrates the comprehensive approach to obtaining moisture-free FTIR spectra from polyethylene and EVA samples, incorporating both preventive measures (purging, vacuum) and advanced computational corrections (spectral shift correction, 2D-COS).
Problem-Solution Framework for FTIR Moisture Interference: This diagram outlines the root causes of persistent water vapor interference in FTIR spectroscopy and connects them to validated solutions, providing researchers with a systematic troubleshooting approach.
Conclusion
Overcoming water vapor interference is not a single-step fix but requires a holistic strategy combining robust instrumental setup, meticulous sample handling, and sophisticated computational correction. The advent of advanced, accessible software like VaporFit marks a significant leap forward, enabling dynamic and precise removal of atmospheric artifacts. For the biomedical and pharmaceutical sectors, mastering these techniques is paramount. High-quality, vapor-free FTIR data is the foundation for accurate protein structural analysis, reliable biomaterial characterization, and rigorous quality control in drug development. Future progress hinges on the continued integration of machine learning for automated correction and the development of standardized, universally applicable validation protocols to ensure data reproducibility and integrity across laboratories.
References
- 1. Fourier transform infrared technique for analysis of... spectroscopic [https://pubs.rsc.org/en/content/articlehtml/2025/na/d5na00522a]
- 2. FTIR Moisture Interference: Mitigating Water Vapor Peaks [https://eureka.patsnap.com/article/ftir-moisture-interference-mitigating-water-vapor-peaks]
- 3. A new approach to removing interference of moisture from ... [https://www.sciencedirect.com/science/article/abs/pii/S1386142521009501]
- 4. VaporFit: an open-source software for accurate ... [https://pubs.rsc.org/en/content/articlelanding/2025/cp/d5cp01007a]
- 5. Scattering correction for samples with cylindrical domains ... [https://www.sciencedirect.com/science/article/pii/S0003267023009431]
- 6. Mini-Tutorial: Cleaning Up the Spectrum Using ... [https://www.spectroscopyonline.com/view/mini-tutorial-cleaning-up-the-spectrum-using-preprocessing-strategies-for-ft-ir-atr-analysis]
- 7. Common Problems with FT-IR Instruments and How to ... [https://www.spectroscopyonline.com/view/common-problems-with-ft-ir-instruments-and-how-to-avoid-them]
- 8. Water vapor absorption peaks in infrared spectroscopic ... [https://www.sciencedirect.com/science/article/abs/pii/S294990892500072X]
- 9. Is Digital Drying an Effective Method for Infrared ... [https://pmc.ncbi.nlm.nih.gov/articles/PMC12613144/]
- 10. Spectrophotometer Troubleshooting [https://www.hinotek.com/spectrophotometer-troubleshooting/]
- 11. Sample Preparation for FTIR Analysis [https://www.drawellanalytical.com/sample-preparation-for-ftir-analysis-sample-types-and-prepare-methods/]
- 12. Vapor correction of FTIR spectra – A simple automatic least ... [https://www.sciencedirect.com/science/article/abs/pii/S1386142519307632]
- 13. FT-IR Troubleshooting Guide: How to Solve Common ... [https://www.spectroscopyonline.com/view/ftir-troubleshooting-guide-how-to-solve-common-problems-in-infrared-spectroscopy]
- 14. Best practice methods for reliable results from your DRIFTS ... [https://specac.com/ftir-applications/best-practice-methods-for-reliable-results-from-your-drifts-setup/]
- 15. FTIR Errors Got You Down? A US Lab's Troubleshooting Guide [https://knowhowspot.blog/ftir-errors-troubleshooting-guide]
- 16. Purging the microscope - Thermo Fisher Knowledge Base [https://knowledge1.thermofisher.com/Molecular_Spectroscopy/Fourier_Transform_(FT)_Infrared_(IR)_and_Near_Infrared_(NIR)/Nicolet_Microscopes/Nicolet_RaptIR/269-3626_00_Rev_A_Nicolet_RaptIR_PLUS_FTIR_Microscope_Site_and_Safety__Guide/Purging_the_microscope]
- 17. VaporFit: an open-source software for accurate ... [https://pubs.rsc.org/en/content/articlehtml/2025/cp/d5cp01007a]
- 18. Comprehensive modified approaches to reducing the ... [https://www.sciencedirect.com/science/article/abs/pii/S1386142522011520]
- 19. FT‐IR Sample Preparation - NIU - Department of Chemistry ... [https://www.niu.edu/chembio/research/analytical-lab/ftir/sample-preparation.shtml]
- 20. Generating Purge Gas for FT-IR Spectroscopy [https://www.spectroscopyonline.com/view/generating-purge-gas-ft-ir-spectroscopy]
- 21. Common Problems and Precautions in the Operation of ... [https://www.drawellanalytical.com/common-problems-and-precautions-in-the-operation-of-ftir-spectrophotometer/]
- 22. Providing Purge Gas for FTIR Systems [https://www.americanlaboratory.com/913-Technical-Articles/1665-Providing-Purge-Gas-for-FTIR-Systems/]
- 23. Importance of Tissue Preparation Methods in FTIR Micro-Spectroscopical Analysis of Biological Tissues: ‘Traps for New Users’ - PMC [https://pmc.ncbi.nlm.nih.gov/articles/PMC4339720/]
- 24. Better than Baking Soda: Defining the Essentials of ... [https://www.goldbio.com/blogs/articles/better-than-baking-soda-defining-the-essentials-of-desiccation?srsltid=AfmBOoqQvag55yjn2N5snAUxaJISh15CzQYoQkFQf7c-cJ-5eJhvXDaI]
- 25. Understanding Desiccants: Function & Types [https://www.edcosupply.com/blog/what-are-desiccants/]
- 26. Fourier Transform Infrared (FTIR) Spectroscopic Analyses of Microbiological Samples and Biogenic Selenium Nanoparticles of Microbial Origin: Sample Preparation Effects - PMC [https://pmc.ncbi.nlm.nih.gov/articles/PMC7924863/]
- 27. FT-IR Spectroscopy Mini-Tutorial: Principles, Practice, and Applications Across Disciplines | Spectroscopy Online [https://www.spectroscopyonline.com/view/ft-ir-spectroscopy-mini-tutorial-principles-practice-and-applications-across-disciplines]
- 28. Spectral Subtraction [https://www.spectroscopyonline.com/view/spectral-subtraction]
- 29. A New Criterion to Evaluate Water Vapor Interference in ... [https://www.mdpi.com/1422-0067/15/6/10018]
- 30. Vapor correction of FTIR spectra - A simple automatic least ... [https://pubmed.ncbi.nlm.nih.gov/31325844/]
- 31. Using Fourier transform IR spectroscopy to analyze biological ... [https://pmc.ncbi.nlm.nih.gov/articles/PMC4480339/]
- 32. A New Criterion to Evaluate Water Vapor Interference in ... [https://pmc.ncbi.nlm.nih.gov/articles/PMC4100137/]
- 33. Serum Fourier-Transform Infrared Spectroscopy with Machine ... [https://pmc.ncbi.nlm.nih.gov/articles/PMC12606736/]
- 34. Fourier transform infrared spectroscopy with visible light [https://opg.optica.org/oe/fulltext.cfm?uri=oe-28-4-4426]
- 35. Savitzky–Golay filter [https://en.wikipedia.org/wiki/Savitzky%E2%80%93Golay_filter]
- 36. Deep Learning for Reconstructing Low-Quality FTIR and ... [https://pmc.ncbi.nlm.nih.gov/articles/PMC8674871/]
- 37. (FTIR) Power Spectrum Becomes too Small, or Fluctuates [https://faq.an.shimadzu.co.jp/faq/show/4908?site_domain=english]
- 38. Demystifying FTIR: A Practical Guide for New Users [https://whitebearphotonics.com/blogs/measurement-techniques/ftir-basics-guide?srsltid=AfmBOorEzBQCx65MAIggrIVDpkQTEhfQbUUr_ydv71YzT52IbQTTP53U]
- 39. Troubleshooting - Thermo Fisher Knowledge Base [https://knowledge1.thermofisher.com/Molecular_Spectroscopy/Fourier_Transform_FT_Infrared_IR_and_Near_Infrared_NIR/Nicolet_Spectrometers/Nicolet_Apex_FTIR_Spectrometer/269-3615_01_Rev_A_Nicolet_Apex_FTIR_Spectrometer_User_Guide/Troubleshooting]
- 40. A novel infrared spectral preprocessing method based on ... [https://www.sciencedirect.com/science/article/abs/pii/S0924203123000693]
- 41. Development and validation of derivative UV spectroscopic ... [https://pmc.ncbi.nlm.nih.gov/articles/PMC12083154/]
- 42. Trends Fourier self-deconvolution in IR spectroscopy [https://www.sciencedirect.com/science/article/pii/0165993688870109]
- 43. A fourier self-deconvolution approach [https://www.sciencedirect.com/science/article/pii/S2772577425000709]
- 44. A review on spectral data preprocessing techniques for ... [https://www.sciencedirect.com/science/article/pii/S258900422501020X]
- 45. A review on spectral data preprocessing techniques for ... [https://pmc.ncbi.nlm.nih.gov/articles/PMC12221524/]
- 46. What is FTIR Spectroscopy? FAQ Guide - Optosky [https://www.optosky.net/ftir-faq.html]
- 47. Demystifying FTIR: A Practical Guide for New Users [https://whitebearphotonics.com/blogs/measurement-techniques/ftir-basics-guide?srsltid=AfmBOop8BoTf8sWbrLHKithnUVG_Arn9-0rY1ggYAOn8aNdPnuXqSain]
- 48. Guide to FT-IR Spectroscopy [https://www.bruker.com/en/products-and-solutions/infrared-and-raman/ft-ir-routine-spectrometer/what-is-ft-ir-spectroscopy.html]
- 49. Inorganics I: Introduction [https://www.spectroscopyonline.com/view/inorganics-i-introduction]
- 50. Raman Imaging & Spectroscopy Comparison [https://www.horiba.com/usa/scientific/technologies/raman-imaging-and-spectroscopy/comparison-with-other-techniques/]
- 51. Comparison Of Raman And FTIR Spectroscopy [https://gatewayanalytical.com/comparison-of-raman-and-ftir-spectroscopy-advantages-and-limitations/]
- 52. FTIR and Raman – Composition and Contamination Analysis [https://www.eag.com/blog/ftir-and-raman-composition-and-contamination-analysis/]
- 53. VaporFit: an open-source software for accurate atmospheric correction... [https://pubs.rsc.org/En/content/articlelanding/2025/cp/d5cp01007a]
- 54. Fourier transform infrared spectroscopic technique for ... [https://pubs.rsc.org/en/content/articlelanding/2025/na/d5na00522a]
- 55. Algorithms Used for Data Processing in FTIR [https://www.shimadzu.com/an/service-support/technical-support/ftir/tips_and_tricks/algorithms.html]
- 56. Enhancing spatial resolution in Fourier transform infrared ... [https://www.nature.com/articles/s41598-023-50060-0]
- 57. Evaluating the impact of data pre-processing methods on ... [https://www.sciencedirect.com/science/article/pii/S0016236124018507]
- 58. High-fidelity nano-FTIR spectroscopy by on-pixel ... [https://pmc.ncbi.nlm.nih.gov/articles/PMC11501567/]
- 59. Establishment and Validation of Fourier Transform Infrared ... [https://www.mdpi.com/2304-8158/12/6/1199]
- 60. Polyethylene characterization by FTIR [https://www.sciencedirect.com/science/article/abs/pii/S0142941801001246]
- 61. Absorption and desorption of water in glass/ethylene-vinyl- ... [https://www.sciencedirect.com/science/article/abs/pii/S0142941806000821]
- 62. Validation of an FT-IR microscopy method for the ... [https://link.springer.com/article/10.1007/s11356-024-33966-8]