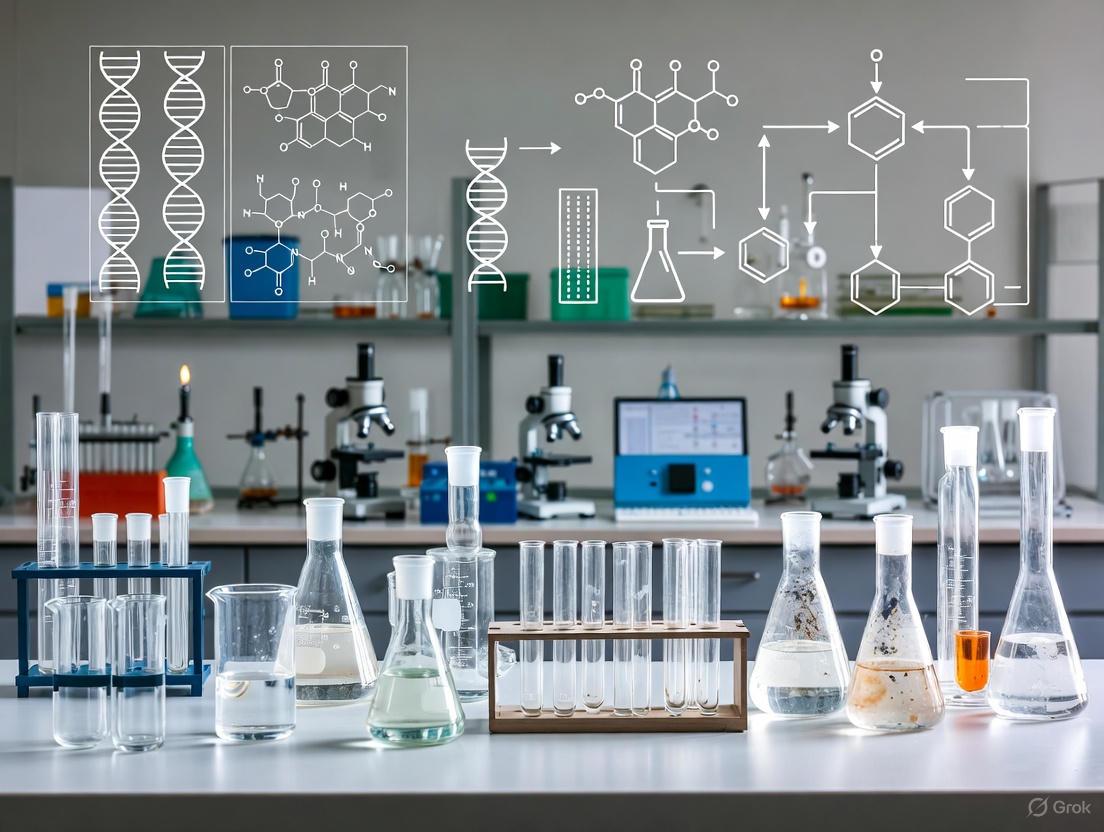
A Comprehensive Guide to Removing DNA Contamination from Laboratory Surfaces and Instruments
This article provides a complete framework for researchers, scientists, and drug development professionals to establish a robust DNA decontamination strategy.
A Comprehensive Guide to Removing DNA Contamination from Laboratory Surfaces and Instruments
Abstract
This article provides a complete framework for researchers, scientists, and drug development professionals to establish a robust DNA decontamination strategy. Covering foundational principles to advanced validation, it details the severe risks of DNA contamination in sensitive applications like qPCR, NGS, and forensics, which can lead to false positives and compromised data. We evaluate the efficacy of various chemical and physical decontamination methods, including sodium hypochlorite, UV radiation, and commercial reagents, across different surfaces. The content also offers protocols for troubleshooting common pitfalls, optimizing workflows, and implementing rigorous validation procedures using controls and DNA quantification to ensure laboratory integrity and reproducible results.
Understanding the Critical Need for DNA Decontamination in Modern Labs
Troubleshooting Guides: Addressing Common Trace DNA Issues
Problem 1: Inconsistent Results from Surfaces Suspected of Trace DNA Contamination
Question: Why am I getting inconsistent or irreproducible DNA results from swabbed surfaces, and how can I improve reliability?
Answer: Inconsistent recovery is a hallmark of trace DNA analysis. Success depends on a combination of the collection method, the substrate surface, and the nature of the original deposit.
- Primary Cause: The efficiency of DNA recovery varies dramatically with the swabbing technique, the wetness of the swab, and the texture of the surface (e.g., porous vs. non-porous). A dry swab may not efficiently capture cells, while an overly wet swab can spread a small sample over a larger area, diluting it.
- Solution: Standardize your swabbing protocol. Use a single, consistent type of swab. For dry surfaces, moisten the swab slightly with sterile water or a recommended buffer to improve cell adhesion. Use a rotating motion and apply consistent pressure. For optimal recovery from difficult surfaces, consider alternative methods like vacuum metal deposition (VMD) for forensic-level analysis, which can be combined with non-thermal plasma (NTP) for subsequent decontamination [1].
Problem 2: PCR Contamination in Low-Template DNA Experiments
Question: My negative controls are showing amplification, indicating contamination. How do I identify the source and eliminate it?
Answer: Contamination is the most significant threat to the integrity of low-template DNA work, such as PCR and Next-Generation Sequencing (NGS). Systematic action is required.
- Primary Cause: The most common sources are previously amplified PCR products (amplicons) or cross-contamination from other high-concentration DNA samples in the lab. This is often facilitated by improper lab practices, such as using the same equipment or spaces for pre- and post-PCR work [2].
- Solution:
- Physical Separation: Establish physically separated pre-PCR and post-PCR areas with dedicated equipment, lab coats, and supplies. Never bring reagents or equipment from the post-PCR area back into the pre-PCR area [2].
- Aerosol Prevention: Use pipette tips with aerosol filters exclusively for pre-PCR work.
- Reagent Management: Aliquot all reagents into single-use portions to avoid repeatedly exposing stock solutions to potential contamination.
- Rigorous Controls: Always include a negative control (e.g., ultrapure water instead of template DNA) in every PCR run to monitor for contamination [2].
Problem 3: Difficulty Interpreting Complex or Mixed DNA Profiles
Question: The DNA profile I've generated is a complex mixture or has low peak heights, making interpretation difficult. What are the best practices?
Answer: Interpreting low-level or mixed DNA samples is a known challenge in forensic science and can lead to false positives if not handled correctly.
- Primary Cause: Stochastic effects dominate when analyzing trace DNA (often below 100-200 pg). This can cause allele drop-out (failure to detect a real allele), allele drop-in (appearance of a contaminating allele), and peak height imbalance, which complicates mixture deconvolution [3].
- Solution:
- Replicate Analyses: Performing multiple PCRs from the same extract can help distinguish consistent, true alleles from stochastic drop-in/drop-out events.
- Use of "Mini-STRs": Employ primer sets that generate shorter amplicons (miniSTRs). These are more likely to amplify successfully from degraded or trace DNA samples, improving the robustness of the profile [3].
- Probabilistic Genotyping: For complex mixtures, use validated probabilistic genotyping software. These systems use statistical models to calculate the likelihood of the observed data given different proposed contributors, rather than relying on subjective manual thresholds.
Quantitative Data on Forensic DNA Contamination and Errors
The following table summarizes data from a large-scale study of wrongful convictions, highlighting the specific forensic disciplines most prone to errors related to false or misleading evidence [4].
Table 1: Forensic Discipline Error Rates in Wrongful Convictions
| Forensic Discipline | Percentage of Examinations Containing at Least One Case Error | Percentage of Examinations Containing Individualization/Classification Errors | Key Findings & Sources of Error |
|---|---|---|---|
| Seized Drug Analysis | 100% | 100% | 129 of 130 errors were from the use of drug testing kits in the field, not the laboratory [4]. |
| Bitemark Comparison | 77% | 73% | Disproportionate share of incorrect identifications; often involved independent consultants outside standard lab controls [4]. |
| Forensic Medicine (Pediatric Physical Abuse) | 83% | 22% | High rate of case errors, though a lower proportion were specific identification errors [4]. |
| Fire Debris Investigation | 78% | 38% | -- |
| Serology | 68% | 26% | Errors involved testimony, failure to follow best practices, and inadequate defense challenging of evidence [4]. |
| Hair Comparison | 59% | 20% | Most testimony errors conformed to standards of the time but would not meet current standards [4]. |
| DNA Evidence | 64% | 14% | Errors often involved early methods, complex DNA mixtures, and unreliable interpretation [4]. |
| Latent Fingerprint | 46% | 18% | Almost all errors were associated with fraud or uncertified examiners violating basic standards [4]. |
Long-term statistical data from routine forensic casework provides another perspective on the pervasiveness of contamination.
Table 2: Contamination Statistics from 17 Years of Forensic DNA Analysis
| Statistic | Value | Context |
|---|---|---|
| Total Trace Samples Analyzed | ~46,000 | Samples processed by the Austrian laboratory over 17 years [5]. |
| Detected Contamination Incidents | 347 | Contamination caused by police officers during the pre-analytical phase [5]. |
| Overall Contamination Rate | 0.75% | This quantifies the risk of external contamination during evidence collection [5]. |
Experimental Protocols for Decontamination & Analysis
Detailed Protocol 1: DNA Decontamination Using Non-Thermal Plasma (NTP)
This protocol is adapted from research on decontaminating a forensic Vacuum Metal Deposition chamber and represents a novel, non-chemical method [1].
Application: Decontamination of forensic instruments and potentially other laboratory equipment and surfaces that are sensitive to chemicals or UV-C light. Principle: NTP generates a cloud of reactive species that can damage DNA, making it an effective decontaminant that can reach areas inaccessible to UV light.
- Placement: Position the item to be decontaminated inside the vacuum chamber.
- Evacuation: Evacuate the chamber to a low pressure. The study found a pressure of 2 × 10⁻¹ mbar to be effective.
- Plasma Generation: Generate non-thermal plasma at maximum power for a set duration.
- Exposure: Expose the item to the NTP for the determined time. The study showed significant reduction after 1 hour.
- Ventilation: After treatment, vent the chamber and remove the item.
Validation: The protocol achieved an approximate 100-fold reduction in DNA concentration. Its effectiveness was notable on DNA sources that were out of the direct line of sight, where UV-C may fail [1].
Detailed Protocol 2: Standardized PCR Setup to Minimize Contamination
This protocol consolidates best practices for preventing contamination in sensitive PCR-based experiments [2].
Application: Any laboratory conducting PCR, qPCR, or NGS library preparation, especially when working with low-template DNA. Principle: Physical and procedural separation of pre- and post-PCR activities to prevent amplicon contamination.
- Lab Design:
- Designate three distinct, physically separated areas:
- Reagent Preparation Room: For preparing master mixes. This should be a clean, amplicon-free environment.
- Sample Preparation Room: For extracting and handling template DNA.
- Amplicon Analysis Room: For post-PCR processes like gel electrophoresis and product purification.
- Designate three distinct, physically separated areas:
- Workflow:
- Follow a unidirectional workflow: Reagent Prep → Sample Prep → Amplification → Analysis. Never move backwards.
- Dedicated Equipment & Supplies:
- Assign dedicated pipettes, tips, lab coats, and waste containers to each area. Pipettes in pre-PCR areas must use aerosol-filter tips.
- Clearly label all equipment to prevent accidental transfer.
- Reagent & Sample Handling:
- Aliquot all reagents into single-use volumes to prevent repeated exposure of stock solutions.
- Centrifuge all tubes briefly before opening to collect contents from the lid.
- Control Reactions:
- Always include a negative control (no template DNA) and, if possible, a positive control in every run to monitor for contamination.
Signaling Pathways and Workflow Diagrams
Experimental Workflow for Trace DNA Analysis & Contamination Mitigation
This diagram illustrates the critical control points in a trace DNA workflow, from sample collection to data interpretation, highlighting where specific mitigation strategies are essential.
Decision Tree for Addressing PCR Contamination
This decision tree provides a logical, step-by-step guide for investigators to identify and resolve the source of PCR contamination in their experiments.
The Scientist's Toolkit: Key Research Reagent Solutions
Table 3: Essential Reagents and Kits for DNA Decontamination and Purification
| Item | Function & Application | Key Considerations |
|---|---|---|
| DNase I & RNase A | Enzymes that degrade contaminating DNA or RNA in nucleic acid samples. Critical for preparing RNA-seq libraries (DNase) or DNA-seq libraries (RNase). | RNase I is effective in standard buffers like TE without requiring heat inactivation, which can denature DNA [6]. |
| Ampure XP / SPRI Beads | Solid-phase paramagnetic beads for cleaning up DNA samples after enzymatic reactions (e.g., PCR, digestion). Remove salts, enzymes, and short fragments. | Ideal for high-throughput processing. The bead-to-sample ratio determines the size cutoff for fragment retention [6]. |
| Silica Spin Columns | Devices for purifying and concentrating DNA from complex mixtures. Bind DNA in high-salt conditions, which is then eluted in a low-salt buffer. | Perform at least two wash steps. A final "dry spin" before elution prevents ethanol carryover. Extended incubation during elution improves yield [6]. |
| DNA Decontamination Solutions | Ready-to-use chemical solutions designed to degrade DNA on laboratory surfaces and equipment. | A non-chemical alternative is Non-Thermal Plasma (NTP), effective for decontaminating instruments within a vacuum chamber [1]. |
| Aerosol-Resistant Pipette Tips | Disposable pipette tips with an internal filter to prevent aerosols from contaminating the pipette shaft and subsequent samples. | Mandatory for all pre-PCR and sample preparation work to prevent cross-contamination [2]. |
Frequently Asked Questions (FAQs)
Q1: What is the difference between primary, secondary, and tertiary DNA transfer? A1: Primary transfer occurs when DNA is deposited directly from an individual onto an item (e.g., by touching it). Secondary transfer happens when DNA from an individual is first deposited on an intermediate object or person, which then carries and deposits it onto a final item. Tertiary (and beyond) transfer involves additional intermediate steps. Research has documented instances of quaternary transfer, demonstrating how easily trace DNA can be moved from its original source [7].
Q2: How can I assess the purity of my trace DNA sample before PCR? A2: Use fluorometry (e.g., Qubit) for accurate concentration measurement. Spectrophotometry (e.g., Nanodrop) can assess purity via 260/280 and 260/230 ratios, but be cautious: these ratios become misleading at very low concentrations (<10 ng/µL). Skewed 260/230 ratios can indicate carryover of organic substances like ethanol from purification [6].
Q3: Our lab is setting up a new facility for sensitive PCR work. What is the single most important practice to implement? A3: The most critical practice is the physical separation of pre-PCR and post-PCR areas with dedicated equipment, reagents, and lab coats for each. This "golden rule" prevents amplicons from high-concentration PCR products from contaminating your sensitive sample preparation and reagent setup areas [2].
Q4: Can the choice of DNA extraction method affect my downstream results? A4: Yes, significantly. Different extraction methods have varying efficiencies in recovering short DNA fragments, removing inhibitors, and avoiding the introduction of contaminants. This is well-documented in ancient DNA research [8] and is a critical factor in modern trace DNA analysis, as it directly impacts the quantity and quality of DNA available for profiling.
FAQs: Addressing Critical Contamination Concerns
Q1: What are the most common sources of DNA contamination in sensitive molecular biology experiments? DNA contamination can originate from multiple sources. Aerosolized amplicons from previous PCR reactions are a major risk in qPCR and sequencing workflows [9]. Laboratory reagents and kits themselves, including PCR enzymes and DNA extraction kits, can be contaminated with bacterial DNA [10] [11]. Human operators and the laboratory environment (e.g., surfaces, equipment) are also frequent contamination vectors, a concern critically important in forensic analysis and low-biomass microbiome studies [12].
Q2: How can I detect contamination in my qPCR experiments? The primary method is to use No Template Controls (NTCs). These wells contain all reaction components (primers, master mix, water) except for the DNA template [9] [13]. A contamination-free NTC should show no amplification [9]. If amplification occurs in the NTC, it indicates possible contamination of reagents or environmental carryover. The pattern of amplification (e.g., consistent Ct values across NTCs vs. random amplification) can help identify the contamination source [9].
Q3: What are the most effective chemical agents for decontaminating laboratory surfaces? Research consistently shows that freshly diluted sodium hypochlorite (bleach) and Virkon are among the most effective decontaminants [14] [15]. A forensic study found that 1% bleach and 1% Virkon removed all amplifiable DNA from surfaces [14]. In contrast, common disinfectants like 70% ethanol and isopropanol are significantly less effective, removing only a fraction of DNA and leaving amplifiable material behind [14] [15].
Q4: What specific practices are crucial for forensic labs to avoid cross-contamination? Forensic genetics laboratories rely on a strict physical separation of pre- and post-PCR areas with dedicated equipment and unidirectional workflow to prevent amplicon carryover [14]. Regular cleaning of laboratory spaces and equipment with validated DNA-removing agents (like bleach) is essential, as is the use of personal protective equipment (PPE), aerosol-resistant tips, and rigorous negative controls to monitor for contamination [14] [15].
Q5: Why is contamination control especially critical for low-biomass microbiome studies? In low-biomass samples (e.g., certain human tissues, drinking water, air), the target DNA "signal" can be very low. Contaminating DNA from reagents or the environment can therefore constitute a large proportion of the "noise," leading to spurious results and incorrect conclusions about the presence of a microbiome where one may not exist [12]. This has been a pivotal issue in debates over the microbiomes of human placenta, blood, and other low-biomass environments [12].
Troubleshooting Guides
Table 1: Troubleshooting Common DNA Contamination Problems
| Problem | Possible Cause | Solution | Relevant Field |
|---|---|---|---|
| Amplification in NTCs | Contaminated reagents (water, master mix) | Aliquot reagents; use new, validated batches. | qPCR, Sequencing |
| Aerosolized amplicons in lab environment | Implement physical pre-/post-PCR separation; use UNG enzyme. | qPCR, Forensic, Sequencing | |
| Inconsistent/low yield | Inhibitors co-extracted during sample prep | Include an internal positive control (IPC); use inhibitor-resistant polymerases. | qPCR, Forensic, Drug Dev |
| False positives in sequencing | Contaminating DNA in commercial enzymes/kits | Include extraction and PCR negative controls; use multiple kit batches. | Microbiome Sequencing |
| High background/strange peaks | Cross-contamination from other samples | Use aerosol-resistant tips; decontaminate workspaces with bleach between samples. | Forensic, Sequencing |
| Distorted community profiles | Reagent-derived bacterial DNA in low-biomass samples | Sequence negative controls and subtract contaminant sequences bioinformatically. | Microbiome Sequencing, Drug Dev |
Table 2: Efficacy of Common Cleaning Agents for DNA Decontamination
| Cleaning Agent | Active Reagent | DNA Remaining Post-Clean | Efficacy & Notes |
|---|---|---|---|
| 1% Bleach | Sodium Hypochlorite | 0% [14] | Most effective; corrosive, can be inactivated by organics. |
| 1% Virkon | Potassium Peroxomonosulfate | 0% [14] | Most effective; strong oxidizer, less corrosive than bleach. |
| DNA AWAY | Sodium Hydroxide | 0.03% [14] | Highly effective; alkaline reagent. |
| 70% Ethanol | Ethanol | 4.29% [14] | Ineffective for DNA removal; good for disinfection but not decontamination. |
| Isopropanol Wipe | Isopropanol | 9.23% [14] | Ineffective for DNA removal. |
| UV Radiation | UV Light | Variable [15] | Efficiency depends on exposure time, distance, and sample type. |
Experimental Protocols
Protocol 1: Validating Surface Decontamination Procedures
This protocol is adapted from a forensic science study evaluating cleaning strategies [14] [15].
1. Objective: To quantitatively test the efficiency of a cleaning agent in removing DNA from laboratory surfaces.
2. Materials:
- Surfaces to test (e.g., plastic, metal, wood)
- DNA solution (e.g., 60 ng of cell-free human DNA or whole blood)
- Candidate cleaning agent (e.g., 1% bleach, 1% Virkon)
- Spray bottle, calibrated
- Dust-free wipes
- Cotton swabs
- 0.9% sodium chloride solution
- DNA extraction kit (e.g., QIAamp DNA Blood Mini Kit)
- Real-time PCR system and reagents
3. Methodology:
- Surface Contamination: Deposit a measured volume (e.g., 10 µL) of the DNA solution onto a defined area (e.g., a 2 cm² circle) on the test surface. Allow it to dry completely [15].
- Application of Cleaning Agent: Spray the cleaning agent onto the contaminated area using a calibrated bottle. Wipe the area in a standardized manner (e.g., three circular motions) with a dust-free wipe [14]. Allow the surface to dry.
- Sample Collection (Swabbing): Moisten a cotton swab with 0.9% sodium chloride. Swab the entire cleaned area thoroughly to collect residual DNA. Include positive controls (contaminated, not cleaned) and negative controls (no contamination) [15].
- DNA Extraction and Quantification: Extract DNA from the swabs following the manufacturer's protocol. Quantify the recovered DNA using a sensitive real-time PCR assay [14] [15].
- Data Analysis: Calculate the percentage of DNA recovered compared to the positive (no cleaning) control. An effective decontaminant should reduce recoverable DNA to negligible levels (near 0%) [14].
Protocol 2: Monitoring Laboratory Contamination with No Template Controls (NTCs)
1. Objective: To routinely monitor qPCR reagents and the laboratory environment for DNA contamination.
2. Methodology:
- Include a minimum of one NTC per reaction plate. The NTC must contain all components of the master mix (polymerase, buffers, primers, probes, water) but no template DNA [9] [13].
- Run the qPCR assay under standard cycling conditions.
- Interpretation: Observe the amplification plots. Any significant amplification curve in the NTC well indicates contamination. A consistent Ct value across NTCs suggests reagent contamination, while variable Ct values point to random environmental contamination or aerosol carryover [9].
Workflow Visualizations
Diagram: Comprehensive Strategy for DNA Contamination Control
The Scientist's Toolkit: Essential Reagents & Materials
Table 3: Key Research Reagent Solutions for Contamination Control
| Item | Function & Application |
|---|---|
| Aerosol-Resistant Filtered Pipette Tips | Prevents aerosol carryover from pipettes into samples, a fundamental practice in all sensitive applications [9]. |
| Uracil-N-Glycosylase (UNG) | An enzyme incorporated into master mixes that degrades PCR products from previous reactions (carryover contamination) by targeting uracil-containing DNA [9] [13]. |
| Sodium Hypochlorite (Bleach) | A highly effective chemical for decontaminating surfaces and equipment. Fresh 1% solutions are recommended for complete removal of amplifiable DNA [14] [15]. |
| Virkon | A potent oxidizing agent used for surface decontamination. Shown to be as effective as bleach for removing DNA, and is less corrosive [14]. |
| DNA-Free Water | Certified nuclease-free and DNA-free water is critical for preparing reaction mixes and NTCs to avoid introducing contamination [13]. |
| Validated "DNA-Free" Reagents | Kits and enzymes specifically tested for low levels of contaminating bacterial DNA, crucial for microbiome and low-biomass studies [12] [11]. |
In molecular biology research, the integrity of your data is paramount. Contamination—the unwanted introduction of foreign DNA into your samples or experiments—can compromise results, waste valuable resources, and lead to incorrect conclusions. This guide identifies the primary sources of contamination, from personnel to equipment, and provides proven strategies for mitigation, forming a critical component of a broader thesis on decontaminating laboratory surfaces and instruments.
Contamination in the lab can originate from multiple sources. The following table summarizes the most common culprits and their impact.
| Source Category | Specific Examples | Type of Contaminant | Potential Impact on Experiments |
|---|---|---|---|
| Personnel | Skin cells, hair, aerosol droplets from breathing/talking [12], improper glove use [16] | Human DNA, microbial flora (e.g., from skin) | False positives in human DNA assays; distorted microbial community profiles in low-biomass studies [12] [17] |
| Laboratory Reagents & Kits | DNA extraction kits, PCR master mixes, molecular-grade water [17] [10] | Bacterial DNA (e.g., Acidobacteria, Pseudomonas), amplified DNA from previous runs | Dominant contaminant signal in low-biomass samples (e.g., plasma, airway samples); batch effects that confound biological results [17] [10] |
| Laboratory Environment | Airborne dust and aerosols, unclean work surfaces, HVAC systems [16] | Environmental microbes, aerosolized amplicons from post-PCR areas | Background contamination that overwhelms sample signal, especially in sensitive techniques like qPCR [9] [16] |
| Equipment & Consumables | Unsterilized glassware, reused pipette tips, contaminated centrifuges or vortexers [16] [18] | Residues from previous samples, detergents, microbial DNA | Cross-contamination between samples; introduction of enzyme-inhibiting substances [19] [16] |
| Sample Handling & Packaging | Direct contact between samples and packaging, unsecured exhibits during transport [20] | Transfer of DNA between samples or from sample to container | Loss of original sample DNA; complicated interpretation of results, particularly in forensic analysis [20] |
Contamination Mitigation Strategies and Protocols
Personnel-Derived Contamination
- Personal Protective Equipment (PPE): Always wear gloves, lab coats, and—for low-biomass work—face masks and hairnets. Gloves should be changed frequently, especially when moving between samples or after touching any potentially contaminated surface [12] [18].
- Technique: Avoid talking over open samples or cultures. Use careful, slow pipetting techniques to minimize aerosol generation [16].
Reagent and Kit Contamination
- Quality Control: Use reagents that are certified nuclease-free and of molecular biology grade.
- Kit Consistency: Use the same batch of DNA extraction kits throughout a project to minimize batch-to-batch variation in contaminant profiles [10].
- * enzymatic Decontamination:* For qPCR, use a master mix containing Uracil-N-Glycosylase (UNG). This enzyme degrades carryover contamination from previous PCR reactions that contain uracil, while your new (dUTP-containing) products remain intact [9].
Environmental and Workflow Controls
- Physical Separation: Establish physically separated pre- and post-amplification areas. These areas should have dedicated equipment, lab coats, and consumables to prevent amplicons from contaminating new reactions [9].
- Air Filtration: Use laminar flow hoods or biosafety cabinets with HEPA filters, which remove 99.9% of airborne particulates, to create a clean workspace for sample preparation [18].
- Surface Decontamination: Regularly clean work surfaces and equipment with a 10% bleach solution (freshly diluted), followed by wiping with deionized water to remove any residue. Bleach is highly effective at degrading DNA [12] [9].
Equipment and Consumables
- Use Sterile, Single-Use Consumables: Whenever possible, use sterile, single-use plasticware and filtered pipette tips to prevent cross-contamination [16].
- Regular Sterilization: Autoclave glassware and other non-disposable tools. Routinely decontaminate equipment like centrifuges and vortexers with 70% ethanol or a bleach solution [16] [18].
Frequently Asked Questions (FAQs)
Q1: My No-Template Control (NTC) in qPCR shows amplification. What does this mean? Amplification in your NTC indicates contamination. If the contamination is consistent across all NTC wells at a similar Ct value, the source is likely a contaminated reagent. If it is random and shows variable Ct values, the cause is likely sporadic environmental contamination, such as aerosolized amplicons drifting into the plate [9].
Q2: Why is contamination a bigger problem for low-biomass samples? In samples with very little native microbial DNA (e.g., blood, placenta, drinking water), the small amount of contaminating DNA from kits, reagents, or the environment can make up a large proportion—or even the majority—of the sequenced DNA. This contaminant "noise" can completely obscure the true biological "signal" [12] [17].
Q3: My water control shows microbial growth. What should I do? If your purified water shows contamination, service your water purification system. Replace filters as recommended and test the water quality with an electroconductive meter. You can also test for microbial contamination by using culture media in a petri dish with a sample of your lab water [18].
Q4: How can I identify which taxa in my dataset are likely contaminants? The most effective method is to sequence negative control samples (e.g., "blank" extractions that use only reagents without a sample). Microbial taxa that appear prominently in these controls are likely contaminants and should be treated with caution, especially if they are also present in your low-biomass experimental samples [12] [17] [10].
The Scientist's Toolkit: Essential Reagents for Contamination Control
| Item | Function | Application Example |
|---|---|---|
| Aerosol-Resistant Filtered Tips | Prevents aerosols from entering the pipette shaft and cross-contaminating subsequent samples. | Used during all pipetting steps, especially when setting up PCR reactions [9]. |
| UNG (Uracil-N-Glycosylase) | An enzyme that degrades uracil-containing DNA from previous amplification reactions, preventing carryover contamination. | Added to qPCR master mixes when using dUTP instead of dTTP [9]. |
| DNA-Decontaminating Solutions (e.g., 10% Bleach) | Chemically degrades DNA on surfaces and equipment. | Used for routine cleaning of benches, centrifuges, and other equipment [12] [9]. |
| HEPA-Filtered Laminar Flow Hood | Provides a sterile workspace by continuously blowing HEPA-filtered air across the work surface, preventing airborne contaminants from settling. | Used for sample preparation, reagent aliquoting, and PCR setup [16] [18]. |
| Silica-Based DNA Binding Columns | Selective binding of DNA under high-salt conditions, allowing impurities to be washed away before DNA is eluted. | Used in many commercial DNA extraction kits to purify DNA from proteins and other cellular debris [21]. |
Experimental Workflow for Contamination Monitoring
The following diagram illustrates a robust experimental workflow designed to monitor for and mitigate contamination at key stages.
The table below summarizes key findings from influential studies on contamination, providing a quantitative perspective on the issue.
| Study / Context | Key Contaminants Identified | Impact on Data | Recommended Mitigation |
|---|---|---|---|
| Salter et al. (2014) [17] [10] | 63 contaminant taxa from DNA extraction kits; common genera: Acidobacteria Gp2, Burkholderia, Pseudomonas | Contaminants became the majority of sequences in serial dilutions of a pure culture; different kit batches produced different cluster patterns in PCoA. | Use the same kit batch per project; include extraction blank controls; monitor contaminant taxa in controls. |
| Nature Microbiology Consensus (2025) [12] | Human-associated microbes, reagent-derived bacteria | In low-biomass systems (e.g., fetal tissue), the "microbiome" profile can be indistinguishable from negative controls. | Use PPE, decontaminate surfaces with bleach/UV, include sampling controls (e.g., swabs of air, collection vessels). |
| Forensic Packaging Study [20] | Touch DNA, saliva deposits, blood flakes | DNA transfer from exhibit to packaging is common; touch and saliva transfer can be mitigated by limiting contact. | Secure exhibits suspended within packaging; use physical barriers to separate areas. |
Proven Protocols: Effective DNA Decontamination Methods for Surfaces and Instruments
Technical Support Center
Troubleshooting Guides
Guide 1: Troubleshooting Ineffective DNA Decontamination
Problem: Amplifiable DNA is still detected on laboratory surfaces after cleaning.
| Possible Cause | Recommended Solution | Underlying Principle |
|---|---|---|
| Use of ineffective disinfectants (e.g., ethanol, isopropanol alone) | Switch to a proven DNA remover: ≥1% sodium hypochlorite (bleach) or 1% Virkon. | Ethanol precipitates DNA but does not degrade it, leaving it amplifiable [14]. Hypochlorite and Virkon chemically degrade DNA [14]. |
| Using old or degraded bleach solution | Prepare freshly diluted sodium hypochlorite solutions for each decontamination cycle. | The concentration of available chlorine in diluted bleach decreases over time, reducing its efficacy [22] [15]. |
| Residual decontaminant inhibiting PCR | After using hypochlorite, wipe the surface with 70% ethanol or water to remove residues. This step is not needed for Virkon [14]. | Key components of commercial extraction kits can be inactivated by hypochlorite residues [14]. |
| High organic load (e.g., blood) | For blood contamination, 1% Virkon has been shown to be particularly effective [22] [15]. | The efficiency of some agents can vary between cell-free DNA and DNA contained within biological materials like blood [22]. |
Guide 2: Selecting a Decontaminant for Specific Scenarios
Problem: Choosing the right agent for your specific laboratory area and contamination type.
| Scenario | Recommended Agent | Rationale & Consideration |
|---|---|---|
| General pre-/post-PCR surface decontamination | ≥1% Sodium Hypochlorite (Freshly diluted) | Highly effective at destroying amplifiable DNA; low cost [14]. Be aware of corrosiveness to metals and potential for poisonous gas release if mixed with acids [14]. |
| Decontamination of sensitive equipment or blood spills | 1% Virkon | Proven efficacy against blood and amplifiable DNA; less corrosive than hypochlorite [22] [14]. |
| Routine disinfection (where DNA removal is secondary) | 70% Ethanol or Isopropanol | Provides general microbial disinfection but is not reliable for DNA removal. Follow with a dedicated DNA decontaminant if needed [14]. |
| Emergency decontamination in CBRN scenarios | Fast-Act, CHPowder, or GDS2000 | These powder decontaminants aimed at chemical agents have been shown to not adversely affect subsequent DNA profiling [23]. |
Frequently Asked Questions (FAQs)
Q1: Why is 70% ethanol, a common disinfectant, ineffective for complete DNA removal? A1: While ethanol is an excellent disinfectant, its action on DNA is primarily to precipitate or fix it onto surfaces rather than degrade it. Studies show that after cleaning with 70% ethanol, over 4% of the original DNA can still be recovered and amplified, which represents a significant contamination risk for sensitive techniques like PCR [14]. For DNA destruction, a chemical agent that causes DNA strand breaks and oxidative damage is required.
Q2: What is the minimum effective concentration of sodium hypochlorite (bleach) for DNA decontamination? A2: Research indicates that a concentration of 1% household bleach is sufficient to remove all amplifiable DNA from surfaces [14]. This concentration typically corresponds to approximately 0.3-0.6% hypochlorite. Lower concentrations (e.g., 0.1% bleach) may only partially remove DNA, leaving behind detectable levels [14].
Q3: How does Virkon compare to sodium hypochlorite for DNA decontamination? A3: Both 1% Virkon and ≥1% sodium hypochlorite are highly effective at removing all amplifiable DNA from laboratory surfaces [14]. The choice between them often comes down to practical considerations:
- Virkon is less corrosive to metals and may be preferred for sensitive equipment. It has also shown excellent efficiency against blood [22] [14].
- Sodium Hypochlorite is generally more cost-effective but can be corrosive and requires care to avoid mixing with acidic solutions [14].
Q4: Can the surface material impact the efficiency of DNA decontamination? A4: Yes, the substrate can influence efficacy. Studies testing DNA removal from plastic, metal, and wood surfaces have shown that recovery rates of DNA, even from untreated controls, can vary significantly between these materials [22] [15]. Therefore, decontamination protocols should be validated for the specific surfaces in your laboratory.
Experimental Data & Protocols
The table below summarizes key quantitative findings from recent studies on DNA decontamination efficiency.
| Decontaminant | Active Reagent | DNA Recovered (%) | Experimental Context & Notes |
|---|---|---|---|
| 1% Bleach | Hypochlorite | 0% | Complete removal of amplifiable DNA from surfaces [14]. |
| 0.3% Bleach | Hypochlorite | 0.66% | Partial removal; low-level DNA recovery [14]. |
| 1% Virkon | Potassium peroxymonosulfate | 0% | Complete removal of amplifiable DNA from surfaces [14]. |
| 0.54% Hypochlorite | Hypochlorite | ≤0.3% | Tested on cell-free DNA on plastic, metal, and wood [22] [15]. |
| Virkon | Potassium peroxymonosulfate | ≤0.8% | Maximum recovery when decontaminating blood on various surfaces [22] [15]. |
| 70% Ethanol | Ethanol | 4.29% | Ineffective; leaves amplifiable DNA [14]. |
| Liquid Isopropanol | Isopropanol | 87.99% | Highly ineffective; most DNA remains [14]. |
| DNA AWAY | Sodium Hydroxide | 0.03% | Very effective, but traces of DNA may remain [14]. |
Detailed Experimental Protocol: Evaluating Decontamination Efficiency
This protocol is adapted from methodologies used in the cited research [22] [14] [15].
Objective: To quantitatively assess the efficiency of chemical agents in removing contaminating DNA from laboratory surfaces.
Materials:
- DNA Source: Purified human DNA (e.g., 60 ng in 10 µL) or whole blood.
- Surfaces: Test coupons of plastic, metal, and wood.
- Decontaminants: Solutions of sodium hypochlorite (various concentrations), Virkon, ethanol, etc.
- Equipment: Calibrated spray bottles, sterile cotton swabs, DNA extraction kit (e.g., QIAamp DNA Blood Mini Kit), real-time PCR system, and associated reagents.
- Consumables: Powder-free gloves, absorbent wipes, microcentrifuge tubes.
Methodology:
- Surface Contamination: Deposit a known quantity of DNA or blood (e.g., 10 µL) onto marked areas on the test surfaces. Allow to dry completely (approximately 2 hours).
- Application of Decontaminant: Apply the test decontaminant using a calibrated spray bottle, ensuring consistent coverage. Wipe the area uniformly with a clean, absorbent wipe.
- Post-Treatment: Allow the surface to air-dry.
- Sample Collection (Swabbing): Moisten a sterile cotton swab with a neutral solution (e.g., 0.9% NaCl). Swab the entire treated area thoroughly to collect residual DNA.
- DNA Extraction: Extract DNA from the swabs using a commercial kit, eluting in a consistent volume (e.g., 100 µL).
- DNA Quantification: Quantify the recovered DNA using a highly sensitive real-time PCR assay.
- Controls:
- Positive Control: Surfaces contaminated but not decontaminated (swabbed only).
- Negative Control: Swabs from clean, un-contaminated surfaces.
- No-Template Control (NTC): Included in the PCR step.
Data Analysis:
Calculate the percentage of DNA recovered for each decontaminant relative to the mean DNA yield from the positive control.
% DNA Recovered = (Mean quantity of DNA from treated surface / Mean quantity of DNA from positive control) × 100
Workflow and Process Diagrams
DNA Decontamination Efficacy Testing Workflow
Decision Guide for DNA Decontaminant Selection
The Scientist's Toolkit: Research Reagent Solutions
| Item | Function in DNA Decontamination |
|---|---|
| Sodium Hypochlorite (Bleach) | A potent oxidizing agent that causes strand breaks and base modifications in DNA, rendering it non-amplifiable. It is the most common and cost-effective choice [22] [14] [15]. |
| Virkon | A broad-spectrum oxidizing agent based on potassium peroxymonosulfate. It effectively degrades DNA and is particularly useful for blood spills and on metal surfaces due to its lower corrosivity compared to bleach [22] [14] [24]. |
| DNA AWAY | A commercial alkaline solution (sodium hydroxide) designed specifically for removing DNA contamination. It is highly effective, though studies show it may leave trace amounts of DNA compared to bleach and Virkon [14]. |
| Real-time PCR (qPCR) | A critical analytical tool used to quantify trace amounts of DNA left on surfaces after decontamination. It provides the sensitive data needed to compare the efficiency of different cleaning strategies [22] [14] [25]. |
| Cotton Swabs | Used for standardized sampling of surfaces post-decontamination to collect any residual nucleic acids for subsequent analysis [22] [14]. |
| QIAamp DNA Blood Mini Kit | An example of a commercial DNA extraction kit used to purify DNA from collection swabs, ensuring the DNA is in a format suitable for downstream qPCR analysis [14]. |
Troubleshooting Guide: Common Issues with UV-Based Decontamination
Problem 1: Inconsistent Decontamination Results
- Possible Cause: Insufficient UV dose or shadowing effects. The effectiveness of UV irradiation depends on delivering a sufficient energy dose (measured in mJ/cm²) to all contaminated surfaces [26].
- Solution: Ensure the UV intensity is calibrated and that the exposure time is sufficient. For nanogram quantities of DNA, a minimum dose of 7250 mJ/cm² may be required, which can take at least 2 hours depending on the UV source power [26]. Position items to ensure direct line-of-sight to the UV source.
Problem 2: Photoreactivation of Microorganisms
- Possible Cause: After UV disinfection alone, some bacteria can repair UV-induced DNA damage when exposed to light, a process known as photoreactivation [27].
- Solution: Implement a synergistic UV/oxidant process. Combining UV with oxidants like ozone (O₃) or chlorine dioxide (ClO₂) has been shown to significantly inhibit photoreactivation by causing additional, irreparable damage to cell structures [27].
Problem 3: Persistent Contamination from Small DNA Fragments
- Possible Cause: Short fragments of contaminating DNA can be more resistant to elimination by UV irradiation [26].
- Solution: Consider using autoclaving as an alternative or complementary method. Studies have shown autoclaving can be more effective than UV at eliminating short DNA fragments. A 2-hour autoclave cycle may be needed to eliminate nanogram quantities of DNA from dried stains [26].
Frequently Asked Questions (FAQs)
Q1: How does UV radiation actually damage DNA? UV-B radiation causes direct damage to DNA by inducing the formation of lesions between adjacent pyrimidine bases (thymine and cytosine). The two primary types of damage are cyclobutane pyrimidine dimers (CPDs) and 6–4 pyrimidine pyrimidone photoproducts (6-4PPs). These lesions create kinks in the DNA double helix, which can halt replication and transcription, effectively inactivating the genetic material [28] [29].
Q2: Can I use UV to decontaminate my PCR setup area? UV irradiation can be part of a comprehensive decontamination strategy for surfaces and certain consumables [26]. However, it should not be relied upon exclusively. The most critical practice is physical separation of pre- and post-PCR areas, along with the use of dedicated equipment, lab coats, and consumables for each area [9] [30]. UV is less effective on complex surfaces and may not reach shadowed areas.
Q3: What is the advantage of combining UV with chemical treatments? Synergistic processes combine the DNA-targeting effect of UV with the powerful oxidizing power of chemicals, leading to enhanced disinfection and decontamination. While UV primarily attacks genetic material, oxidants like ozone and free radicals can damage cell walls, membranes, proteins, and enzymes. This multi-target approach is more effective and can prevent repair mechanisms like photoreactivation [27]. The table below compares the effectiveness of different UV-based synergistic processes on E. coli inactivation.
Q4: What is a negative control, and why is it essential? A "No Template Control" (NTC) is a reaction that contains all PCR components—master mix, primers, water—except for the DNA template. It is crucial for detecting DNA contamination in your reagents or environment. If amplification occurs in the NTC, it signals that one of your reagents has been contaminated with the target DNA sequence [9].
Experimental Protocols & Data
Protocol 1: UV Decontamination of Laboratory Consumables
This protocol is adapted from systematic studies on eliminating contaminating DNA [26].
- Preparation: Place clean laboratory consumables (e.g., plasticware, non-organic components) in a UV crosslinker or a laminar flow hood with a calibrated UV-C source.
- Irradiation: Expose the items to a minimum UV dose of 7250 mJ/cm².
- Time Calculation: The exposure time will depend on the power output of your UV lamp. For a low-power lamp, this dose may require at least 2 hours of continuous exposure.
- Storage: After irradiation, store consumables in a clean, pre-PCR designated area to prevent recontamination.
Protocol 2: Surface Decontamination with Bleach
For surfaces and equipment, chemical decontamination is often more practical and effective [9] [31].
- Prepare Solution: Create a fresh 10–15% bleach (sodium hypochlorite) solution weekly, as it degrades over time [9].
- Safety: Wear appropriate personal protective equipment (PPE), including gloves and eye protection.
- Application: Apply the bleach solution to work surfaces and equipment (e.g., centrifuges, vortexers) and allow it to sit for 10–15 minutes.
- Rinsing: Wipe the area down with de-ionized water to remove any residual bleach, which could corrode equipment [9].
Quantitative Data on Decontamination Methods
Table 1: Comparison of Decontamination Methods for Eliminating Nanogram Quantities of DNA
| Method | Effective Dose / Duration | Key Consideration |
|---|---|---|
| UV Irradiation | Minimum 7250 mJ/cm² (approx. 2 hours) [26] | Less effective on short DNA fragments; potential for shadowing. |
| Autoclaving | 2 hours [26] | More effective than UV for short DNA fragments. |
| Bleach Treatment | 10-15% solution, 10-15 min contact time [9] | Effective for surface decontamination; requires fresh preparation. |
Table 2: Comparison of UV-Based Synergistic Processes for E. coli Inactivation (Adapted from [27])
| Process | Typical Inactivation Rate (log reduction) | Mechanism & Notes |
|---|---|---|
| UV Alone | 2.03 – 3.84 | Direct DNA damage (formation of CPDs and 6-4PPs). |
| UV/H₂O₂ | 2.62 – 4.30 | Generates hydroxyl radicals (HO·); attacks cell structures. |
| UV/Persulfate (PS) | 2.93 – 5.07 | Generates sulfate radicals (SO₄⁻·); strong oxidizers. |
| UV/O₃ | 4.02 – 6.08 | O₃ reduces water turbidity/chroma, improving UV penetration; generates HO·. |
| UV/Chlorine | 3.78 – 6.55 | Oxidants (HOCl, ClO₂) enter cells and damage internal proteins/enzymes. |
Workflow and Mechanism Diagrams
Diagram 1: Mechanism of direct DNA damage by UV radiation, leading to the formation of primary lesions and functional inactivation of genetic material [28] [29].
Diagram 2: Synergistic disinfection mechanism of UV combined with chemical oxidants, showing multiple cellular targets for enhanced effectiveness [27].
The Scientist's Toolkit: Key Reagent Solutions
Table 3: Essential Materials and Reagents for DNA Decontamination and Contamination Prevention
| Item / Reagent | Function / Purpose |
|---|---|
| Uracil-N-Glycosylase (UNG) | An enzyme in some qPCR master mixes that destroys carryover contamination from previous PCRs containing uracil instead of thymine [9]. |
| Aerosol-Resistant Filtered Pipette Tips | Prevents aerosolized contaminants from entering the shaft of the pipette and contaminating subsequent samples [9] [30]. |
| Sodium Hypochlorite (Bleach) | A potent chemical decontaminant for surfaces and equipment. A 10% solution is commonly used [9] [31]. |
| 70% Ethanol | Used for routine cleaning of work surfaces and equipment before and after experiments [9]. |
| Molecular Biology Grade Water | Used for preparing reagents and negative controls to ensure no exogenous DNA is introduced [30]. |
| HEPA Filter / Laminar Flow Hood | Provides a sterile workspace by maintaining a constant flow of filtered air, preventing airborne contaminants from settling on samples [32]. |
Troubleshooting Guides and FAQs
FAQ 1: Which cleaning agent is most effective for removing DNA contamination from laboratory surfaces?
The most effective cleaning agents are those that destroy DNA rather than just displacing it. Based on recent studies, freshly diluted sodium hypochlorite (household bleach) and Virkon are consistently the top performers, capable of removing nearly all amplifiable DNA [22] [14]. The efficiency of a cleaning agent can also depend on the surface material and whether the DNA is cell-free or contained within cells [22].
FAQ 2: I cleaned my benchtop with ethanol, but my no-template controls (NTCs) still show amplification. Why?
This is a common issue. Ethanol and isopropanol are disinfectants but are not efficient at destroying DNA molecules [14]. They may kill microbial cells but can leave the DNA intact and capable of being amplified by PCR. If your NTCs show amplification after cleaning with alcohol, switch to a DNA-destroying agent like a freshly prepared bleach solution or Virkon [14] [9]. Always monitor for contamination using NTCs, which should contain all reaction components except the DNA template [9].
FAQ 3: How does the surface material impact the choice of decontamination protocol?
The surface material significantly influences decontamination efficiency. Porous materials like wood are more challenging to clean than non-porous ones like plastic and metal [22]. Furthermore, some chemicals can damage equipment; for example, hypochlorite (bleach) is corrosive to metals, and it is recommended to follow a bleach decontamination with a wipe-down using 70% ethanol or water to protect the equipment [14] [9].
FAQ 4: What is the critical difference between cleaning, disinfecting, and decontaminating in a molecular biology context?
In a molecular biology lab, these terms have distinct meanings:
- Cleaning refers to the removal of visible dirt and organic matter.
- Disinfecting means using an agent like ethanol to kill microorganisms, though it may not destroy their DNA.
- Decontaminating (for DNA removal) specifically means using an agent that destroys DNA molecules to prevent PCR amplification [14] [33]. Effective decontamination often requires a specific DNA-destroying reagent.
Experimental Data and Protocols
The tables below summarize data from controlled studies testing the efficiency of various cleaning strategies on different surfaces. The values represent the mean percentage of DNA recovered after cleaning, demonstrating the agent's effectiveness.
Table 1: Efficiency on Cell-Free DNA Contamination (Data sourced from [22])
| Cleaning Agent | Active Reagent | Plastic | Metal | Wood |
|---|---|---|---|---|
| No-treatment Control | - | 100% | 100% | 100% |
| 1% Virkon | Potassium peroxymonosulfate | ~0% | ~0% | ~0% |
| 10% Trigene | Proprietary | ≤ 0.3% | ≤ 0.3% | ≤ 0.3% |
| Fresh 0.54% NaOCl | Sodium Hypochlorite | ≤ 0.3% | ≤ 0.3% | ≤ 0.3% |
| 70% Ethanol | Ethanol | ~33% | ~10% | ~2% |
| UV Radiation | Ultraviolet Light | ~15% | ~4% | ~1% |
Table 2: General Decontamination Efficiency on Hard Surfaces (Data sourced from [14])
| Cleaning Agent | Active Reagent | DNA Recovered (%) |
|---|---|---|
| Positive Control | - | 100 ± 10.3 |
| 1% Bleach | Sodium Hypochlorite | 0 |
| 3% Bleach | Sodium Hypochlorite | 0 |
| 1% Virkon | Potassium peroxymonosulfate | 0 |
| DNA AWAY | Sodium Hydroxide (NaOH) | 0.03 ± 0 |
| 70% Ethanol | Ethanol | 4.29 ± 1.2 |
| Liquid Isopropanol | Isopropanol | 87.99 ± 7.4 |
Detailed Experimental Protocol: Testing Cleaning Strategies
The following workflow is based on methodologies used in recent studies to evaluate decontamination protocols [22] [14].
Title: Workflow for Testing Cleaning Efficiency
Protocol Steps:
Surface Contamination:
- Mark a defined area (e.g., a 2 cm² square or a 25 mm-wide circle) on the test surfaces (plastic, metal, wood) [22] [14].
- Deposit a controlled volume (e.g., 10 µL) and amount (e.g., 5-60 ng) of contaminant. Common contaminants include purified cell-free DNA, whole blood (as a source of cell-contained DNA), or amplified DNA libraries to simulate PCR product contamination [22] [14].
- Allow the droplet to air-dry completely (approximately 45 minutes to 2 hours) [22] [14].
Application of Cleaning Agent:
- Apply the test decontamination agent. This can be done by administering one spray from a calibrated spray bottle or by using an absorbent wipe saturated with the liquid agent [22] [14].
- Wipe the surface in a standardized way (e.g., three circular motions) to ensure consistency across tests. All cleaning should be performed by the same person to minimize variability [22].
Post-Cleaning Sample Collection:
- After the cleaned area has dried (approximately 30-120 minutes), sample the entire marked area using a cotton swab moistened with a recovery solution such as 0.9% sodium chloride or molecular grade water [22] [14].
- Include appropriate controls: positive "no-treatment" controls (contaminated but not cleaned) and negative background controls (swabs from clean surfaces) [22].
DNA Extraction and Quantification:
- Extract DNA from the cotton swabs using a commercial DNA extraction kit, following the manufacturer's protocol for forensic swabs or environmental samples [22] [14].
- Quantify the recovered DNA using a highly sensitive method. Real-time PCR (qPCR) is preferred as it detects amplifiable DNA, which is the relevant metric for contamination in PCR-based workflows. Fluorometry (e.g., Qubit) can also be used [22] [14] [6].
Surface-Specific Considerations and Workflow
The following diagram integrates the key findings to provide a logical guide for selecting a decontamination protocol based on the surface type and contamination concern.
Title: Surface-Based Decontamination Guide
The Scientist's Toolkit: Research Reagent Solutions
Table 3: Essential Reagents for DNA Decontamination
| Reagent | Primary Function in DNA Decontamination | Key Considerations |
|---|---|---|
| Sodium Hypochlorite (Bleach) | Oxidizes and irreversibly degrades DNA molecules [14]. | Must be freshly diluted (e.g., 0.5-1%) for reliability; corrosive to metals [14] [9]. |
| Virkon | A potent oxidizing agent that destroys amplifiable DNA [22] [14]. | Highly effective on various surfaces including wood; less corrosive than bleach [22] [14]. |
| Sodium Hydroxide (NaOH) | Alkaline reagent that hydrolyzes DNA; active component in DNA AWAY [14] [34]. | Can be effective but may leave trace amplifiable DNA; requires careful handling [14]. |
| Ethanol / Isopropanol | Disinfects by denaturing proteins and lysing cells. | Ineffective for destroying free DNA; should not be relied upon for DNA decontamination [14]. |
| UV Radiation | Creates thymine dimers and strand breaks in DNA, inhibiting amplification [22]. | Efficiency depends on exposure time, distance, and can create shadows; often used in combination with chemical methods [22]. |
| Uracil-N-Glycosylase (UNG) | Enzyme used in PCR reactions to degrade carryover contamination from previous PCRs containing dUTP [9]. | A preventive measure in the reaction tube, not a surface decontaminant [9]. |
This guide provides troubleshooting and best practices for establishing pre- and post-PCR zones to eliminate DNA contamination in your lab.
The Principle of Physical Separation
Polymerase Chain Reaction (PCR) is an extremely sensitive technique that amplifies minuscule amounts of DNA. A primary contamination risk is amplified DNA (amplicons) from previous experiments entering new reactions, which can lead to false positives and unreliable data [35]. The most effective strategy to prevent this is physical separation between pre- and post-PCR areas [36] [35].
- Pre-PCR Zone ("Clean Area"): This dedicated space is for handling precious samples prior to amplification. It must be kept free of contaminating amplified DNA to ensure reliable results [35].
- Post-PCR Zone ("Amplified DNA Area"): This separate area is for tasks involving amplified DNA, such as PCR amplification itself, gel electrophoresis, and analysis using instruments like Fragment Analyzers or NanoDrop [35]. Contamination risk to the current experiment is no longer a threat here.
Establishing Your Unidirectional Workflow
A strict unidirectional workflow must be enforced: samples and materials should always move from the pre-PCR zone to the post-PCR zone, but never in the reverse direction [35].
The following diagram illustrates the correct workflow and the consequences of a breach in protocol.
Contamination Control Methods
Beyond physical separation, implement these practices to minimize contamination risks.
| Contamination Source | Risk Description | Mitigation Strategy |
|---|---|---|
| Aerosols | Aerosol generation spreads amplicons [36]. | Use high-quality filtered pipette tips or positive displacement pipettes [36]. |
| Laboratory Consumables | Tubes and plate seals can cause liquid transfer and DNA leakage [37]. | Inspect tube seals for damage; select consumables with low leakage risk (e.g., external thread tubes, adhesive seals) [37]. |
| Surface Contamination | Amplified DNA on lab surfaces, equipment, and gloves [36]. | Clean surfaces with DNA-degrading solutions (e.g., sodium hypochlorite); use UV irradiation for equipment [36] [35]. |
| Cross-Use of Equipment | Using the same equipment in both zones [35]. | Use dedicated instruments, pipettes, racks, and reagents in each zone [35]. |
Decontamination Protocol for Surfaces and Instruments
- DNA-Degrading Solutions: Regularly clean work surfaces with dedicated DNA removal reagents or sodium hypochlorite solutions [35].
- UV Irradiation: Use UV light to decontaminate bench tops, pipettes, and other equipment not suitable for liquid cleaning. Follow the manufacturer's decontamination instructions [35].
- Ethanol Cleaning: Clean the workspace inside a laminar flow hood or biosafety cabinet with 80% ethanol before starting work, especially for RNA assays [35].
The Scientist's Toolkit: Essential Research Reagent Solutions
| Item or Reagent | Function in Workflow |
|---|---|
| Filtered Pipette Tips | Prevents aerosol contamination by filtering potentially contaminated air within the pipette shaft from entering the sample [36]. |
| Positive Displacement Pipettes | Alternative to air-displacement pipettes; uses a disposable piston that contacts the liquid, ideal for handling highly sensitive samples [36]. |
| DNA Degradation Solutions | For surface decontamination; chemically destroys any contaminating DNA present on benchtops and equipment [35]. |
| UV Chamber / Crosslinker | Used to decontaminate non-disposable equipment (e.g., pipettes, tube racks) by damaging DNA with ultraviolet light [35]. |
| DNA-Certified Free Consumables | Tubes, plates, and tips certified to be free of contaminating DNA and nucleases [37]. |
| Adhesive Plate Sealing Films | For sealing PCR plates; present a lower risk of DNA transfer compared to strip caps [37]. |
Frequently Asked Questions (FAQs)
Why is separating the zones in a PCR room so critical?
Zoning prevents cross-contamination between sample preparation, amplification, and analysis. Amplified DNA from a completed PCR is present in enormous quantities and can easily contaminate a new reaction during setup, leading to false positives and compromising the integrity of your results [35] [38].
We have limited lab space. How can we implement separation without dedicated rooms?
Physical barriers are ideal, but if separate rooms are not feasible, you can designate specific, well-separated bench areas for pre- and post-PCR work. The key is ensuring strict unidirectional workflow and using dedicated equipment and supplies for each area. Never use the same pipette, ice bucket, or rack in both zones [35].
What is the most common contamination mistake you see in labs?
The most common mistake is the cross-use of equipment, particularly micropipettes. Using the same pipette to handle amplified PCR products and then to set up a new reaction is a guaranteed path to widespread contamination. Always use dedicated, color-coded pipettes for your pre-PCR work [36] [35].
How does airflow design help in PCR labs?
Proper airflow management reduces airborne contaminants. A design with positive air pressure in the pre-PCR zone helps prevent the entry of external contaminants and aerosolized amplicons from the post-PCR area. The use of HEPA filters in laminar flow hoods or biosafety cabinets in the pre-PCR zone further protects samples [38].
What should I do if I suspect my pre-PCR area is contaminated?
- Stop all work immediately to prevent further experiments from being compromised.
- Decontaminate all surfaces with a DNA-degrading solution (e.g., 10% bleach, followed by ethanol to prevent corrosion).
- Decontamate equipment by thoroughly cleaning pipettes and other instruments; use a UV chamber if available [35].
- Run negative controls in your next experiment to verify the contamination has been eliminated before proceeding with valuable samples.
Troubleshooting Common Pitfalls and Optimizing Your Decontamination Workflow
Troubleshooting Guides
Why is my No Template Control (NTC) showing amplification?
Problem: Amplification occurs in the NTC well, which should contain all reaction components except the template DNA.
| Observation | Likely Cause | Confirmation Method |
|---|---|---|
| Amplification curve with a Cq < 40 and a dissociation curve peak matching your target. [39] [40] | DNA Contamination: The reaction components or lab environment are contaminated with your target DNA. [41] | Compare the melt curve of the NTC to your positive sample; identical peaks confirm contamination. [39] |
| Amplification curve with a late Cq (often >35) and a dissociation curve with a low-temperature peak not seen in positive samples. [39] [41] | Primer-Dimer Formation: Forward and reverse primers have annealed to each other and been extended, creating a small, unwanted product. [39] [41] | Check gel electrophoresis for a faint, low molecular weight band/smear (<100 bp). [41] |
| High background noise or jagged amplification plots. [40] | Reagent Degradation or Equipment Issue. | Test with fresh reagent aliquots and check equipment. |
How do I diagnose and fix DNA contamination in my NTC?
Diagnosis: Consistent amplification across NTC replicates indicates systemic reagent contamination, while random amplification suggests sporadic contamination during plate setup. [39]
Solution: A Systematic Decontamination Plan
- Discard Results: Immediately stop and invalidate all data from the contaminated run. [41]
- Decontaminate Your Workspace and Equipment:
- Clean Surfaces: Wipe down pipettes, benchtops, centrifuges, and tube racks with a 10% bleach solution, followed by ethanol or nuclease-free water to remove the bleach residue. [41] [40] [13]
- UV Irradiation: Use a UV light in your PCR hood for 15-30 minutes to degrade nucleic acids before setting up your next experiment. [41] [12]
- Implement Physical Separation:
- Use Dedicated Equipment and Supplies:
- Manage Reagents and Incorporate Enzymatic Digestion:
- Aliquot Everything: Upon receipt, aliquot all reagents (polymerase, primers, dNTPs, water) into small, single-use volumes to minimize the risk of contaminating a large stock. [41]
- Use UNG/UDG: Incorporate a master mix containing Uracil-N-Glycosylase (UNG) or Uracil-DNA Glycosylase (UDG). This enzyme degrades any PCR products from previous reactions (which contain dUTP), preventing their re-amplification. [39] [13]
How do I resolve primer-dimer formation in my NTC?
Solution: PCR Optimization
| Action | Method & Rationale |
|---|---|
| Increase Annealing Temperature. [41] | Use a thermal gradient to find the highest temperature that permits specific amplification but discourages loose primer binding to each other. |
| Optimize Primer Concentration. [39] | Test different combinations of forward and reverse primer concentrations (e.g., 100-400 nM each) to find the balance that maximizes specificity and efficiency. [39] |
| Use Hot-Start Polymerase. [41] | This polymerase is inactive until the initial denaturation step, preventing primer extension during reaction setup at lower temperatures. |
| Redesign Primers. [41] | As a last resort, use primer design software to check for self-complementarity and redesign primers with minimal complementarity, especially at the 3' ends. |
FAQs
What does a band in my negative control mean?
A band in your negative control (NTC) almost always indicates a problem that invalidates the experiment. [41] If the band is the same size as your target product, it is contamination from a positive sample or a previous PCR product. [41] If the band is very small (e.g., <100 bp), it is likely primer-dimers. [41]
How can I prevent contamination when setting up a PCR?
Follow these core principles for prevention: [42]
- Work in a dedicated "pre-PCR" area that is physically separated from where DNA templates or PCR products are handled. [41] [42]
- Use aerosol-resistant filter tips and dedicated pipettes for all pre-PCR work. [41] [42]
- Aliquot all reagents into small, single-use volumes to avoid contaminating your stock. [41]
- Always include an NTC in every run to monitor for contamination. [42]
My NTC is clean, but my sample Cq values are later than expected. What could be wrong?
This suggests PCR inhibition or poor reaction efficiency. [40] Potential causes and solutions include:
- Inhibitors in the sample: Re-purify your template DNA or dilute it to reduce the concentration of inhibitors. [40]
- Suboptimal primer design or concentration: Redesign primers or optimize their concentrations. [40]
- Annealing temperature is too low: Optimize the annealing temperature using a thermal gradient. [40]
Experimental Protocols & Data
Quantitative Comparison of Decontamination Methods
The following table summarizes key methods for decontaminating laboratory surfaces and equipment, a critical step in preventing NTC contamination.
| Method | Mechanism of Action | Efficacy (DNA Reduction) | Key Advantages | Key Limitations |
|---|---|---|---|---|
| Sodium Hypochlorite (Bleach). [12] | Oxidative fragmentation of DNA. [43] | High (when used correctly). [12] | Inexpensive; widely available. [43] | Corrosive; requires removal with ethanol/water to avoid PCR interference. [41] [13] |
| UV-C Irradiation. [12] | Induces pyrimidine dimers, preventing amplification. [41] | Variable. [13] | Easy to use in cabinets/hoods; no physical cleaning. [41] | Ineffective on shadowed areas; less effective against short or GC-rich amplicons. [12] [13] |
| Non-Thermal Plasma (NTP). [1] | Liberated reactive species damage DNA. [1] | ~100-fold reduction (2 log). [1] | Reaches areas inaccessible to UV-C; integrated into vacuum systems. [1] | Emerging technology; requires optimization of power and exposure. [1] |
| Commercial DNA Removal Sprays. [43] | Proprietary formulations designed to degrade nucleic acids and nucleases. [43] | Removes detectable DNA within one minute. [43] | Stabilized, ready-to-use; often less corrosive than bleach. [43] | Higher cost than homemade solutions. |
Protocol: UNG/UDG Carryover Prevention
This protocol outlines the use of Uracil-N-Glycosylase (UNG) to prevent contamination from previous PCR amplicons. [39] [13]
Principle: A master mix containing dUTP is used in PCR. In subsequent reactions, the UNG enzyme hydrolyzes any contaminating uracil-containing PCR products before amplification begins, preventing re-amplification.
Procedure:
- Reagent Preparation: Use a master mix that contains the UNG enzyme and substitute dTTP with dUTP.
- UNG Incubation Step: Program your thermocycler to include a hold step at 25-50°C for 2-10 minutes before the initial denaturation. This allows the UNG enzyme to actively degrade any contaminating amplicons.
- Enzyme Inactivation: The initial denaturation step at 95°C will irreversibly inactivate the UNG enzyme, preventing it from degrading the newly synthesized PCR products in the current reaction.
Workflow Diagram: Systematic NTC Troubleshooting
The following diagram illustrates a logical pathway for diagnosing and resolving NTC amplification.
The Scientist's Toolkit: Essential Research Reagents & Materials
This table details key reagents and materials used in contamination control and PCR troubleshooting.
| Item | Function & Application |
|---|---|
| Aerosol-Resistant Filter Tips. [41] [42] | Creates a physical barrier within the pipette tip, preventing aerosols from contaminating the pipette shaft and subsequent reactions. Essential for all PCR setup. |
| Uracil-N-Glycosylase (UNG). [39] [13] | An enzyme used in master mixes to prevent carryover contamination by degrading PCR products from previous reactions that contain dUTP. |
| Hot-Start DNA Polymerase. [41] | A modified polymerase that is inactive at room temperature, preventing non-specific amplification and primer-dimer formation during reaction setup. Activated at high temperatures. |
| Nuclease-Free Water. [41] | Purified water certified to be free of nucleases and DNA/RNA. A common source of contamination if compromised. |
| Surface Decontaminant (e.g., 10% Bleach, DNA Away). [41] [43] | Chemical solutions used to wipe down surfaces and equipment to degrade contaminating nucleic acids. |
| Primer Design Software. [41] | Bioinformatics tools used to design specific primers with minimal self-complementarity to reduce the risk of primer-dimer formation. |
While bleach (sodium hypochlorite) is a well-known decontaminant, its limitations—including corrosiveness to equipment, potential for generating hazardous gases, and inability to address all contamination scenarios—necessitate a broader toolkit for modern laboratories. This technical support center provides researchers and drug development professionals with advanced troubleshooting guides and FAQs to effectively combat DNA contamination, ensuring the integrity of your sensitive experiments.
FAQs: Understanding Decontamination Fundamentals
Why is bleach not always the best choice for DNA decontamination?
While freshly made household bleach is highly effective at removing amplifiable DNA from surfaces, its use comes with significant caveats [14]. Bleach is corrosive to metals and can produce poisonous chlorine gases if it reacts with acidic solutions or key components in several commercial extraction kits [14]. For delicate instrumentation or in environments where chemical safety is a primary concern, alternative decontamination methods are recommended.
How can I detect cDNA contamination in my next-generation sequencing (NGS) data?
Contamination with cloned cDNA in DNA sequencing libraries (e.g., from ChIP-seq, ATAC-seq, WGS) is an underappreciated problem that can lead to spurious results like false copy number variants or incorrect peak calls [44]. Unlike endogenous genes, cloned cDNAs lack introns. During alignment to a reference genome, reads derived from these contaminants will only partially align at exon boundaries, resulting in "clipped" reads [44]. Specialized computational tools like cDNA-detector have been developed to identify these patterns quickly and accurately from BAM alignment files, helping to distinguish potential contaminants from endogenous retrogenes [44].
My RNA samples are contaminated with genomic DNA. What is the most efficient way to clean them?
Virtually no RNA isolation method consistently produces DNA-free RNA without DNase treatment [45]. The most effective strategy involves using high-quality, RNase-free DNase I in an optimized buffer, followed by a reliable method to inactivate or remove the DNase itself [45]. Traditional inactivation methods (heat, Proteinase K/organic extraction, EDTA chelation) can be cumbersome, cause RNA loss, or interfere with downstream reactions [45]. Innovative commercial reagents now offer a unique DNase Removal Reagent that binds and removes the enzyme and divalent cations via a quick centrifugation after digestion, leaving RNA intact and ready for sensitive applications like RT-PCR [45].
Troubleshooting Guides & Experimental Protocols
Guide 1: Decontaminating Laboratory Surfaces and Equipment
Problem: Sporadic DNA contamination is affecting sensitive PCR results, and standard disinfectants like ethanol are not solving the problem.
Background: Not all disinfectants remove DNA. A 2024 study showed that ethanol, isopropanol, and other common disinfectants failed to remove all amplifiable DNA from surfaces, whereas bleach and Virkon were highly effective [14].
Solution: Implement a surface decontamination protocol with a proven DNA-removing reagent.
Table 1: Efficacy of Common Cleaning Reagents in Removing Amplifiable DNA
| Cleaning Reagent | Active Ingredient | DNA Recovered Post-Cleaning (%) | Efficacy |
|---|---|---|---|
| 1% Bleach | Hypochlorite (NaClO) | 0% | Excellent |
| 1% Virkon | Oxidation (KHSO₅) | 0% | Excellent |
| DNA AWAY | Sodium Hydroxide (NaOH) | 0.03% | Very Good |
| 70% Ethanol | Ethanol | 4.29% | Poor |
| Liquid Isopropanol | Isopropanol | 88.0% | Very Poor |
Experimental Protocol for Surface Decontamination [14]:
- Prepare Reagent: Freshly dilute household bleach to a 1% concentration. Note: Virkon is a less corrosive and environmentally less toxic alternative with similar efficacy [14].
- Apply: Soak a clean, absorbent wipe (e.g., Sitrix V1) with the decontamination solution.
- Clean: Thoroughly rub the surface (benches, instruments, contact points) with the soaked wipe.
- Dry: Allow the surface to air-dry completely (approximately 30 minutes). For bleach, some protocols recommend a follow-up wipe with 70% ethanol or water to prevent corrosion, though this was not reflected in the survey data [14].
- Validate: Periodically test cleaning efficacy by swabbing cleaned surfaces with a moistened cotton swab, extracting the DNA, and quantifying it via qPCR.
Guide 2: Mitigating Contamination in Single-Molecule DNA Extraction
Problem: Contaminant DNA molecules in single-molecule extraction techniques (e.g., using nanopores) obscure the detection of low-abundance target DNA.
Background: In techniques like nanopore sensing, contamination can be introduced from the air or from impurities in the oil and lipid mixtures used to form the separation bilayer [46].
Solution: A multi-pronged approach combining physical and biochemical methods.
Experimental Protocol for Nanopore-Based DNA Filtering [46]:
- Control the Environment: Perform sample and reagent preparation in a designated area. Use low-aerosol pipette tips and decontaminate work surfaces with UV light for 15 minutes prior to use. This effectively eliminates air-borne contamination [46].
- Implement the PCR Clamp Method: To distinguish target DNA from contaminating DNA within the reaction mixture itself, use Peptide Nucleic Acids (PNA). Design a PNA strand that is complementary to a sequence unique to your target DNA.
- Form PNA-DNA Duplexes: Add the PNA to your sample solution. It will bind to both the target DNA and any contaminant DNA with the same sequence, forming PNA-DNA duplexes.
- Selective Unzipping: As the duplexes pass through the α-hemolysin (αHL) nanopore, the PNA bound to the target DNA will unzip, allowing the target DNA to pass into the detection droplet. The PNA bound to contaminant DNA is designed to remain bound, preventing its transit and thus filtering it out. This method has been shown to remove 99.98% of specific DNA contamination [46].
Guide 3: Decontaminating PCR Reagents for Ultra-Sensitive Detection
Problem: Contaminating microbial DNA in PCR reagents (especially from the recombinant host of polymerase production) causes false-positive results in ultra-sensitive pan-bacterial assays, such as those used for sepsis diagnosis.
Background: Standard decontamination methods like UV light or ethidium monoazide (EMA) alone can be ineffective or can damage reagents, reducing PCR sensitivity, particularly when targeting very low copy numbers (1-2 genome copies) [47].
Solution: A combined UV-EMA treatment protocol that targets different sources of contamination.
Experimental Protocol for Combined UV-EMA Treatment of PCR Reagents [47]:
- UV Treatment of Master Mix: Prepare a master mix containing all PCR components except for the primers. Expose this master mix to UV light in a PCR workstation. This step helps degrade contaminating DNA present in the buffers and polymerase.
- EMA Treatment of Primers: In a separate, light-controlled tube, mix your oligonucleotide primers with EMA. Incubate in the dark for 10 minutes at 4°C to allow the EMA to intercalate any contaminating double-stranded DNA.
- Photoactivation: Expose the primer-EMA mixture to 465–475 nm light in a photolysis device for 10 minutes at room temperature. This cross-links the EMA to the contaminating DNA, rendering it unamplifiable.
- Combine Reagents: Add the EMA-treated, photoactivated primers to the UV-treated master mix. This combined strategy has been shown to enable detection at two genome copies while maintaining a low contamination rate (<5%) [47].
The Scientist's Toolkit: Key Reagents for DNA Decontamination
Table 2: Essential Reagents for Advanced DNA Decontamination
| Reagent / Tool | Function / Description | Key Consideration |
|---|---|---|
| Virkon | A strong oxidative powder that destroys amplifiable DNA on surfaces. | Less corrosive than bleach; better for equipment and environmental considerations [14]. |
| DNA AWAY | A ready-to-use alkaline solution for surface decontamination. | Effective, though may leave trace DNA; convenient liquid format [14]. |
| DNase I & Removal Kit | Enzymatically degrades contaminating DNA in RNA/DNA samples, with a subsequent step to remove the enzyme. | Avoids pitfalls of heat inactivation or phenol extraction, preserving nucleic acid integrity [45]. |
| Peptide Nucleic Acid (PNA) | A synthetic nucleic acid analog used to specifically "clamp" and filter out contaminant DNA in nanopore systems. | Enables sequence-specific decontamination in single-molecule applications [46]. |
| Ethidium Monoazide (EMA) | A photoreactive DNA intercalator that cross-links and inactivates contaminant DNA in solution upon light exposure. | Used for decontaminating PCR reagents; more effective when combined with other methods like UV [47]. |
| cDNA-detector | A computational tool that identifies and facilitates removal of exogenous cDNA contamination in NGS alignment files (BAM). | Crucial for bioinformatic cleaning of sequencing data where physical decontamination is not possible [44]. |
Best Practices for Reagent Handling, PPE Use, and Aerosol-Resistant Tips
Troubleshooting Guides
Troubleshooting DNA Contamination in Low-Biomass Studies
Problem: Inconsistent or unexpected results in low-biomass sample analysis (e.g., human tissues, forensic samples, treated drinking water), suggesting potential DNA contamination.
Investigation and Solutions:
Step 1: Understand the Problem
- Question your methods: Ask when the contamination appears. Is it in your negative controls? Is the microbial profile dominated by taxa commonly found in human skin or laboratory reagents? [12]
- Gather information: Review your sequence data. A high abundance of microbial genera like Acinetobacter, Pseudomonas, or Cupriavidus in negative controls can indicate reagent contamination [12].
- Reproduce the issue: Run a full set of negative controls (e.g., extraction blanks, no-template PCR controls) alongside your samples. If these controls show amplification, contamination is confirmed [12].
Step 2: Isolate the Issue
- Remove complexity: Simplify your workflow to identify the contamination source. Test your DNA extraction kits and PCR reagents independently by processing them as "samples." [12]
- Change one thing at a time: Systematically review your process. Was a new reagent lot introduced? Was a shared piece of equipment used without proper decontamination? Change one variable at a time to pinpoint the source [48].
- Compare to a working version: If available, compare your current results to a previous, successful experiment using the same sample type but different reagent batches [48].
Step 3: Find a Fix or Workaround
- Implement a rigorous cleaning protocol: For laboratory surfaces and instruments, use reagents proven to remove amplifiable DNA. A 1% concentration of freshly diluted household bleach (sodium hypochlorite) or 1% Virkon are highly effective [14]. See the table below for a comparison of cleaning agents.
- Decontaminate, don't just disinfect: Common laboratory disinfectants like 70% ethanol or isopropanol are poor at removing DNA and should not be relied upon for DNA decontamination [14].
- Adopt single-use and aliquoting practices: Use aerosol-resistant tips to prevent cross-contamination during pipetting. Aliquot all reagents to avoid repeated exposure to potential contaminants [12] [49].
Table 1: Effectiveness of Common Cleaning Agents for DNA Decontamination
| Cleaning Reagent | Active Ingredient | DNA Removed? | Notes and Considerations |
|---|---|---|---|
| 1% Bleach (Fresh) [14] | Hypochlorite (NaClO) | Yes | Highly effective and low-cost; can be corrosive to metals; may require a follow-up rinse with water or ethanol to remove residue [14]. |
| 1% Virkon [14] | Potassium peroxymonosulfate | Yes | Effective and less corrosive than bleach; can generate halogen gases in contact with halides [14]. |
| DNA AWAY [14] | Sodium Hydroxide (NaOH) | Nearly Complete (0.03% recovered) | Effective but may leave trace DNA; alkaline composition requires careful handling [14]. |
| 70% Ethanol [14] | Ethanol | No (4.29% recovered) | Good for general disinfection but ineffective for DNA removal; should not be used as the sole decontaminant in DNA-critical work [14]. |
| Isopropanol Wipe [14] | Isopropanol | No (9.23% recovered) | Ineffective for DNA removal; not recommended for critical decontamination [14]. |
Troubleshooting Reagent Integrity and Performance
Problem: Reagents failing unexpectedly, leading to poor DNA yield or failed enzymatic reactions.
Investigation and Solutions:
Step 1: Verify Storage Conditions
- Check the datasheet: Confirm the storage temperature for every reagent. Note that conjugated antibodies often require refrigeration (2–8°C), while many unconjugated antibodies are stored at -20°C [49].
- Monitor the environment: Use temperature loggers in freezers and refrigerators. Store reagents away from high-airflow zones in cold rooms to prevent desiccation [49].
- Protect from light: Store light-sensitive reagents like fluorescent dyes in amber vials or tubes wrapped in aluminum foil [50] [49].
Step 2: Assess Handling Practices
- Aliquot everything: Upon receiving a new reagent, immediately aliquot it into single-use volumes to minimize freeze-thaw cycles and prevent contamination of the entire stock [49].
- Avoid double-dipping: Never use a pipette tip that has already been in contact with another solution or sample. Always use a fresh, sterile tip [49].
- Inspect for contamination: Visually inspect aliquots for particulate matter or discoloration before use.
Step 3: Test Reagent Performance
- Run a positive control: Use a control reaction with a known, well-characterized template to verify that your PCR master mix and enzymes are functioning correctly.
- Optimize concentrations: The manufacturer's recommended dilution is a starting point. Titrate reagents like antibodies to determine the optimal concentration for your specific application [49].
Frequently Asked Questions (FAQs)
Q1: What is the most critical practice for preventing contamination in low-biomass microbiome studies? A1: The most critical practice is the consistent use of a comprehensive set of negative controls throughout the entire workflow, from sample collection to sequencing. This includes field blanks, extraction blanks, and PCR no-template controls. These controls are essential for identifying contamination sources and interpreting your data accurately [12].
Q2: Why are aerosol-resistant tips necessary, even when using proper PPE? A2: Aerosol-resistant tips are a physical barrier that prevents aerosols and liquid droplets from entering the pipette shaft. This protects the instrument from becoming a source of cross-contamination between samples. PPE, such as gloves and lab coats, protects the sample from the user and the user from hazards, but it does not prevent cross-contamination via aerosol transfer inside the pipette [12].
Q3: How should I properly store my PCR reagents to ensure maximum shelf life? A3:
- Follow manufacturer instructions: Always consult the product datasheet for specific storage temperatures.
- Aliquot upon arrival: Aliquot enzymes and master mixes into single-use volumes to avoid repeated freeze-thaw cycles [49].
- Store at -20°C in a non-frost-free freezer: Frost-free freezers undergo temperature cycles that can degrade enzyme activity.
- Use nuclease-free water and tubes: Ensure all materials used for storage are certified nuclease-free [51].
- Keep reagents on ice during use: Minimize the time reagents spend at room temperature.
Q4: I've cleaned my bench with 70% ethanol, but my blanks still show contamination. Why? A4: Ethanol is a disinfectant that kills cells but is ineffective at degrading and removing environmental DNA. Trace amounts of DNA can persist on surfaces after ethanol cleaning and contaminate sensitive reactions. For DNA removal, you must use a dedicated DNA decontamination reagent like freshly diluted bleach (1%) or Virkon (1%), which actively degrade DNA [14].
Q5: What type of respirator is recommended for procedures that generate aerosols? A5: For aerosol-generating procedures (AGPs), a fit-tested N95 respirator or a higher level of protection, such as a Powered Air-Purifying Respirator (PAPR), is recommended. Surgical masks are designed to protect the environment from the wearer and do not provide substantial protection from inhaled aerosols [52] [53].
Research Reagent Solutions
Table 2: Essential Materials for DNA Contamination Control
| Item | Function | Key Considerations |
|---|---|---|
| Aerosol-Resistant Pipette Tips | Prevents cross-contamination between samples by blocking aerosols from entering the pipette shaft. | Essential for all PCR setup and handling of low-biomass samples. Use sterile, nuclease-free tips [12]. |
| Sodium Hypochlorite (Bleach) | Effective chemical decontaminant that degrades amplifiable DNA on surfaces and equipment [14]. | Must be freshly diluted (1% is effective). Can be corrosive; may need to be rinsed with water or ethanol after use [14]. |
| Virkon | Oxidizing agent used for decontaminating surfaces and removing DNA [14]. | Effective at 1% concentration; less corrosive than bleach but may react with halides [14]. |
| DNA-Decontaminating Wipes | Pre-saturated wipes for convenient and effective cleaning of instruments and workspaces. | Ensure wipes are saturated with a proven DNA-removing agent like hypochlorite or Virkon [14]. |
| Nuclease-Free Water | Used to prepare solutions and as a negative control; free of nucleases that could degrade samples. | Critical for all molecular biology applications. Verify nuclease-free status [51]. |
| UV Crosslinker or Cabinet | Uses ultraviolet C (UV-C) light to sterilize surfaces and degrade DNA in reagents and plasticware. | Useful for decontaminating items that cannot be treated with liquid chemicals [12]. |
Experimental Workflow for DNA Contamination Control
The following diagram illustrates a comprehensive workflow for preventing and addressing DNA contamination in the laboratory.
Maintaining a clean and organized laboratory is fundamental to personnel safety, operational efficiency, and the integrity of scientific data [54]. Within the specific context of research aimed at removing DNA contamination from laboratory surfaces and instruments, a robust culture of cleanliness transcends mere tidiness. It becomes a critical defense against the introduction of false-positive results, skewed data, and failed experiments. This technical support center provides targeted guidance, troubleshooting, and standard protocols to help researchers, scientists, and drug development professionals establish and maintain an environment where DNA contamination is systematically controlled and eliminated.
Core Principles of Laboratory Cleanliness and Decontamination
A foundational understanding of decontamination is essential for effective DNA contamination control. The process is multi-staged, progressing from basic cleaning to sterilization.
- Cleaning: This is the essential first step, involving the physical removal of dirt, residues, and organic materials (including DNA) using water, detergents, and mechanical action [55]. It eliminates the medium in which contaminants can persist.
- Decontamination: This broader term refers to the process of making an item safe by neutralizing harmful biological agents [55].
- Sterilization: This is the highest level of decontamination, achieving the complete destruction of all microbial life, including bacterial spores [55]. While crucial for microbial control, some sterilization methods (e.g., autoclaving) are also effective in degrading DNA.
It is a critical error to skip cleaning before sterilization or disinfection, as dirt and residues can shield microorganisms and nucleic acids from the decontaminating agent, leading to incomplete decontamination [55].
Standard Operating Procedures (SOPs) for DNA Decontamination
Comprehensive Workflow for Surface and Instrument Decontamination
The following diagram outlines the logical workflow for decontaminating laboratory surfaces and instruments to remove DNA contamination, integrating both chemical and physical methods.
Detailed Step-by-Step Protocol
Initial Cleaning
- Objective: Physically remove all visible dirt, dust, and biological residues.
- Methodology: Disconnect electrical equipment. Using lint-free wipes, soft brushes, or non-abrasive sponges, scrub surfaces and instruments with a neutral-pH, laboratory-grade detergent (e.g., Alconox) [55]. This mechanical action is crucial for disrupting biofilms and removing the bulk of contaminating DNA.
- Rinsing: Thoroughly rinse with distilled or deionized water to eliminate any detergent residue that could interfere with subsequent steps [55].
DNA-Specific Decontamination (Chemical or Physical)
- Objective: Degrade or destroy residual DNA to below detectable levels.
- Methodology - Chemical: Apply a chemical agent effective against nucleic acids.
- Sodium Hypochlorite (Bleach): A 10% (v/v) solution is highly effective at degrading DNA. Ensure a contact time of at least 15-30 minutes. Note: Corrosive to some metals; requires thorough rinsing.
- Hydrogen Peroxide: Can be used as a liquid solution or vaporized hydrogen peroxide (VHP) for complex equipment [55]. Effective against a broad spectrum of contaminants, including DNA.
- Methodology - Physical:
- UV-C Irradiation: Expose surfaces to ultraviolet light at 254 nm. UV-C photons induce thymine dimers in DNA, rendering it non-amplifiable [55]. Effective for biosafety cabinets, benchtops, and tools. Ensure sufficient exposure time and that surfaces are directly visible to the light source.
- Autoclaving: Use moist heat at 121°C and 15 psi for 20-60 minutes. The combination of heat and pressure effectively fragments DNA. Ideal for heat-resistant materials like glass and stainless steel [55].
Final Processing
- Rinsing and Neutralization: After chemical treatment, rinse thoroughly with sterile deionized water to remove residues [55]. For bleach, a final rinse with 70% ethanol can help neutralize any remaining hypochlorite and accelerate drying.
- Drying: Allow items to air-dry completely in a clean, dust-free environment or a dedicated drying cabinet to prevent recontamination [55].
- Validation and Documentation: Record the date, method, equipment ID, personnel involved, and results (e.g., PCR test for DNA) in a decontamination log for traceability and compliance [55].
The Scientist's Toolkit: Essential Reagents and Equipment
The table below details key materials and equipment essential for implementing an effective DNA decontamination protocol.
Table 1: Key Research Reagent Solutions for DNA Decontamination
| Item | Function / Explanation |
|---|---|
| Neutral pH Detergents (e.g., Alconox) | Laboratory-grade detergents that remove organic and inorganic residues without causing corrosion to sensitive equipment [55]. |
| Sodium Hypochlorite (Bleach) | A potent oxidizing agent that chemically degrades nucleic acids. A 10% solution is standard for surface decontamination. |
| 70% Isopropyl Alcohol | Effective for quick disinfection and rinsing. While excellent for lipids and microbes, it is less effective than bleach for degrading DNA and can fix DNA to surfaces if used alone. |
| Hydrogen Peroxide | A broad-spectrum disinfectant and sterilant that works by producing destructive hydroxyl radicals. Effective against DNA, proteins, and pathogens [55]. |
| DNase I Enzyme | An endonuclease that cleaves DNA into short fragments. Useful for applications where chemical residues must be avoided (e.g., on specific instrument parts). |
| UV-C Lamp (254 nm) | Generates ultraviolet light that damages DNA by forming thymine dimers, preventing amplification in PCR [55]. |
| Autoclave | Uses pressurized steam to sterilize and fragment DNA on heat-resistant instruments like glassware and stainless steel [55]. |
| Ultrasonic Cleaner | Uses cavitation to physically dislodge contaminants from hard-to-reach areas in complex instruments before chemical decontamination [55]. |
| Sterile, Lint-Free Wipes | Essential for applying cleaning and decontamination solutions without introducing additional particulate or fiber contamination. |
Troubleshooting Guides and FAQs
This section addresses specific issues users might encounter during experiments related to DNA contamination.
Troubleshooting Common DNA Decontamination Problems
Table 2: Troubleshooting Guide for DNA Decontamination Issues
| Problem | Possible Cause | Solution |
|---|---|---|
| Persistent DNA contamination detected by PCR after decontamination. | Shielding by biofilms or residue: Incomplete initial cleaning left organic matter that protected DNA.Ineffective contact time: Decontaminant was not in contact with the surface long enough.Incorrect concentration: Decontamination solution was too dilute. | Enhance the mechanical cleaning step. Ensure surfaces are visibly clean before chemical/UV treatment. Validate and extend the contact time for chemical agents. Prepare fresh decontamination solutions at the correct concentration. |
| Corrosion of metal instruments after decontamination. | Prolonged exposure to corrosive agents (e.g., bleach).Lack of neutralization or final rinse. | Reduce contact time with corrosive chemicals. Always perform a thorough final rinse with sterile water or ethanol. Consider alternative decontaminants like hydrogen peroxide for sensitive equipment. |
| Inconsistent decontamination across a large surface. | Uneven application of chemical solutions."Cold spots" in a UV irradiation cabinet where light intensity is low. | Apply chemicals evenly using sprayers and ensure the surface remains wet for the entire contact time. Regularly calibrate UV lamps and rotate items under irradiation to ensure all surfaces receive adequate exposure. |
| Negative control contamination in cell culture. | Aerosol contamination from nearby PCR work.Contaminated reagents or consumables. | Physically separate pre- and post-PCR areas. Use dedicated equipment and laminar flow hoods for cell culture. Aliquot reagents and use UV-irradiated consumables. |
Frequently Asked Questions (FAQs)
Q1: What is the single most important step in preventing DNA contamination? A: While the entire SOP is critical, the initial physical cleaning is paramount. Removing the bulk of contaminants physically dramatically increases the efficacy of subsequent chemical or physical DNA-destruction steps. Skipping or rushing cleaning is a primary cause of decontamination failure [55].
Q2: Can I use 70% ethanol for DNA decontamination? A: No, 70% ethanol is not reliable for DNA decontamination. While it is an effective disinfectant for bacteria and viruses, it can precipitate and fix DNA to surfaces rather than degrade it. For dedicated DNA removal, sodium hypochlorite (bleach) or hydrogen peroxide are the recommended chemical agents.
Q3: How often should we decontaminate general laboratory surfaces? A: Frequency should be risk-based. General work surfaces should be cleaned and decontaminated daily. Surfaces in PCR setup areas or where DNA samples are handled should be decontaminated both before and after work sessions. Biosafety cabinets should be decontaminated after each use and validated on a scheduled basis (e.g., weekly or monthly) [55].
Q4: Does autoclaving effectively destroy DNA? A: Yes, standard autoclaving conditions (121°C, 15-20 minutes) are sufficient to fragment and degrade most DNA to a point where it is not amplifiable by PCR. However, for extremely high concentrations of DNA (e.g., from plasmid preps), a longer cycle or additional chemical pre-treatment may be necessary.
Q5: How can we validate the effectiveness of our DNA decontamination SOP? A: Validation can be performed by environmental monitoring. After decontamination, swab critical surfaces (e.g., bench tops, pipettes, instrument handles) and elute the swabs. Test the eluate using a sensitive PCR assay (e.g., targeting a ubiquitous gene like 16S rRNA or human beta-actin) with no-template controls. Consistent negative PCR results indicate effective decontamination.
Validation and Comparative Analysis: Measuring Decontamination Efficacy
Validating the cleanliness of laboratory surfaces and instruments is a critical requirement in life science research, particularly in sensitive fields like drug development. The presence of trace amounts of DNA contamination can compromise experiments, leading to false positives and unreliable data in applications such as reverse transcription quantitative PCR (RT-qPCR). This technical support center provides comprehensive guidance on using qPCR and swab tests to quantify and eliminate DNA contamination, ensuring the integrity of your research outcomes.
Frequently Asked Questions (FAQs)
Q1: Why is genomic DNA (gDNA) contamination a particular concern for RT-qPCR experiments? gDNA contamination is an inherent problem during RNA purification that can lead to non-specific amplification and aberrant results in RT-qPCR. Without proper correction, gDNA can contribute significantly to the total signal, potentially accounting for as much as 60% of the signal in some cases, thereby compromising data accuracy [56].
Q2: What is the typical DNA recovery efficiency of swabs used for surface sampling? Recovery efficiency varies significantly by swab type. Studies have shown that a substantial portion of DNA is not extracted from the swab, with some swab types effectively binding DNA. The efficiency of different swab types typically never exceeds 50%, with nylon flocked swabs (such as the 4N6FLOQSwab used for buccal sampling) generally demonstrating the best performance [57].
Q3: What controls should I include in my qPCR assay to monitor for contamination? The use of No Template Controls (NTCs) is essential. NTC wells contain all qPCR reaction components except the DNA template. If contamination is present, you will observe amplification in these wells. Consistent Ct values across NTCs may indicate reagent contamination, while random amplification suggests environmental aerosol contamination [9].
Q4: Besides swabbing, what are key laboratory practices to prevent DNA contamination in qPCR? Key practices include:
- Physical Separation: Establish separate, dedicated areas for pre-amplification (sample preparation, qPCR setup) and post-amplification processes (analysis of qPCR products) with dedicated equipment and supplies [9].
- Decontamination: Regularly clean work surfaces and equipment with a 10-15% fresh bleach solution, followed by wiping with de-ionized water [9].
- UNG Enzyme: Use a qPCR Master Mix containing uracil-N-glycosylase (UNG) and dUTP in place of dTTP. UNG enzymatically degrades carryover contamination from previous PCR amplifications before thermocycling begins [9].
Troubleshooting Guides
Problem: Consistently High Background Signal in No Template Controls (NTCs)
Potential Cause: Contamination of reagents, master mix, or primers. Solution:
- Replace Reagents: Prepare fresh aliquots of all reagents, including water, buffers, and master mix.
- Decontaminate Workspace: Thoroughly clean pipettes, centrifuges, and work surfaces with a fresh 10-15% bleach solution [9].
- Use Filter Tips: Always use aerosol-resistant filtered pipette tips to prevent cross-contamination [9].
- Implement UNG: Incorporate uracil-N-glycosylase (UNG) into your qPCR protocol to degrade contaminants from prior amplification products [9].
Problem: Low or Inconsistent DNA Recovery from Swab Samples
Potential Cause: Inefficient elution or suboptimal swab type. Solution:
- Swab Selection: Switch to nylon flocked swabs, which have been shown to provide superior recovery efficiency compared to cotton, foam, polyester, or rayon swabs [57].
- Elution Optimization: Ensure adequate agitation or vortexing during the elution step. Consider increasing the elution buffer volume or incubation time.
- Validation: Spike a known quantity of control DNA onto the swab type you are using and process it through your entire protocol to determine the actual recovery rate for your method [57].
Problem: Suspected gDNA-Derived Signals Skewing RT-qPCR Data
Potential Cause: gDNA contamination in RNA samples. Solution:
- DNase Treatment: Treat your purified RNA samples with DNase I during the RNA purification process.
- ValidPrime Assay: Implement a method like ValidPrime, which uses a gDNA-specific assay targeting a non-transcribed locus to measure the gDNA contribution in RT(+) samples. This allows for precise computational correction of the data, effectively removing the gDNA-derived signal [56].
Experimental Protocols & Data
Standard Protocol: Surface Sampling and qPCR Analysis for DNA Contamination
Workflow Overview: The following diagram illustrates the complete workflow for validating surface cleanliness, from sampling to final analysis.
Detailed Methodology:
Surface Sampling:
- Swab Selection: Use a nylon flocked swab for optimal recovery [57].
- Moistening: Moisten the swab with a compatible buffer (e.g., TE buffer or a proprietary elution solution). Avoid excessive wetting.
- Swabbing Technique: Swab a defined surface area (e.g., 10x10 cm) using a consistent pattern, applying firm pressure, and rotating the swab to ensure all surfaces contact the sample area.
- Elution: Immediately place the swab into a tube containing elution buffer. Vortex vigorously for 30-60 seconds to release captured material. Squeeze the swab against the tube walls to recover as much liquid as possible before discarding the swab [57] [58].
DNA Extraction and Purification:
- Extract DNA from the eluate using a commercial DNA extraction kit. Automated nucleic acid extraction systems can improve consistency and throughput [58].
- Elute the purified DNA in a low-EDTA TE buffer or nuclease-free water compatible with downstream qPCR.
qPCR Setup and Analysis:
- Assay Design: Use a qPCR assay specific to the type of DNA you are monitoring (e.g., a highly repetitive Alu-equivalent sequence for human DNA, or a specific gene for a model organism) [59].
- Reaction Setup: Prepare qPCR reactions according to manufacturer protocols, using an appropriate master mix. Include the following essential controls in every run [60] [9]:
- No Template Control (NTC): Contains all reagents except sample DNA, to detect reagent or environmental contamination.
- Positive Control: Contains a known quantity of the target DNA sequence.
- Standard Curve: A dilution series of known DNA concentrations for absolute quantification and determination of assay efficiency, LOD, and LOQ.
- Data Interpretation: Calculate the amount of DNA recovered from the surface based on the standard curve. Account for the recovery efficiency of your swab and method to back-calculate the original contamination level on the surface.
Key Validation Parameters for qPCR Assays
When validating a qPCR method for cleanliness testing, several performance parameters must be established. The table below summarizes these critical parameters and typical target values, drawing from validation data for DNA detection assays.
Table 1: Key Validation Parameters for qPCR-based Cleanliness Assays
| Parameter | Description | Target / Typical Value | Reference Method |
|---|---|---|---|
| Limit of Detection (LOD) | The lowest concentration of DNA that can be reliably detected. | As low as 3 fg/µL for a CHO host cell DNA assay [59]. | Probit analysis on diluted standards; lowest concentration with ≥95% detection rate [60] [59]. |
| Limit of Quantification (LOQ) | The lowest concentration of DNA that can be accurately quantified. | 0.3 pg/reaction for a CHO host cell DNA assay [59]. | The lowest point on the standard curve with acceptable accuracy (e.g., spike recovery of 80-120%) and precision (CV < 25%) [59]. |
| Specificity | The ability of the assay to only amplify the target DNA sequence. | No amplification observed with non-target genomes (e.g., E. coli, yeast, human, Vero cell) [59]. | Test against DNA from related but non-target species or cells. In silico BLAST analysis of primer/probe sequences [59]. |
| Accuracy (Spike Recovery) | The closeness of the measured value to the true value. | 82.3% - 105.7% recovery [59]. | Spike known amounts of target DNA into the sample matrix and measure the percentage recovered. |
| Precision (Repeatability) | The agreement between replicate measurements. | Intra-assay CV of 0.065–0.452%; Inter-assay CV of 0.471–1.312% [59]. | Measure multiple replicates of a sample within a single run (intra-assay) and across different runs/days (inter-assay). |
| Linearity | The ability of the assay to provide results directly proportional to the DNA concentration. | R² (coefficient of determination) > 0.98 [59]. | Analyze a dilution series of DNA standards and evaluate the R² of the standard curve. |
Comparison of Swab Recovery Efficiencies
Selecting the right swab is crucial for accurate results. The following table summarizes findings from a study on the extraction and recovery efficiency of pure DNA for different swab types.
Table 2: Comparison of DNA Recovery Efficiencies for Different Swab Types
| Swab Type | Reported Performance | Key Characteristics |
|---|---|---|
| Nylon Flocked | Best performance among tested types [57]. | Specialized design for sample collection; allows for high elution efficiency. |
| Rayon | Efficiency never exceeds 50% [57]. | Common material; lower recovery efficiency. |
| Polyester | Efficiency never exceeds 50% [57]. | Common material; lower recovery efficiency. |
| Foam | Efficiency never exceeds 50% [57]. | Absorbent material; may bind DNA effectively. |
| Cotton | Efficiency never exceeds 50% [57]. | Traditional material; can have low and variable recovery. |
The Scientist's Toolkit: Research Reagent Solutions
Table 3: Essential Materials for Cleanliness Validation with qPCR and Swabs
| Item | Function / Description | Examples / Considerations |
|---|---|---|
| Nylon Flocked Swabs | Optimal sample collection from surfaces. Designed to release a high percentage of captured material. | 4N6FLOQSwabs [57]. |
| qPCR Master Mix with UNG | Enzymatic master mix for amplification. Contains Uracil-N-Glycosylase (UNG) to prevent carryover contamination from previous PCR products. | Various commercial suppliers [9]. |
| DNA Standards | A dilution series of DNA with known concentration. Essential for generating a standard curve for absolute quantification and determining LOD/LOQ. | Synthetic nucleic acid standards, genomic DNA [60] [59]. |
| Nucleic Acid Extraction Kit | For purifying DNA from the swab eluate. Removes inhibitors and concentrates the sample for reliable qPCR. | Automated systems (e.g., Maelstrom 4800) or manual kits [58] [59]. |
| ValidPrime Assay | A specialized method to correct RT-qPCR data for signals derived from genomic DNA contamination. | Targets a non-transcribed genomic locus to measure and subtract gDNA-derived signal [56]. |
Advanced Method: The ValidPrime Approach for RT-qPCR
For RT-qPCR experiments where residual gDNA is a major concern, the ValidPrime method offers a sophisticated solution beyond simple DNase treatment.
Concept: ValidPrime uses a gDNA-specific ValidPrime Assay (VPA) that targets a non-transcribed locus to directly measure the gDNA content in an RT(+) sample. This measured gDNA signal is then used to correct the data from the gene of interest (GOI), accurately estimating the RNA-derived component [56].
Workflow: The following diagram contrasts the standard approach with the advanced ValidPrime correction method.
Advantages:
- Accuracy: Corrects with high precision for both exogenous and endogenous gDNA, even when gDNA contributes a large portion of the total signal [56].
- Efficiency: Reduces the number of required qPCR control reactions (e.g., RT-minus controls) per sample, offering a cost-efficient alternative [56].
Frequently Asked Questions (FAQs)
1. What is the primary goal of surface decontamination in a research lab? The primary goal is to prevent cross-contamination, which can lead to false positives, skewed experimental results, and a lack of reproducibility. In sensitive fields like drug development and forensic science, this is critical to ensure data integrity and prevent potentially serious clinical or legal implications [43].
2. How do I choose between a chemical disinfectant and a physical method like non-thermal plasma? The choice depends on your specific application and equipment. Chemical disinfectants like bleach are widely accessible and effective for general lab surfaces. In contrast, non-thermal plasma (NTP) is a promising technology for complex equipment as it can reach areas inaccessible to UV-C light and chemicals, and it doesn't involve solvents that could interfere with sensitive systems like vacuum chambers [1].
3. What does a "reduction of approximately 100-fold in DNA concentration" mean for my experiment? This quantitative measure, often reported in decontamination studies, means that the method has reduced the amount of detectable DNA on a surface to one-hundredth (1%) of its original level. For example, if you started with 1,000 nanograms of DNA, after treatment, you would have approximately 10 nanograms remaining. This level of reduction is significant for mitigating cross-contamination risks [1].
4. Are commercial wipes an effective decontamination method? Yes, certain commercial wipes can be highly effective. Recent research evaluating nine decontamination methods found that products like Oxivir Tb Wipes and a 10% bleach solution were among the most effective at reducing DNA quantities on various surfaces below the level of detection for subsequent DNA profiling (STR analysis) [61].
5. What is the difference between cleaning and disinfecting in a laboratory context?
- Cleaning physically removes dirt, impurities, and germs from surfaces, reducing their numbers but not necessarily killing them.
- Disinfecting uses chemicals to kill germs on surfaces. This process does not clean dirty surfaces but is most effective after cleaning to further reduce the risk of infection spread [62].
6. What are the key factors in validating a cleaning process for pharmaceutical equipment? A robust cleaning validation program must consider several interconnected factors:
- Equipment characteristics: Construction material, surface finish, and geometry.
- Product/process design: Solubility of residues and cleaning agent compatibility.
- Manufacturing parameters: Processing temperatures and hold times before cleaning.
- Analytical parameters: Sensitivity and specificity of the methods used to detect residues [63].
Troubleshooting Guides
Problem: Persistent DNA Contamination After Routine Cleaning
Possible Causes and Solutions:
- Cause 1: Inadequate method for the surface type.
- Solution: Consult comparison tables (see below) to select a method proven effective for your specific equipment material (e.g., metal, plastic, electronic). For complex equipment, consider advanced methods like Non-Thermal Plasma (NTP) [1].
- Cause 2: Insufficient contact time with the disinfectant.
- Solution: Ensure the disinfectant remains wet on the surface for the manufacturer's recommended contact time. For a 10% bleach solution, ensure adequate contact before wiping [62].
- Cause 3: The surface has hard-to-reach areas.
Problem: Inconsistent Decontamination Results Across Different Lab Equipment
Possible Causes and Solutions:
- Cause 1: Using a one-size-fits-all decontamination protocol.
- Cause 2: Variable residue composition.
- Solution: For pharmaceutical QC labs, adopt a "worst-case" validation approach. Use the Active Pharmaceutical Ingredient (API) with the lowest solubility and highest toxicity to validate your cleaning protocol. If it removes this residue effectively, it will likely remove others [64].
- Cause 3: Human error in manual cleaning processes.
Quantitative Data Comparison
The following tables summarize experimental data on the efficacy of various decontamination methods from recent studies.
Table 1: Efficacy of Decontamination Methods on Crime Scene Equipment (Forensic Study)
This study tested various methods on equipment contaminated with blood and saliva, quantifying remaining DNA and the success rate of subsequent DNA profiling (STR analysis) [61].
| Decontamination Method | Reduction in DNA Quantity | STR Profile Result on Decontaminated Surface |
|---|---|---|
| 10% Bleach Solution | Reduced to levels below detection | No profile obtained |
| Oxivir Tb Wipes | Reduced to levels below detection | No profile obtained |
| CaviWipes 1 | Significant reduction | Mostly no profile or partial profiles |
| 5% Virkon S | Significant reduction | Mostly no profile or partial profiles |
| 70% Isopropyl Alcohol Wipes | Moderate reduction | Full DNA profile still possible |
| Lysol Dual Action Wipes | Moderate reduction | Full DNA profile still possible |
| Clorox Wipes | Moderate reduction | Full DNA profile still possible |
| Sani-Hands Instant Hand Sanitizing Wipes | Moderate reduction | Full DNA profile still possible |
| Spartan CDC | Moderate reduction | Full DNA profile still possible |
Table 2: Non-Thermal Plasma (NTP) vs. UV-C Light for DNA Decontamination
A proof-of-concept study compared NTP generated within a vacuum chamber to traditional UV-C light for degrading human DNA [1].
| Method | Key Advantage | Key Disadvantage | Optimal Condition (from study) | DNA Reduction |
|---|---|---|---|---|
| Non-Thermal Plasma (NTP) | Effective out of the line of sight; reaches hidden areas. | Less efficient at degrading cell-free DNA in direct line of sight. | 1 hour, 2 x 10⁻¹ mbar, max power. | ~100-fold reduction |
| UV-C Light | Highly efficient in direct line of sight; reduces cell-free DNA below detection. | Ineffective on surfaces not directly exposed to the light. | N/A | Below limit of detection (for direct exposure) |
Experimental Protocols
Protocol 1: Evaluating Decontamination Methods Using Swab and Rinse Sampling
This methodology is adapted from pharmaceutical cleaning validation and forensic science best practices [64] [61].
1. Objective: To validate the effectiveness of a decontamination procedure in removing DNA-based residues from a specific piece of laboratory equipment.
2. Materials:
- Test substance (e.g., specific DNA solution, blood, saliva)
- Selected decontamination agent (e.g., 10% bleach, commercial wipe)
- Sterile polyester swabs
- Appropriate solvent for residue recovery (e.g., Acetonitrile, Acetone for organic residues)
- Test tubes and pipettes
- Spectrophotometer or qPCR instrument for quantification
3. Procedure:
- Step 1: Contamination. Apply a known quantity of the test substance to a defined surface area (e.g., 100 cm²) of the equipment.
- Step 2: Drying. Allow the contaminant to dry under ambient conditions for a specified time.
- Step 3: Decontamination. Apply the decontamination method according to its SOP, ensuring recommended contact time.
- Step 4: Sampling.
- Swab Method (for accessible surfaces): Pre-wet a swab with solvent. Swab the entire contaminated area systematically with horizontal and vertical strokes. Place the swab in a test tube with solvent and extract for 10 minutes [64].
- Rinse Method (for internal geometries): Rinse the equipment with a defined volume of solvent (e.g., 2 x 5 mL), ensuring it contacts all internal surfaces. Collect the composite rinse sample for analysis [64].
- Step 5: Analysis. Quantify the recovered DNA in the sample using a sensitive method like qPCR (e.g., targeting the ACTB gene) or spectrophotometry [66] [61].
4. Validation: The method is considered validated if the residual DNA is below a pre-defined acceptable limit, such as 10 ppm, or if no STR profile can be generated from the recovered material [64] [61].
Protocol 2: Application of Non-Thermal Plasma (NTP) for DNA Decontamination
This protocol is derived from a proof-of-concept study for decontaminating a Vacuum Metal Deposition chamber [1].
1. Objective: To degrade DNA contaminants in hard-to-reach areas of a specialized chamber or enclosure using NTP.
2. Materials:
- Vacuum chamber capable of achieving low pressure (e.g., ~2 x 10⁻¹ mbar)
- Non-thermal plasma generation system
- Power supply
3. Procedure:
- Step 1: Loading. Place the equipment or samples with known DNA concentrations inside the vacuum chamber.
- Step 2: Vacuum. Evacuate the chamber to the target pressure (e.g., 2 x 10⁻¹ mbar).
- Step 3: Plasma Exposure. Generate the NTP at the predetermined power setting (e.g., maximum power) for the set duration (e.g., 1 hour).
- Step 4: Venting. After treatment, vent the chamber and remove the samples.
4. Analysis: Quantify the remaining DNA using qPCR and compare it to non-treated controls to calculate the fold-reduction (e.g., 100-fold) [1].
Workflow and Strategy Diagrams
Diagram 1: Surface Decontamination Strategy Selection
The Scientist's Toolkit: Key Reagents and Materials
Table 3: Essential Reagents for Decontamination and Validation
This table lists key materials used in the experiments cited in this guide.
| Item | Function/Application | Example from Research |
|---|---|---|
| 10% Bleach Solution | Powerful chemical oxidizer that degrades DNA and inactivates pathogens. | One of the most effective methods for eliminating detectable DNA from crime scene equipment [61]. |
| Oxivir Tb Wipes | EPA-registered disinfectant wipe effective against a broad spectrum of pathogens and DNA. | Showed high efficacy, reducing DNA on surfaces below the detection limit for profiling [61]. |
| Non-Thermal Plasma (NTP) | Advanced decontamination method using ionized gas to liberate DNA-damaging species. | Achieved ~100-fold DNA reduction, especially effective in non-line-of-sight areas of a VMD chamber [1]. |
| Polyester Swabs | Used for direct surface sampling to recover residues for analytical testing. | Recommended for sampling flat or irregular surfaces (e.g., Petri dishes, spatulas) in cleaning validation [64]. |
| Chelex-100 Resin | Used in a rapid, cost-effective boiling method to extract DNA from samples like dried blood spots. | Yielded significantly higher DNA concentrations from DBSs compared to column-based kits, useful for analysis [66]. |
| Acetonitrile & Acetone | Organic solvents used as analytical diluents and rinsing agents to recover difficult API residues. | Selected for their high solubility of poorly water-soluble compounds like Oxcarbazepine in cleaning validation [64]. |
Frequently Asked Questions (FAQs)
Q1: My negative controls are consistently showing DNA. Does this invalidate my entire study?
Not necessarily. The consistent presence of the same contaminant in controls can actually help you identify and subtract background noise from your results. The key is to use this information to distinguish true signal from contamination. Statistical tools like decontam can use the prevalence of sequences in negative controls compared to true samples to classify contaminants [67]. You should investigate the source of the contamination (e.g., reagents, personnel, environment) and intensify cleaning protocols, but the data may still be salvageable with proper reporting of the control results [12].
Q2: I work with high-biomass samples. Are these controls still important? Yes. While contaminants have a proportionally larger impact on low-biomass samples, controls remain critical for quality assurance. In high-biomass samples, contamination primarily affects the detection of low-frequency taxa. These rare sequences can be important in contexts like disease biomarkers, and their false detection can lead to incorrect conclusions. Controls help verify that rare sequences are not artifacts [67].
Q3: How many negative controls should I include in my experiment? The number should be sufficient to capture the variability in potential contamination across your workflow. Best practices recommend including multiple negative controls [12]. At a minimum, you should have at least one control for each batch of samples processed together (e.g., per DNA extraction batch or PCR run) [68]. For large or complex studies, including controls for different reagents, operators, or workstations provides a more robust identification of contamination sources.
Q4: Can I just remove all sequences that appear in my negative controls from my dataset? This is not recommended, as cross-contamination can cause abundant true sequences from your samples to appear in controls [67]. A simple subtraction would remove genuine biological signal. Instead, use statistical methods that consider the frequency and prevalence of sequences in controls versus real samples to make a probabilistic classification of contaminants [67].
Troubleshooting Guides
Problem: Widespread Contamination in Negative Controls
- Potential Cause 1: Contaminated Reagents or Consumables.
- Solution: Use consumables certified to be free of detectable human DNA (e.g., compliant with standards like PAS 377:2023 or ISO 18385) [68]. Aliquot reagents to minimize repeated use of the same stock. Include a reagent-only negative control to pinpoint this source.
- Potential Cause 2: Inadequate Decontamination of Work Surfaces or Equipment.
- Solution: Implement a validated cleaning procedure. Studies show that sodium hypochlorite (bleach) and Virkon are among the most efficient agents for removing DNA from surfaces [22]. See Table 2 for efficiency data. Ensure UV irradiation, if used, is applied for a sufficient duration and at an appropriate wavelength (e.g., 254 nm) [22].
- Potential Cause 3: Personnel-Derived Contamination.
- Solution: Enforce strict use of personal protective equipment (PPE) including gloves, lab coats, and masks. Maintain and regularly consult an elimination database containing DNA profiles of all laboratory personnel to identify the source of human contamination [68].
Problem: Inconsistent DNA Recovery from Surfaces During Sampling
- Potential Cause 1: Suboptimal Swab Type or Swabbing Technique.
- Solution: Choose a swab designed for high DNA release. Research indicates that nylon-flocked swabs can have significantly higher DNA recovery efficiency (~85%) compared to cotton swabs (~55%) when seeded directly [69]. Ensure a consistent and validated swabbing technique is used by all personnel.
- Potential Cause 2: The Influence of the Surface Material.
- Solution: Be aware that recovery efficiency varies by surface. For example, one study found DNA recovery from plastic knife handles was around 55%, but was lower from materials like metal cable [69]. The decontamination efficiency of cleaning agents also varies significantly by surface [22]. Always test your recovery protocol for new surface types.
Problem: Suspected Cross-Contamination Between Samples
- Potential Cause 1: Aerosol Generation During Liquid Handling.
- Solution: Use aerosol-resistant pipette tips. Seal sample plates properly before centrifugation. Automated liquid handlers should be programmed to minimize splashing and the creation of aerosols [68].
- Potential Cause 2: Inadequate Workflow Segregation.
- Solution: Implement a unidirectional workflow. Physically segregate pre-PCR and post-PCR areas, and do not allow personnel or equipment to move from post-PCR to pre-PCR areas without thorough decontamination [68] [12]. Also, consider segregating the processing of high-DNA-yield samples (e.g., blood) from low-yield trace DNA samples [68].
Experimental Protocols & Data
Protocol 1: Evaluating Decontamination Efficiency on Laboratory Surfaces
This protocol is adapted from a study evaluating DNA removal from surfaces [22].
- Surface Preparation: Cut materials of interest (e.g., plastic, metal, painted wood) into standardized pieces. Decontaminate them initially with 20% bleach and UV irradiation to remove background DNA.
- Contamination: Apply a known quantity (e.g., 10 µL) of cell-free DNA or a biological fluid like whole blood to the surface in a marked circle. Allow it to dry completely (e.g., 2 hours).
- Application of Cleaning Agent: Apply the decontamination treatment (e.g., a single spray from a calibrated bottle). Wipe the area uniformly with a dust-free paper.
- Sample Collection: Swab the entire marked area with a moistened cotton or nylon-flocked swab.
- DNA Extraction and Quantification: Extract DNA from the swabs and quantify the recovered DNA using a sensitive method, such as real-time PCR targeting mitochondrial DNA for high sensitivity [22].
- Analysis: Compare the quantity of DNA recovered from cleaned surfaces to the quantity recovered from no-treatment controls to calculate the percentage of DNA removed.
Protocol 2: Implementing a Prevalence-Based Contaminant Identification Workflow
This protocol outlines the use of the decontam R package as described in the literature [67].
- Sequence Data & Control Preparation: Generate your marker-gene or metagenomic sequencing data from both biological samples and negative controls (e.g., extraction blanks).
- Data Import: Create a feature table (e.g., ASV table) and a sample metadata table. Import these into R.
- Run
decontam: Use the "prevalence" method in thedecontampackage. The function requires the feature table and a vector indicating which samples are negatives. - Statistical Classification: The tool calculates a score statistic for each sequence feature by comparing its prevalence in true samples versus negative controls using a chi-square test. Features with a higher prevalence in negative controls are classified as contaminants [67].
- Result Application: Filter the contaminants identified by
decontamfrom your primary dataset before downstream ecological analysis.
Table 1: DNA Recovery Efficiencies of Different Sampling Methods
Data derived from experiments seeding known quantities of DNA onto swabs and surfaces [69].
| Method | Condition | Average Recovery Efficiency | Notes |
|---|---|---|---|
| Direct Extraction | From solution | ~81.5% | Baseline extraction efficiency of the kit |
| Cotton Swab | Seeded with DNA | ~55.8% | Lower efficiency of DNA release from swab |
| Nylon-Flocked Swab | Seeded with DNA | ~84.6% | Superior design for DNA release |
| Swabbing | From plastic knife handle | ~55% | Efficiency varies by surface type |
Table 2: Efficiency of Cleaning Agents for DNA Decontamination
Percentage of recovered DNA after cleaning contaminated surfaces. Lower values indicate better decontamination. Data summarized from [22].
| Cleaning Agent | Cell-Free DNA on Plastic | Cell-Free DNA on Metal | Blood on Plastic |
|---|---|---|---|
| No Treatment (Control) | 100% | 100% | 100% |
| 70% Ethanol | ~35% | ~20% | ~60% |
| UV Radiation | ~25% | ~15% | ~50% |
| 1% Virkon | < 1% | < 0.5% | ~0.8% |
| Sodium Hypochlorite (0.4-0.54%) | < 0.3% | < 0.3% | < 5% |
| 10% Trigene | < 0.3% | < 0.3% | ~10% |
Research Reagent Solutions
Table 3: Essential Materials for DNA Contamination Control
A toolkit of key reagents and consumables for effective contamination management.
| Item | Function & Rationale |
|---|---|
| DNA-Free Certified Consumables (tubes, tips, plates) | Prevents introduction of contaminating DNA during manufacturing; compliant with standards like ISO 18385 [68]. |
| Nylon-Flocked Swabs | Provides superior recovery and release of DNA from surfaces compared to traditional cotton swabs [69]. |
| Sodium Hypochlorite (Bleach) | A highly effective chemical for degrading and removing DNA from laboratory surfaces and equipment [22] [12]. |
| qPCR Reagents & Human-Specific Assays | Enables highly sensitive detection and quantification of human DNA contamination for monitoring laboratory environments [70]. |
| Cell-Free DNA Tracer | Purified human DNA used as a positive control in decontamination efficiency experiments [22]. |
decontam R Package |
A statistical software tool for identifying contaminant sequences in sequencing data based on prevalence in negative controls or sample DNA concentration [67]. |
Workflow and Decision Diagrams
Control Implementation Workflow
Troubleshooting Contamination Sources
Frequently Asked Questions
Q1: What are the most critical updated standards for forensic DNA testing in 2025? The FBI has approved revised Quality Assurance Standards (QAS) for both Forensic DNA Testing Laboratories and DNA Databasing Laboratories, effective July 1, 2025. These updates provide crucial clarification on implementing Rapid DNA technology for forensic samples and for processing qualifying arrestees at booking stations. Laboratories should prepare by reviewing pre-issuance copies and comparison tables from SWGDAM [71].
Q2: Our laboratory is seeing sporadic low-level DNA contamination in extraction blanks. What are the likely sources? Contemporary DNA extraction kits are highly efficient, which increases the detection of previously unnoticed contamination. Primary sources include:
- Laboratory consumables: Sample tubes with compromised seals and the choice between adhesive plate films versus strip caps can significantly impact liquid and DNA transfer [37].
- Reagent "kitome": The reagents themselves contain trace microbial DNA, with profiles that vary by brand and even between manufacturing lots of the same brand [72].
- Personnel and environment: Direct transfer from skin, lab surfaces, and co-processed samples remains a persistent risk [37].
Q3: How can we validate that our DNA decontamination procedures for surfaces are effective? Incorporate a validation protocol using fluorescein solution. This dye fluoresces under an alternate light source, allowing you to visually track potential liquid transfer during simulated lab procedures. This method can identify failures like leakage from sample tubes during lysis or aerosol dispersal during plate seal removal [37].
Q4: Is accreditation different for a forensic toxicology lab versus a clinical lab? Yes. In 2025, specific programs like the CAP Forensic Drug Testing Accreditation Program are designed for the unique needs of forensic labs, emphasizing robust chain of custody, annual method validation, and secondary review of confirmatory tests. Notably, some programs now also inspect and accredit forensic toxicology labs that perform clinical toxicology, certifying their compliance with CLIA regulations [73].
Q5: We are implementing a new clinical mNGS test. How do we manage background DNA in reagents? For metagenomic next-generation sequencing (mNGS), managing reagent contamination is essential for accurate diagnosis.
- Run Extraction Blanks: Include negative controls with molecular-grade water in every sequencing run to define the background "kitome" [72].
- Profile by Lot: Document the contaminant profile for each new lot of extraction reagents, as it can vary significantly [72].
- Use Bioinformatics: Employ tools like Decontam to statistically identify and remove contaminant sequences found in your negative controls from your clinical samples [72].
Troubleshooting Guides
Problem: Inconsistent Contamination in Extraction Blanks
Investigation and Resolution
| Step | Action | Rationale & Reference |
|---|---|---|
| 1. Identify Pattern | Check if contamination correlates with a new lot of extraction kits. | Reagent microbiota profiles are brand and lot-specific [72]. |
| 2. Inspect Consumables | Check for damaged tube seals or rim compromises, especially with specific chemistries like PrepFiler. | Damaged seals on LySep columns cause leakage and crusting, facilitating transfer [37]. |
| 3. Review Technique | Audit the removal of seals from 96-well PCR plates. | Adhesive films pose a lower transfer risk than removable strip caps due to liquid adhesion [37]. |
| 4. Update Protocol | Implement the use of fluorescein dye to visualize liquid transfer during your specific workflow. | Fluorescein provides visual confirmation of spillage, leakage, or aerosol events not otherwise visible [37]. |
Problem: Aseptic Technique Failures Leading to Profile Mixtures
Investigation and Resolution
| Step | Action | Rationale & Reference |
|---|---|---|
| 1. Glove Change Frequency | Enforce mandatory glove changes after handling high-DNA samples and when moving between pre-PCR and post-PCR areas. | This minimizes secondary DNA transfer, a key risk for low-level contamination [37]. |
| 2. Surface Decontamination | Use a DNA decontamination solution on all work surfaces and equipment before and after use. | These solutions neutralize residual nucleic acids to prevent false positives [74]. |
| 3. Workflow Segregation | Verify that your lab maintains strict physical separation of pre-amplification and post-amplification activities. | This is a core requirement of quality standards like ISO/IEC 17025 to prevent amplicon contamination [75]. |
| 4. Equipment Maintenance | Check and maintain automated liquid handlers and other equipment per manufacturer schedules. | UV light sources in sterilizers can degrade, and chemical vapor systems can leak, leading to decontamination failures [74]. |
The following table summarizes key accreditation standards and their relevance to DNA contamination control.
| Standard / Accrediting Body | Key Focus | Contamination Control Relevance |
|---|---|---|
| FBI QAS (Effective July 2025) [71] | Forensic & Databasing DNA Labs | Mandates standards for implementing Rapid DNA and general QA procedures that inherently control for contamination. |
| ISO/IEC 17025 (via ANAB) [75] | General lab competence & impartiality | Provides the framework for the entire quality management system, including validation, personnel competence, and corrective actions. |
| CAP Forensic Drug Testing [73] | Forensic toxicology; now includes CLIA compliance | Emphasizes sample integrity, chain of custody, and annual validation of all methods, which underpins contamination tracking. |
| OSAC Registry Standards [76] | Specific forensic disciplines | Includes over 225 standards for disciplines like biology, providing best practices for evidence handling and analysis. |
Experimental Protocol: Visualizing Liquid Transfer with Fluorescein
This protocol, adapted from a 2024 study, provides a methodology to visually identify points of potential DNA cross-contamination during laboratory workflows by using fluorescein dye [37].
Reagent Preparation
- Create a fluorescein working solution by dissolving 60 mg of Fluorescein powder in 30 mL of sterile water. Confirm fluorescence using a crime-lite or similar ALS at 450 nm with appropriate goggles [37].
Simulation of Laboratory Processes
- Lysis Step Simulation: Pipette recommended volumes of lysis buffer mixed with fluorescein into the consumables being tested (e.g., PrepFiler LySep columns, Investigator Lyse&Spin Baskets, AutoLys tubes). Process them according to the standard protocol, including incubation at recommended temperatures (e.g., 70°C) [37].
- Seal Removal Simulation: Apply the fluorescein solution to a 96-well plate. Seal the plate using the films or strip caps in use. Then, remove the seals as normally done in the protocol [37].
Analysis and Visualization
- Under the alternate light source, inspect all equipment surfaces, tube exteriors, rims, caps, and the undersides of plate seals for fluorescent signal.
- The presence of fluorescence indicates unwanted liquid transfer. Document the locations, as these are potential sites for DNA cross-contamination [37].
The Scientist's Toolkit: Key Research Reagent Solutions
| Item | Function in Contamination Control |
|---|---|
| Fluorescein Dye | A fluorescent tracer used to visually map the potential for liquid—and thus DNA—transfer during laboratory processes that are otherwise invisible to the naked eye [37]. |
| DNA/RNA Decontamination Solution | Chemical solutions designed to neutralize or degrade residual nucleic acids on laboratory surfaces, instruments, and equipment to prevent false-positive results [74]. |
| Extraction Blanks (Molecular-Grade Water) | A negative control used in every extraction batch to monitor the presence of contaminating DNA derived from the reagents, environment, or process itself [72]. |
| ZymoBIOMICS Spike-in Control | A defined microbial community used as a positive control for extraction and sequencing, helping to distinguish true signals from background contamination in mNGS workflows [72]. |
| Adhesive Plate Sealing Films | These films, when compared to removable strip caps, have been shown to reduce the risk of liquid aerosol and transfer during the sealing/unsealing of PCR plates [37]. |
Workflow: DNA Contamination Investigation
The diagram below outlines a systematic workflow for investigating and addressing DNA contamination issues in the laboratory, based on the FAQs and troubleshooting guides.
Conclusion
Effective DNA decontamination is not a single action but a comprehensive strategy integral to data integrity in biomedical research and clinical applications. The key takeaways underscore that sodium hypochlorite (bleach) and specialized commercial reagents consistently demonstrate high efficacy, though the optimal method is highly dependent on the surface material and the nature of the contaminating DNA. A successful program combines validated chemical and physical methods with rigorous laboratory design, unwavering adherence to SOPs, and a proactive culture of contamination awareness. Future directions point toward the development of faster, non-destructive, and portable decontamination technologies to keep pace with increasingly sensitive analytical methods. Furthermore, the adoption of standardized reporting and validation frameworks, as championed in low-biomass microbiome research, will be crucial for enhancing reproducibility and trust in scientific findings across the life sciences.
References
- 1. The use of non-thermal plasma for DNA decontamination ... [https://www.sciencedirect.com/science/article/pii/S037907382500091X]
- 2. Seven tips for avoiding DNA contamination in your PCR [https://www.takarabio.com/about/bioview-blog/tips-and-troubleshooting/avoid-dna-contamination-in-pcr?srsltid=AfmBOorGm-v8cFsh_zqPCitSDuosqVs4YAxl6av9QUGZor_iC0C8amVU]
- 3. Forensic trace DNA: a review | Investigative Genetics | Full Text [https://investigativegenetics.biomedcentral.com/articles/10.1186/2041-2223-1-14]
- 4. The Impact of False or Misleading Forensic Evidence on ... [https://nij.ojp.gov/topics/articles/impact-false-or-misleading-forensic-evidence-wrongful-convictions]
- 5. Contamination incidents in the pre-analytical phase of ... [https://pubmed.ncbi.nlm.nih.gov/28843849/]
- 6. How should I purify my samples? How should I remove DNA ... [https://dnatech.ucdavis.edu/faqs/how-should-i-purify-my-samples-how-should-i-remove-dna-or-rna-contamination]
- 7. Helping to distinguish primary from secondary transfer ... [https://www.sciencedirect.com/science/article/abs/pii/S1872497317300376]
- 8. Wet Lab Protocols Matter: Choice of DNA Extraction and ... [https://pmc.ncbi.nlm.nih.gov/articles/PMC12550470/]
- 9. Avoiding Contamination | Thermo Fisher Scientific - ES [https://www.thermofisher.com/us/en/home/life-science/pcr/real-time-pcr/real-time-pcr-learning-center/real-time-pcr-basics/good-laboratory-practice-avoid-contamination-qpcr-experiments.html]
- 10. Strategies to Mitigate Common DNA Contamination in ... [https://www.cd-genomics.com/resource-dna-contamination-in-microbial-sequencing.html]
- 11. Bacterial DNA Contamination of Commercial PCR Enzymes [https://pmc.ncbi.nlm.nih.gov/articles/PMC12029200/]
- 12. Guidelines for preventing and reporting contamination in ... [https://www.nature.com/articles/s41564-025-02035-2]
- 13. Controlling for contamination in qPCR testing - LGC [https://blog.biosearchtech.com/how-to-control-for-contamination-in-qpcr-testing]
- 14. Cleaning protocols in forensic genetic laboratories - PMC [https://pmc.ncbi.nlm.nih.gov/articles/PMC11306349/]
- 15. Evaluation of Different Cleaning Strategies for Removal ... [https://www.mdpi.com/2073-4425/13/1/162]
- 16. How Contamination Happens in Labs (and How to Prevent It) [https://www.msesupplies.com/blogs/news/how-contamination-happens-in-labs-and-how-to-prevent-it?srsltid=AfmBOoriagvBnXFUIS2IhTHu6uvpMw_YmDRYOiOQjfrXElEZpjxPNSj0]
- 17. Tracking down the sources of experimental contamination in ... [https://pmc.ncbi.nlm.nih.gov/articles/PMC4311479/]
- 18. How to Avoid Contamination in Lab Samples [https://www.aurorabiomed.com/how-to-avoid-contamination-in-lab-samples/?srsltid=AfmBOoog5jIrnYqHYk-kXgs_zZG40J0yg6-ghdBj_Mwke3dP_0xtvZAD]
- 19. Quick Guide: 8 Commonly Used Methods for DNA Extraction [https://www.rwdstco.com/quick-guide-8-commonly-used-methods-for-dna-extraction/]
- 20. DNA transfer in packaging: Investigation of mitigation ... [https://pubmed.ncbi.nlm.nih.gov/41235604/]
- 21. DNA Purification | DNA Extraction Methods [https://www.promega.com/resources/guides/nucleic-acid-analysis/dna-purification/]
- 22. Evaluation of Different Cleaning Strategies for Removal ... [https://pmc.ncbi.nlm.nih.gov/articles/PMC8775027/]
- 23. Impact on DNA profiling from blood and saliva [https://www.sciencedirect.com/science/article/pii/S0379073824002871]
- 24. Efficacy of commercial disinfectants Virkon®S and ... [https://www.sciencedirect.com/science/article/pii/S2588933825000263]
- 25. Comparative evaluation of various DNA extraction methods ... [https://bmcbiotechnol.biomedcentral.com/articles/10.1186/s12896-024-00933-7]
- 26. UV irradiation and autoclave treatment for elimination of ... [https://pubmed.ncbi.nlm.nih.gov/20129466/]
- 27. Ultraviolet-based synergistic processes for wastewater ... [https://www.sciencedirect.com/science/article/abs/pii/S0304389423006763]
- 28. Molecular Mechanisms of Ultraviolet Radiation-Induced DNA ... [https://pmc.ncbi.nlm.nih.gov/articles/PMC3010660/]
- 29. The Mechanism of DNA Damage by UV Radiation [https://www.news-medical.net/life-sciences/The-Mechanism-of-DNA-Damage-by-UV-Radiation.aspx]
- 30. Seven tips for avoiding DNA contamination in your PCR [https://www.takarabio.com/about/bioview-blog/tips-and-troubleshooting/avoid-dna-contamination-in-pcr?srsltid=AfmBOopUIpW050hmiQ9iNnka-9OjNXRbAZslx7wjLp-hfBBTuQGZwXBP]
- 31. How to Avoid DNA Contamination: 10 Essential Tips [https://bento.bio/resources/bento-lab-advice/10-essential-tips-to-avoid-dna-contamination-during-extraction-and-amplification/]
- 32. How to Avoid Contamination in Lab Samples [https://www.aurorabiomed.com/how-to-avoid-contamination-in-lab-samples/?srsltid=AfmBOorybhzoNDjckoOHryMuZdrwbAW0fMab4bBkBKPOSLJHzqwus10M]
- 33. How to Clean Laboratory Equipment: Essential Guide for ... [https://pobel.com/en/blog/guides/how-to-clean-laboratory-equipment-essential-guide-for-hygiene-and-accuracy]
- 34. Removing RNase or DNase from Plastic Containers [https://www.coleparmer.com/tech-article/removing-rnase-or-dnase-from-plastic-containers]
- 35. General guidelines and tips for good scientific practice [https://www.lexogen.com/blog/general-guidelines-and-tips-for-good-scientific-practice/]
- 36. Optimizing PCR Workflows: 4 Strategies for Lab Managers [https://www.labmanager.com/optimizing-pcr-workflows-4-strategies-for-lab-managers-33688]
- 37. Demonstration of potential DNA contamination introduced ... [https://www.sciencedirect.com/science/article/abs/pii/S1872497324001534]
- 38. PCR Room Design: Key Principles for Efficient Lab Spaces [https://www.coohom.com/article/pcr-room-design-key-principles-for-efficient-lab-spaces]
- 39. Amplification of the No Template Control (NTC) [https://www.thermofisher.com/us/en/home/life-science/pcr/real-time-pcr/real-time-pcr-learning-center/real-time-pcr-basics/real-time-pcr-troubleshooting-tool/gene-expression-quantitation-troubleshooting/amplification-no-template-control.html]
- 40. Troubleshooting qPCR: Interpreting Amplification Curves [https://blog.biosearchtech.com/thebiosearchtechblog/bid/63622/qpcr-troubleshooting]
- 41. Why Your Negative Control Has a Band (And How to Fix It) [https://www.clyte.tech/post/troubleshooting-pcr-why-your-negative-control-has-a-band-and-how-to-fix-it?srsltid=AfmBOopBTJV7RuOgybUlpFlPVlm14Hb8PuEo3Q350PVNZz-hGnZdOlSW]
- 42. Seven tips for avoiding DNA contamination in your PCR [https://www.takarabio.com/about/bioview-blog/tips-and-troubleshooting/avoid-dna-contamination-in-pcr?srsltid=AfmBOorMyRThDfvQMhYjCJgoZMxTgWZ2TtDAfXkNlxnOKigKmSlY9dBV]
- 43. How Surface Contamination Affects Sequencing Accuracy [https://micronbrane.com/removing-surface-contamination/]
- 44. cDNA-detector: detection and removal of cDNA contamination in... [https://bmcbioinformatics.biomedcentral.com/articles/10.1186/s12859-021-04529-2]
- 45. DNase Treatment & Removal Reagents | Thermo Fisher Scientific - RU [https://www.thermofisher.com/ru/ru/home/references/ambion-tech-support/rna-isolation/tech-notes/a-new-method-to-remove-dna.html]
- 46. Nanopore Tech May Control Contamination in Single- ... [https://www.clinicallab.com/nanopore-tech-may-control-contamination-in-single-molecule-dna-extraction-27373]
- 47. of Removal by Combined UV-EMA... | PLOS One Contaminant DNA [https://journals.plos.org/plosone/article?id=10.1371/journal.pone.0132954]
- 48. The Art of Troubleshooting for Customer Support ... [https://www.helpscout.com/helpu/art-of-troubleshooting-support/]
- 49. Proper Reagent Storage and Handling | Updated 2025 [https://www.stressmarq.com/blog/proper-reagent-storage-and-handling/?srsltid=AfmBOopDqTtfZ-Vau56RFtLC2J8iVTt-MUID5hwgSC5LwxYSuiADdEft]
- 50. Safe Lab Reagent Storage Guide | Best Practices 2025 [https://www.labdisposable.com/best-practices-for-storing-lab-reagents-safe-compliant-and-organized-laboratory-storage/]
- 51. Essential Tips for PCR & DNA Cleanup: Maximize Your ... [https://www.neb.com/en-us/nebinspired-blog/essential-tips-for-pcr-and-dna-cleanup-maximize-your-dna-purity-and-yield?srsltid=AfmBOoo5pAAMwfTnbQ7-j4ImjaCcOL0LdJsVvPdejJbOMJvMQ_MkUYuV]
- 52. Strategy of using personal protective equipment during ... [https://pmc.ncbi.nlm.nih.gov/articles/PMC7247986/]
- 53. Appendix A: Table 4. Recommendations for Application of ... [https://www.cdc.gov/infection-control/hcp/isolation-precautions/appendix-a-table-4.html]
- 54. Laboratory Housekeeping: Ensuring Safety, Efficiency, and ... [https://www.labmanager.com/laboratory-housekeeping-21269]
- 55. Guide to Effective Lab Equipment Decontamination [https://rdlaboratoryequipment.com/blogs/all/guide-to-lab-equipment-decontamination-and-sterilization?srsltid=AfmBOorwLeexp0Yug9UkCTIKNYNNX2wEQQaVyd_4mSQlkMchP3h-ucuM]
- 56. Correction of RT- qPCR data for genomic DNA -derived signals with... [https://pubmed.ncbi.nlm.nih.gov/22228834/]
- 57. The Extraction and Recovery Efficiency of Pure DNA for ... [https://pubmed.ncbi.nlm.nih.gov/29890011/]
- 58. Comparison of Antigen Tests and qPCR in Rapid ... [https://pmc.ncbi.nlm.nih.gov/articles/PMC8779007/]
- 59. Development and Validation of Quantitative Real-Time PCR for the... [https://biologicalproceduresonline.biomedcentral.com/articles/10.1186/s12575-019-0105-1]
- 60. Commercially available SARS-CoV-2 RT-qPCR diagnostic ... [https://www.nature.com/articles/s41598-023-34220-w]
- 61. Decontamination of Crime Scene Equipment - ICPSR [https://www.icpsr.umich.edu/web/NACJD/studies/37977]
- 62. Lab Disinfecting Guidelines - COVID-19 [https://www.nmt.edu/covid19/labdisinfecting.php]
- 63. Cleaning Methodology and Validation Best Practices [https://www.gxpcellators.com/cleaning-methodology-and-validation-best-practices-document/]
- 64. Cleaning validation in pharmaceutical quality control ... [https://pmc.ncbi.nlm.nih.gov/articles/PMC12229404/]
- 65. Validation of Cleaning Processes (7/93) [https://www.fda.gov/inspections-compliance-enforcement-and-criminal-investigations/inspection-guides/validation-cleaning-processes-793]
- 66. Comparison and Optimization of DNA Extraction Methods ... [https://pmc.ncbi.nlm.nih.gov/articles/PMC11932244/]
- 67. Simple statistical identification and removal of contaminant ... [https://pmc.ncbi.nlm.nih.gov/articles/PMC6298009/]
- 68. : DNA (accessible) - GOV.UK contamination controls laboratory [https://www.gov.uk/government/publications/dna-contamination-controls-laboratory/dna-contamination-controls-laboratory-accessible]
- 69. Efficiencies of recovery and extraction of trace DNA from ... [https://www.sciencedirect.com/science/article/abs/pii/S1875176817302573]
- 70. Establishment and Application of TaqMan qPCR Detection Method for... [https://pubmed.ncbi.nlm.nih.gov/40397590/]
- 71. 2025 FBI Quality Assurance Standards [https://a2la.org/2025-fbi-quality-assurance-standards/]
- 72. Deciphering the impact of contaminating microbiota in DNA ... [https://pmc.ncbi.nlm.nih.gov/articles/PMC12502690/]
- 73. Forensic Drug Testing Accreditation Program [https://www.cap.org/laboratory-improvement/accreditation/forensic-drug-testing-accreditation-program]
- 74. How DNA And RNA Decontamination Solution Works [https://www.linkedin.com/pulse/how-dna-rna-decontamination-solution-works-one-simple-2pvvc]
- 75. ISO/IEC 17025 Forensic Testing Laboratory Accreditation [https://anab.ansi.org/accreditation/iso-iec-17025-forensic-testing-laboratory/?srsltid=AfmBOoqAA3hbBEqRypmBV2Ii8YFlYqriCvFqLfqXQ4ixlHCqg5HUGb8A]
- 76. OSAC Standards Bulletin - January 2025 | NIST [https://www.nist.gov/magazine/osac-standards-bulletin/january-2025]